Posted on 3 Comments

Sewing Adventures – patchwork quilt


The problem with wanting to make ALL of the things means I can get easily sidetracked. Hence my work in progress box is always overflowing. So I’ve decided to knock it down to size one project at a time.


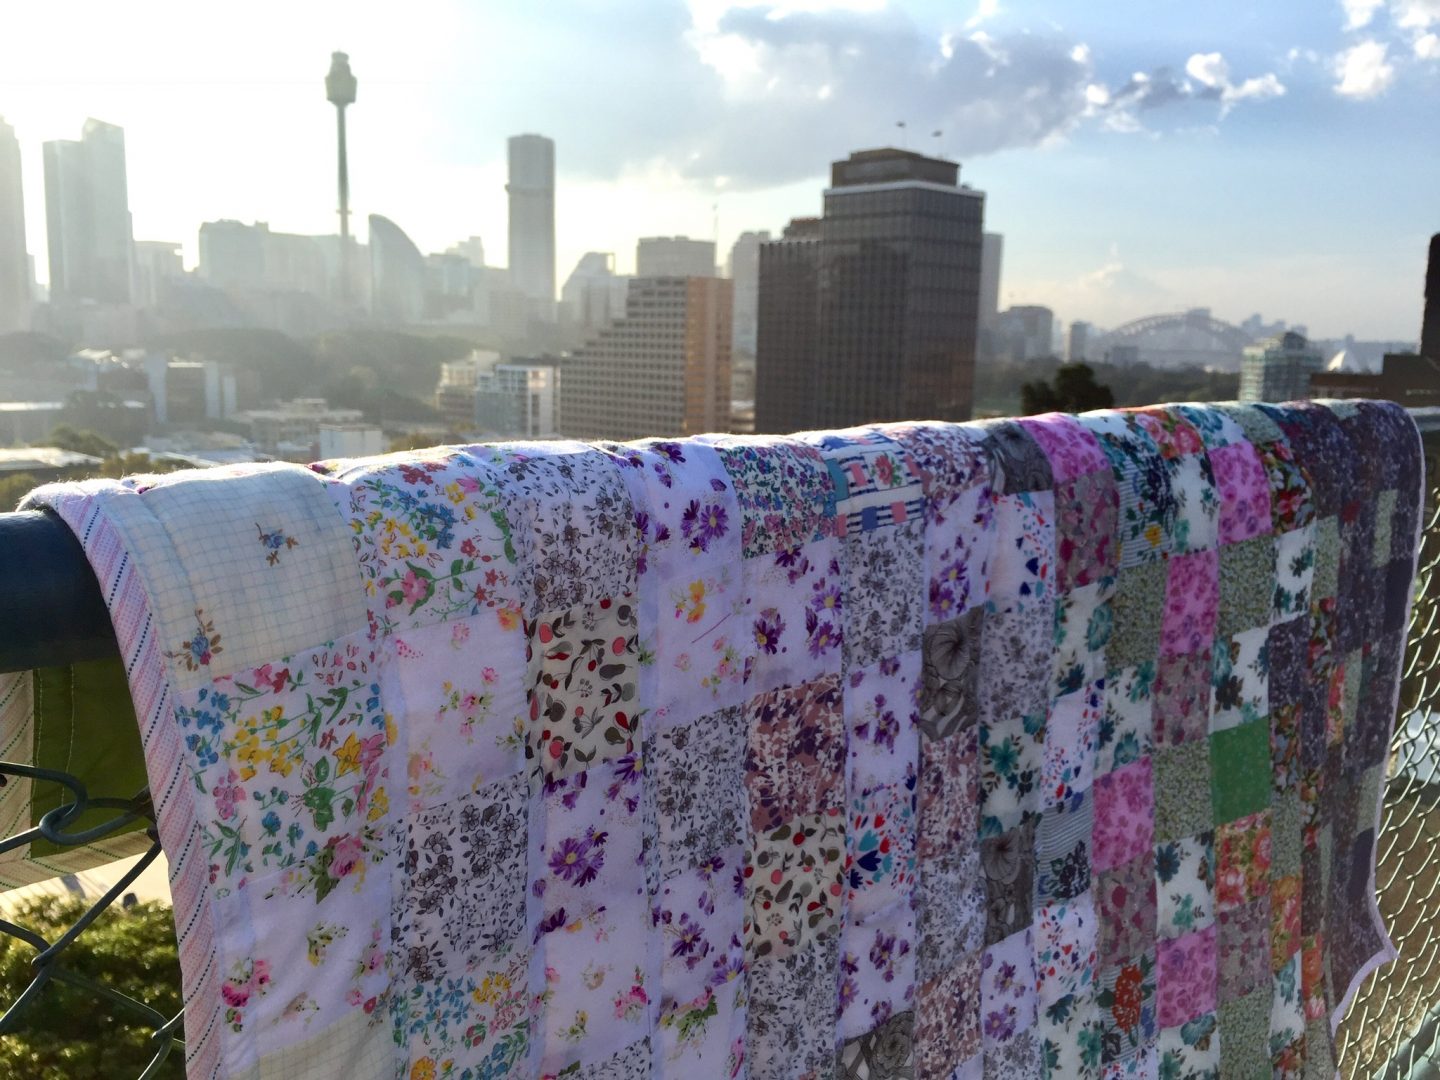
First off the rank was this quilt top I pieced last year. It’s made entirely from scraps leftover from other makes.


After finishing the piecing I laid 2 layers of bamboo batting underneath and a piece of vintage cotton for the back. Pinned together it’s been folded up and abandoned since then.
So today I took it out and quilted the pieces together. I kept it simple and just did one line of stitching one foot width above each horizontal join line.
The batting and the backing extended past the top panel. Once I was finished with all the quilted stitch lines I cut the batting and backing to the same size as the top. I have no idea if that’s how you are meant to do it or not? It seemed to make sense to do it that way and I’m glad I did as there was a bit of movement from the stitching.


Digging in the stash I came up with this cute striped binding for the edging. I briefly considered trying to attach it in one step but then thought better of it due to the thickness of the pieces. Attaching the binding by stitching it onto the back all the way around and then turning it over to stitch from the front. Am so happy with how neat it looks, I’ve never done any kind of quilt binding before and it’s quite fun.

The mitred corners aren’t great but I’m ok with that for a first go.
All that was left was to trim the spare threads then pop into the top roof for some photos on a rather hazy day.

Pattern: just cut squares and placed them in a pleasing arrangement
Fabric: scraps from other makes
Changes for next time: perhaps full bed size?

Posted on 1 Comment

Sewing Adventures

Big weekend of sewing but most of the projects are not ready to share yet. This one is more of a toile/muslin* but looks cute.

colette nutmeg

It’s been getting warm at night and I thought that one of these sweet Colette Pattern Nutmeg‘s might be the answer, so I raided the scrap box and cut out the bralette top. With everything on the bias I went with a patchwork look. It worked out surprisingly well and looks adorable in real life.

You can see I have added a centre front seam to the top panel, this was purely to fit it into the limited amount of fabric I had on hand,  added some silk velvet ribbon as straps as I thought the colours matched well.

Construction wise there were some odd elements. The facing on the top edge is no end of annoying and will never sit in place unless I add another line of stitching across the top cup, next time I would simply cut 2 top panels and bag the entire area out which will not only eliminate the facing but also add more structure to the whole thing. At the centre back straps, it is finished with hand stitching, this would wear very easily, so I bagged out the back panels and moved the opening to the side seam and concealed it there. Much easier and much stronger. Despite these changes it came together quickly and everything lined up.

Once it was together I tried it on and it looks well, awful. Fit wise it covers all that it needs to cover and the elastic is in the right place and the straps are doing what they should, but the complete lack of support just made me look dreadful. I’m not large chested but it would seem that if you are bigger than a B cup that this unsupported style doesn’t do you any favours.

Thankfully it is only a test piece and it didn’t take too long to sew. I think I will look for something that has a different construction/support system and see how that works out?

*I’m never sure if to refer to my tests as toiles or muslins. At fashion college it was strictly a toile and I’ve continued to use that term ever since. However I see that muslin is the preferred term on sewing blogs when talking about test garments. So if I occasionally say toile instead of muslin you will know what I mean.