
https://youtube.com/shorts/x49Wqx_8NEE
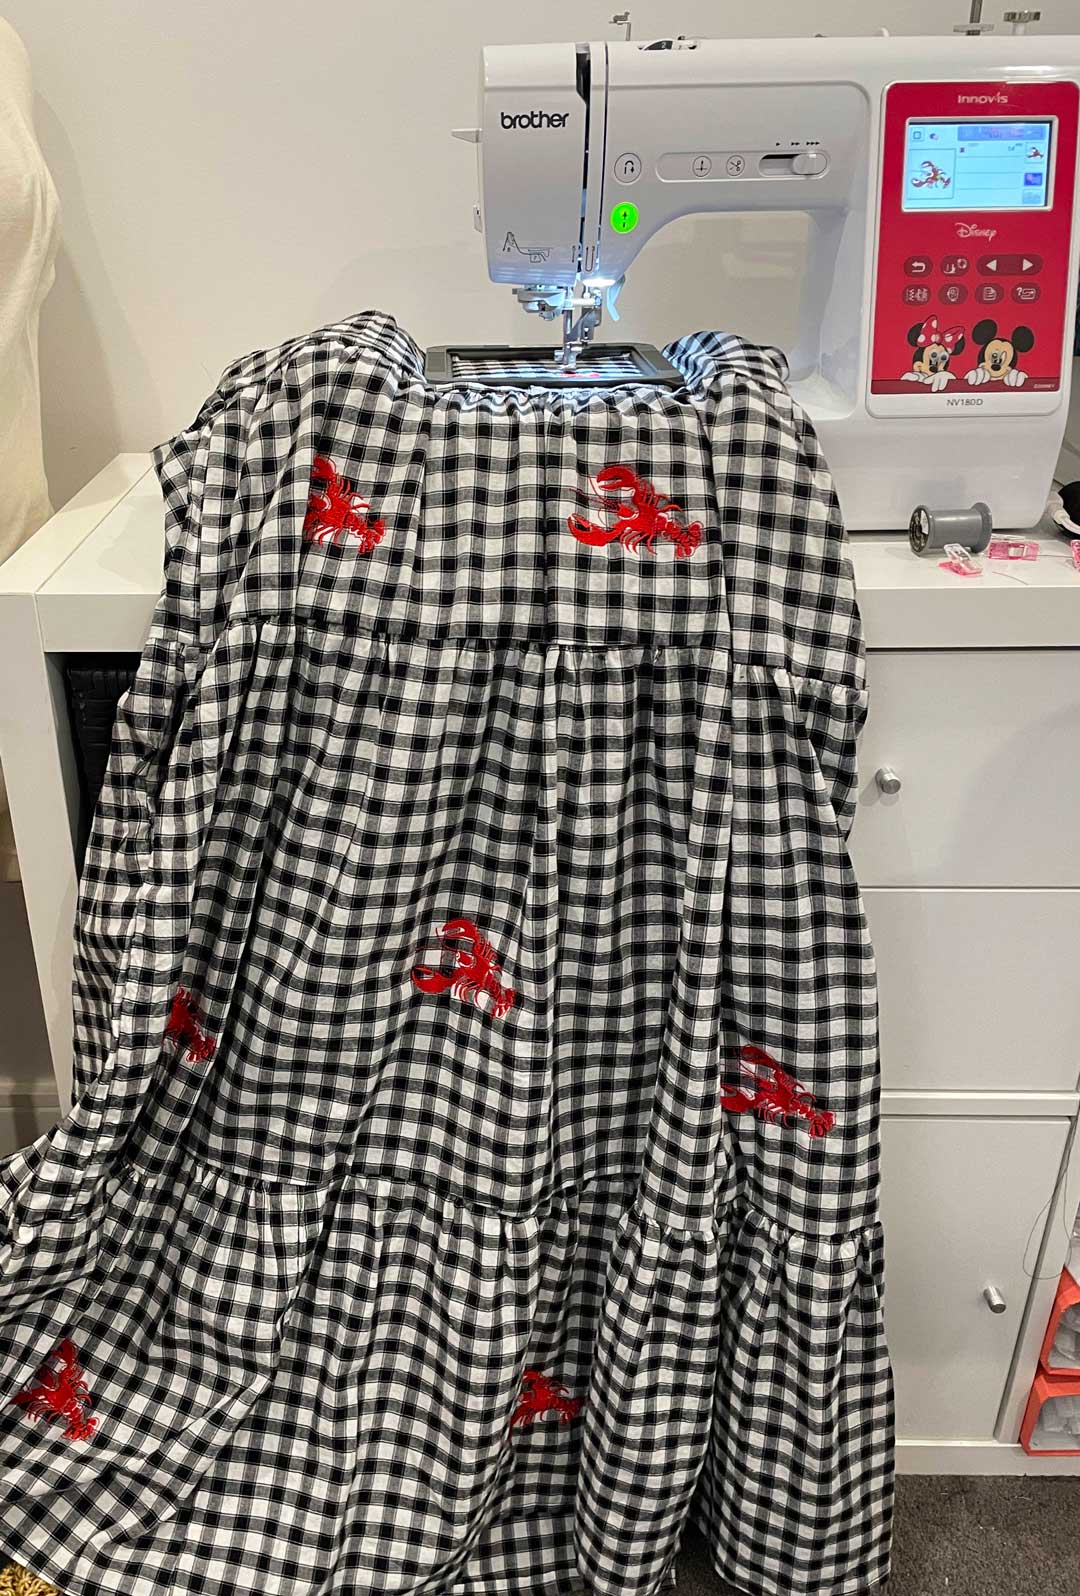
When a student asked me to embroider her recently finished dress with Lobsters, I opened up Hatch Embroidery Software and got to work. With my Brother Sewing and Embroidery machine it was so easy
https://youtube.com/shorts/x49Wqx_8NEE
When a student asked me to embroider her recently finished dress with Lobsters, I opened up Hatch Embroidery Software and got to work. With my Brother Sewing and Embroidery machine it was so easy
A few years ago I was introduced to Sashiko and Boro after watching a documentary on mending from Japan. Intrigued I did some research found some supplies and set about learning some new to me techniques.

I really enjoy it, the slow meditative repetitive stitching quietens my mind while still allowing me to keep my hands busy. There was a period of time where I was spending quite a lot of time in waiting rooms of varying doctors and medical offices and having something to do that didn’t require complicated charts or note keeping was a special gift. The staff were also impressed at someone doing something too!

At some point I would love to go and learn from a traditional artist in Japan as I know I’m probably doing many things incorrectly or at least not best practice, I have found google translate and being able to add subtitles to YouTube videos a good way to learn from people practicing their craft everyday.

This rice bag is one of a handful I made from the same pattern. Each panel was handstitched and then the whole thing assembled by machine. The pattern was from BeBeBold and I had got a bundle of traditional fabrics to use in the pieceing but I did add my own Japanese fabrics I had picked up on trips or been given.

From memory I think I made 3 maybe 4 of these? Since they were made mine was lost in a house fire, my mums was lost in floods, one person has passed away and I think 1 may still be in use by it’s recipient. As always I value the time it took me and how much I enjoyed using that time to create and the joy of gifting them to people. The fact the bags may no be in existence is not sad just what happened.
I just wanted to include these photos here as a record of the make and the enjoyment I got from learning new things and creating.


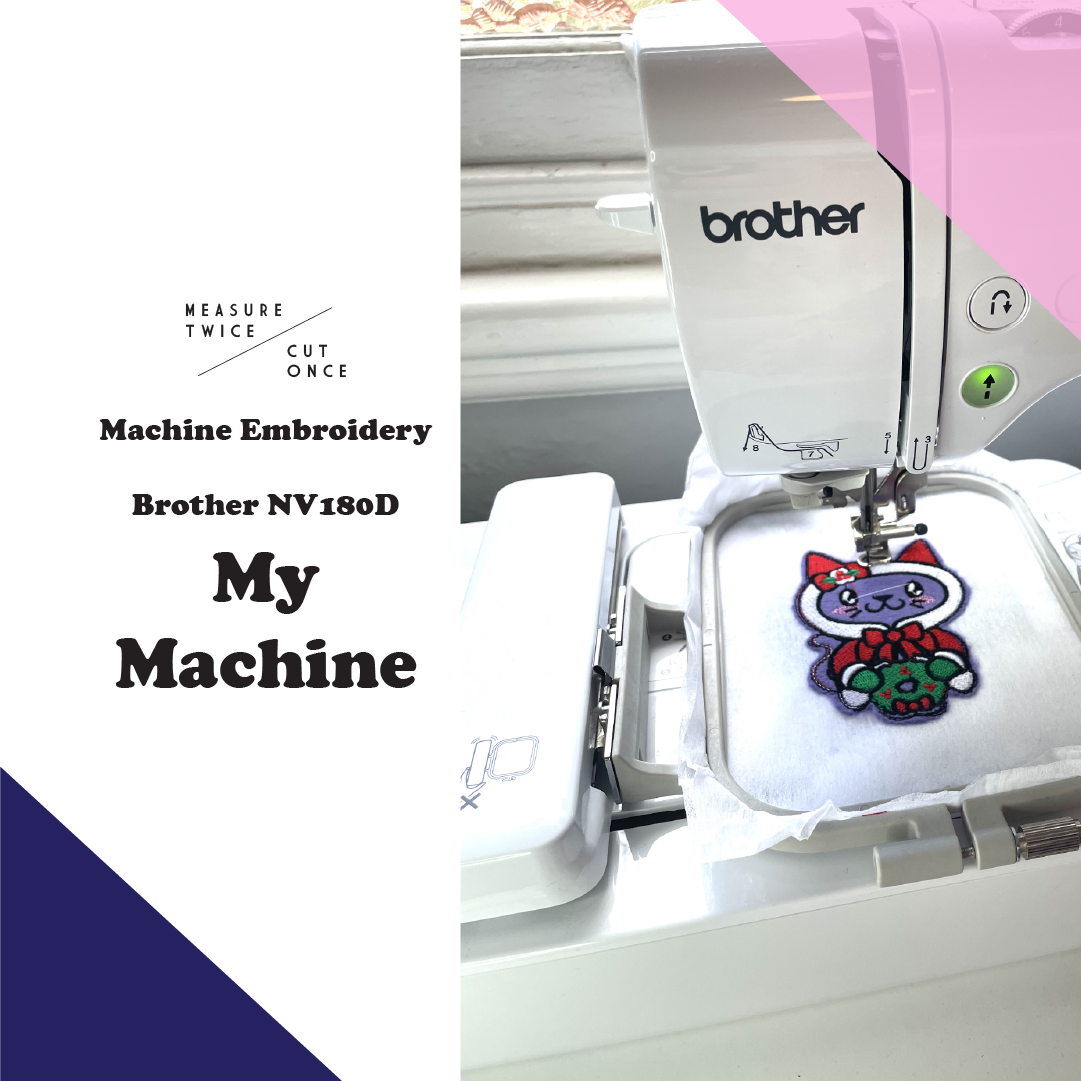
Today I’m showing my machine in its embroidery set up, you normally see it in regular sewing mode.it’s sure easy to swap between the 2 and i love having the fun experimental option of some embroidery. If you’ve got any questions, add them down below and don’t forget to subscribe!
My machine is a Brother NV180D available at Bobbin and Ink https://www.bobbinandink.com/products…
The pattern is available from Urban Threads https://www.urbanthreads.com/products…
Embroidery Thread is from Brother, available at Bobbin and Inkhttps://www.bobbinandink.com/products…
Wool Felt from My Felt Lady https://myfeltlady.com/
2022 is my year of taking the Scary out of Sewing! I want as many people as possible to take up sewing so they can create, make, mend and more. To help take away the scary, every Friday there is going to be a new video with accompanying pattern for a project entirely aimed at beginners. Each week there will be different techniques to learn or go over and it’s going to be a super fun way to grow your sewing skills.
See more of my sewing and shop patterns at https://www.measuretwicecutonce.com.au
Follow me on Instagram https://www.instagram.com/_measuretwi...
Follow me on Twitter https://twitter.com/_MeasureTwice
Support me on Patreon https://www.patreon.com/MeasureTwiceC...
For some time now ‘ve been enjoying the meditative quality of sashiko stitching. It’s enjoyable and fun to embrace the joy of stitching with the knowledge that it doesn’t have to be perfect to work. Mostly I use pre printed panels to stitch on as they make it even easier to be a project you can take with you anywhere. Upside is ease, downside is what to do with the panels once they have been stitched?
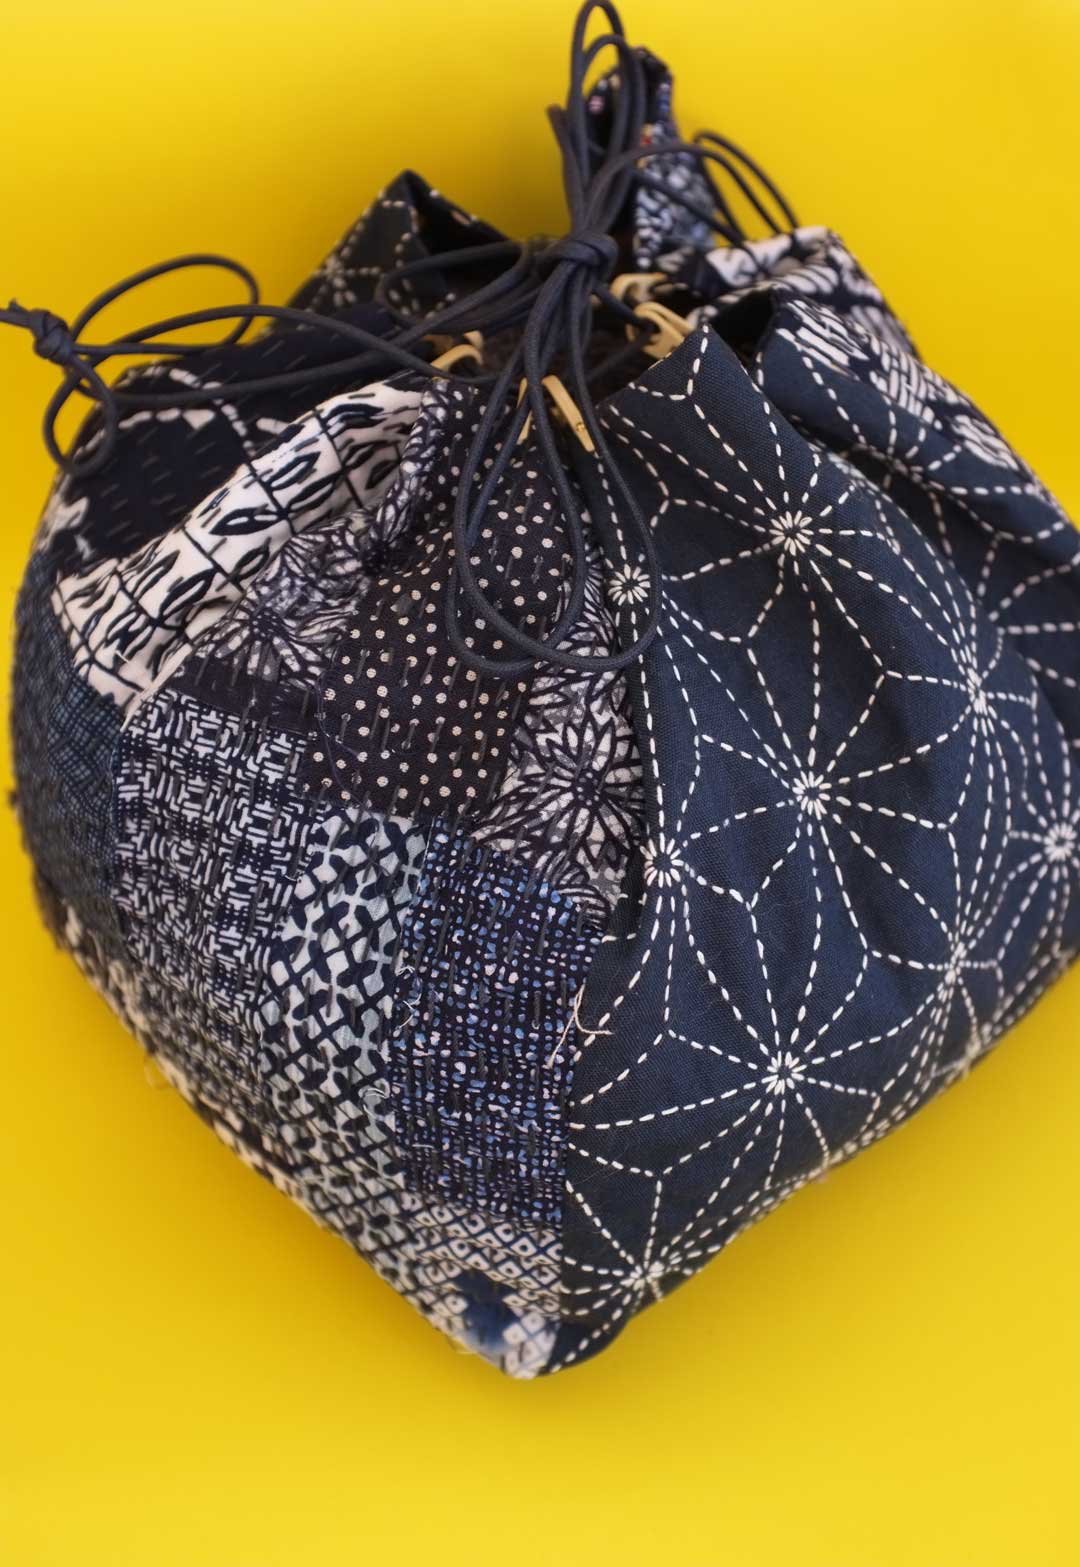
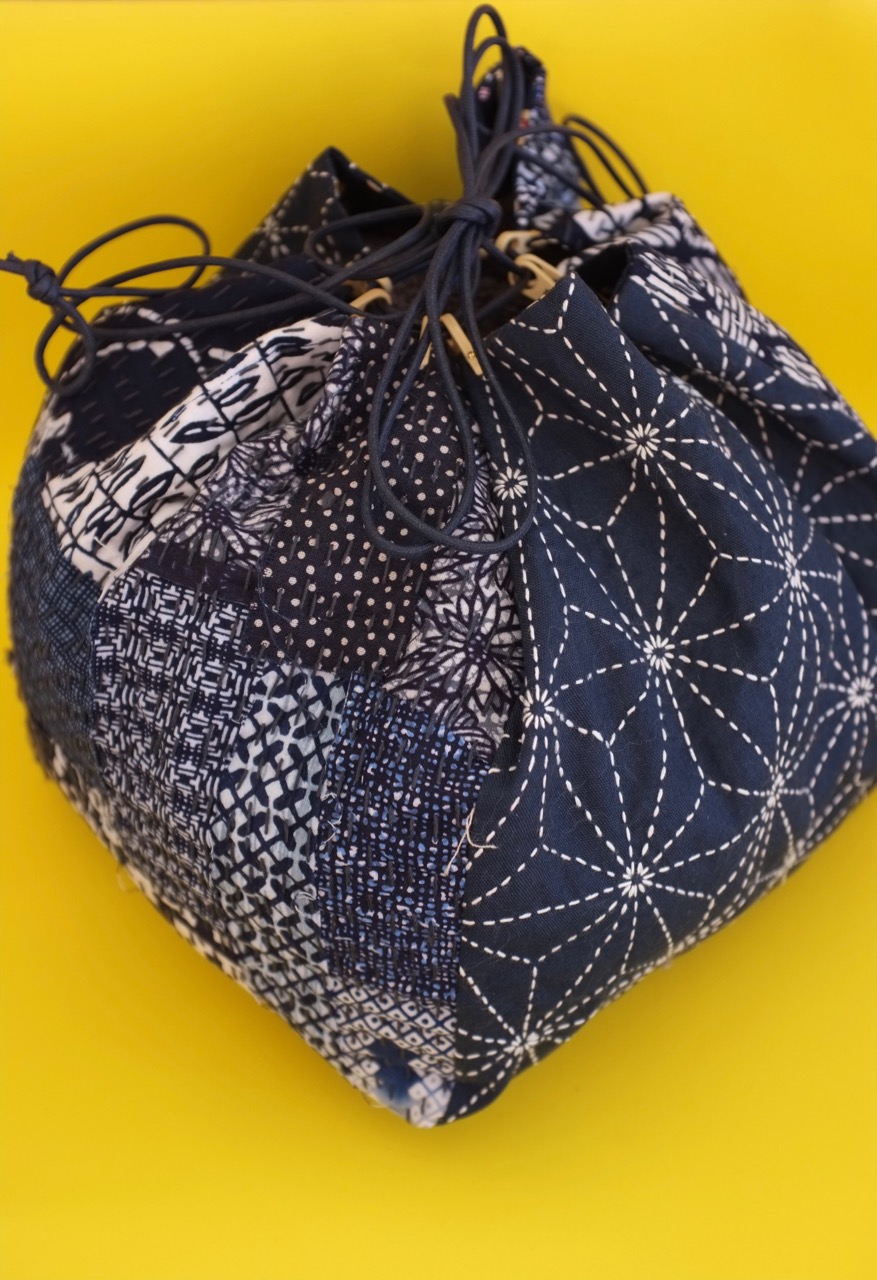
 So far I’ve turned panels into placemats, coasters and now I’ve combined pre printed panels and boro stitching together to make a kinchaku or rice bag.
 The original pattern is from BeBeBold and meant to be quite a bit smaller than the one here. But I didn’t want to cut down my pre printed panels so I supersized the pattern to create this.
 Construction wise it’s a square bottom and 4 rectangular sides (same for the lining) all sewn together and pulled through an opening in the lining to end up fully lined. After closing the internal opening up these nifty little plastic hooks were added to the outside. The plastic has a U shape that slides down over the top edge of the fabric. A metal nail is then inserted into the hole of the plastic hook, through the fabric, through another hole on the other side of the plastic hook and out again. Bashing it down and flat with a mallet ensured it stays in place and there is no pointy bit to scratch your hands as you enter and exit the bag.
 Waxed cotton cord is then thread through from either end to create a double sided drawcord. It really was a super simple make and I love the final shape it’s so lovely. I can’t wait to make some more!
Pattern: from BeBe Bold
Fabrics: Sashiko panels and mixed indigo pack, waxed cord and plastic loops from BeBe Bold. Japanese cat fabric (internal) from Pitt Trading
Alterations: this is a super big bag and I think I’d like to make one in a smaller size too?
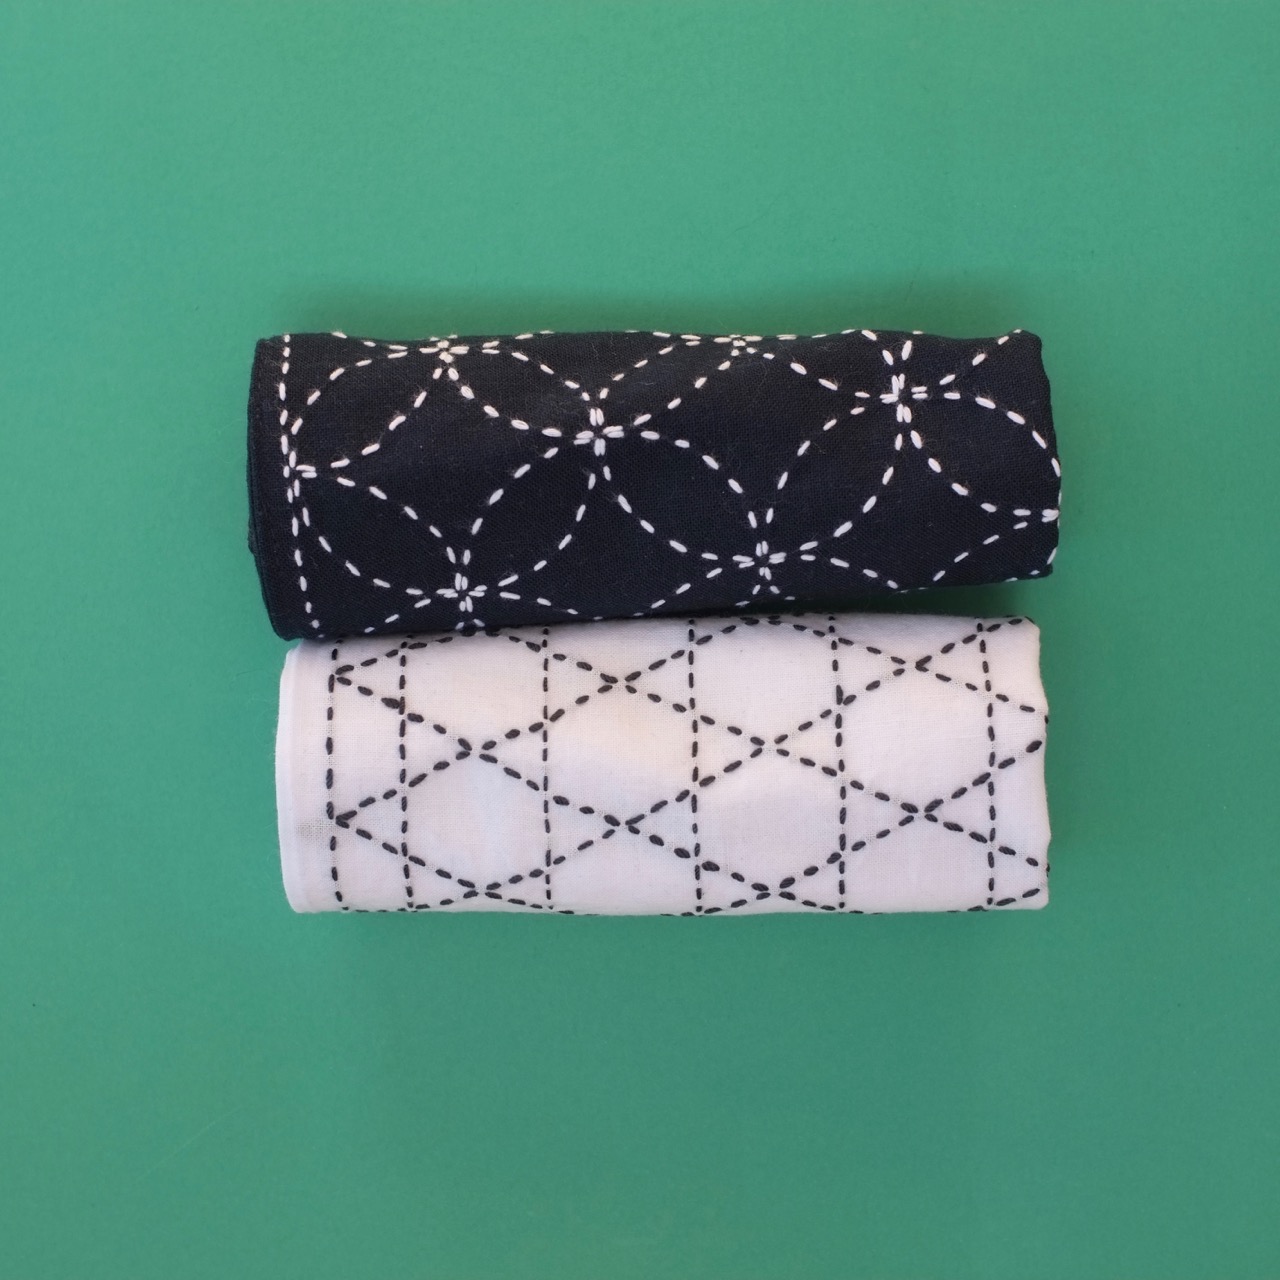
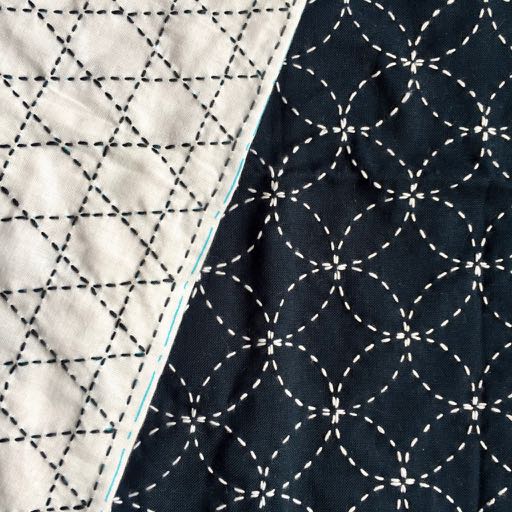
Ever made anything where you weren’t entirely sure what it is you were making? that’s the situation I found myself in with these sashiko cloths. I ordered them from a Japanese site with only minimal translation. I thought I was purchasing pre printed sashiko panels…which I was. These ones are a little different, the fabric is slightly lighter weight and the print has an extra panel off to one side that was printed with Japanese instructions.

Using Google translate I tried to read the instructions and couldn’t not make head nor tail of it. So instead of you know looking things up and getting expert advice I blindly waded on in with stitching. In hindsight I wish I had figured it out better but as it is it’s not a huge issue just more a case of not being correct which vexes me and I feel I’m being disrespectful to the beautiful work of the Japanese stitchers who make these.

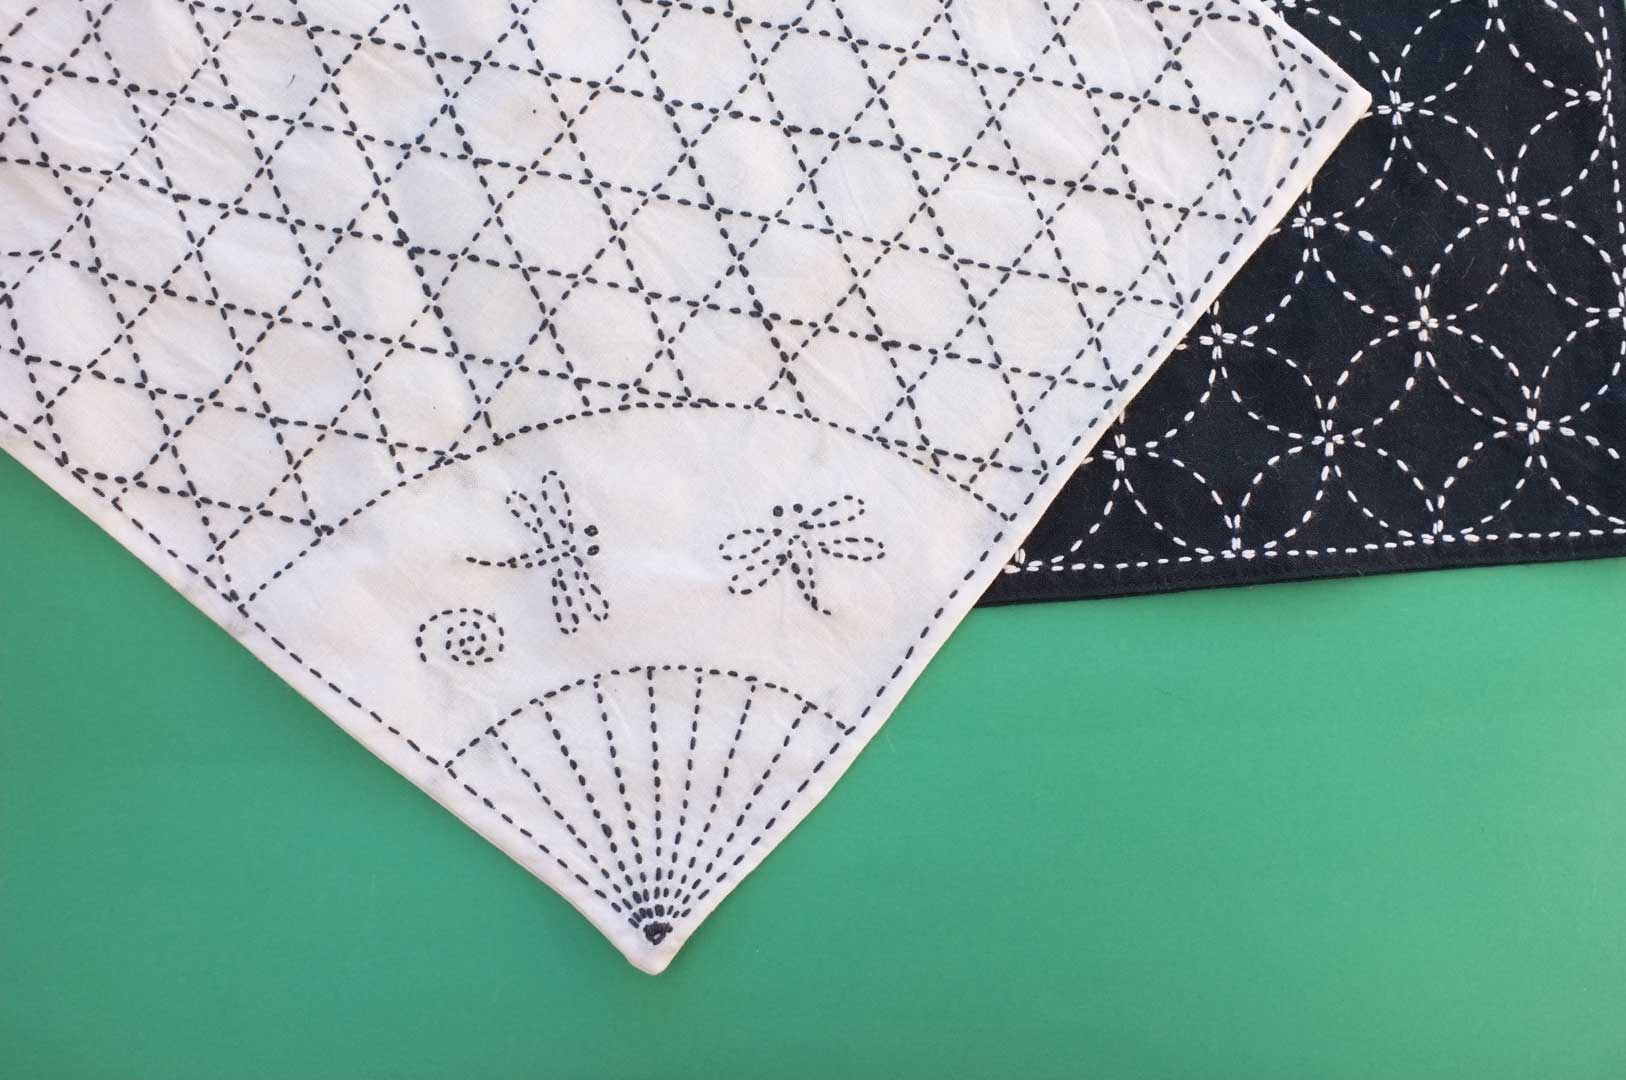
The cloths are actually Hana Fukin which translates as flower cloth or kitchen cloth according to the research I’ve done so far (this is by no means extensive and I may have got it wrong). It indicates a soft useful cloth normally with a flower design stitched on it that is used a cleaning/polishing/useful everyday cloth.

Because I got my instructions wrong I stitched the cloth first before folding it right side together, stitching around it on my machine then turning it right side out before stitching the turning hole closed. It works even though I’m fairly sure I did it wrong.

Despite my misunderstanding they were a joy to stitch and are actually wonderfully useful in the kitchen, I tend to use them as a napkin replacement good for wiping fingers when they get sticky etc. Like many of my other sashiko pieces it’s incredibly joyful to have beautiful pieces to use everyday because there is no sense in only keeping the beauty for “good”.

Fabric – pre printed panel bought randomly on the internet and now can’t find again but similar ones can be found at BeBeBold
Pattern – pre printed but next time I’m going to find out the correct way to do them
Changes – get better at translating instructions
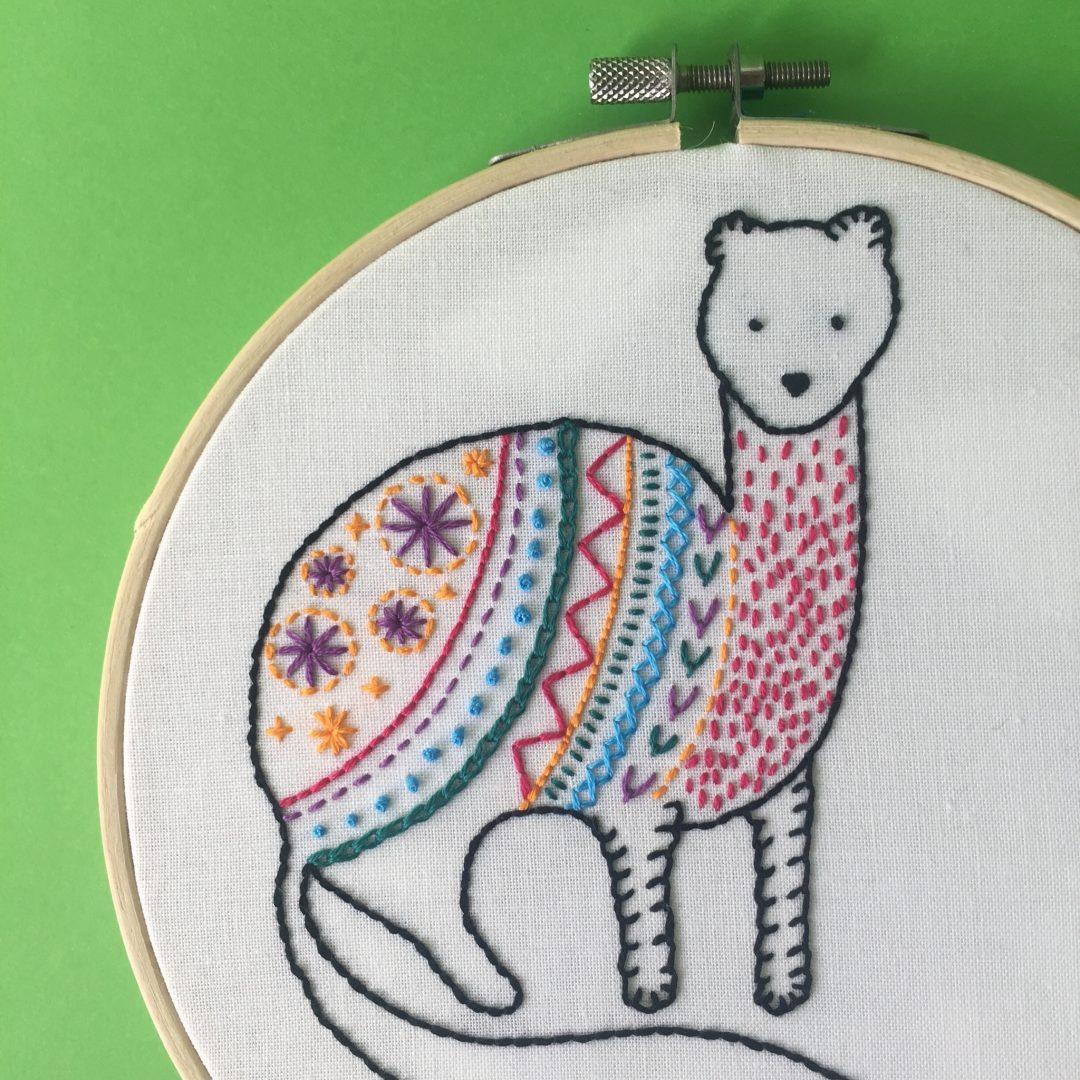
Have you seen the adorable embroidery kits from Hawthorne Handmade? They are so cute and I love the fact that they use unusual animals in their designs its so nice not to just see a clip art bird on everything.

I picked up some supplies from them last year during their Black Friday sale and had it delivered to The Englishmans parents home as I knew we would be there for Christmas.
In theory the purchase was for my niece’s Christmas present. I wanted to give her something stitchy to do in the hope she will love it like I do. But I couldn’t resist sneaking in this stoat for myself.

The pattern comes pre printed on white cotton with the relevant coloured threads, a needle and a frame. Everything was very clearly laid out and simple to follow and a perfect gift for a beginner.

I finished it earlier in the year but never got around to properly framing it up ready to hang. To finish I’ve added a circle of white poplin to the back which I handstitched in place.
Now it’s all done and just awaiting a wall to go on.
Pattern: Stoat from Hawthorne Handmade
Fabric: All supplies (excluding scissors) are included in the pack
Changes: None except maybe to get some more!
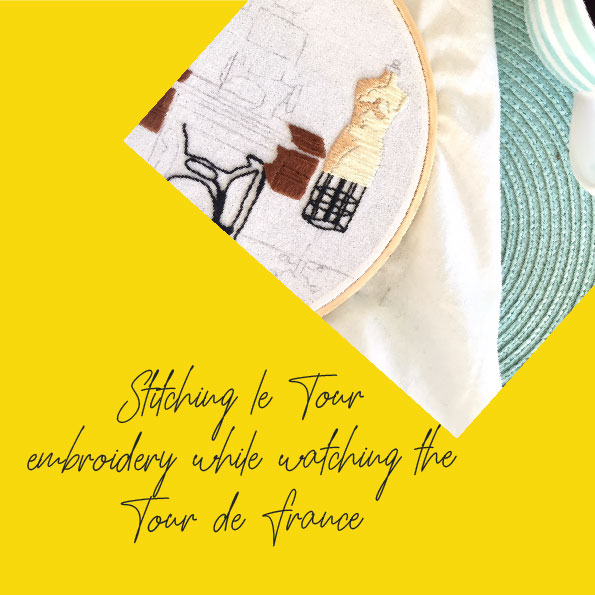
It’s almost Tour de France time and I couldn’t be more excited. It’s sure to be an exciting race and as I do every year I’ll be “stitching le tour” Being in Australia and being a cycling fan means lots of late nights. Easy to do for one or two nights but when we are talking about 3 weeks of late nights it gets tough.
My way to cope is lots of tea and hand stitching. Each year I work on different projects throughout the 3 weeks which means staying up late is not only easier it’s also productive.
This year I’m challenging myself a bit more and working on some pieces I have designed myself and when finished are set to hang in our apartment.

I’m working on 2 pieces, an interiors piece which features an idealised view of my dream sewing set up, sized for a 7″ (18cm) hoop and a second piece I refer to as “Army of mannequins” sized for 5″ (or 13cm) hoop.

Both are currently available in the web store for $8 a piece. You will receive a .pdf giving you the outline of the embroidery at actual size ready for you to transfer to fabric to stitch on. A digital colour guide and suggested stitches is also included in the .pdf. To get started you will need some cloth to embroider, embroidery threads, needle and a hoop.
To see my progress keep up with me on Instagram as I’ll be sharing my stitching there! Happy Tour time!
Having started doing Sashiko stitching earlier in the year, I find that I want to keep doing more. I picked up some pre printed panels from etsy and BeBe Bold.

Having them pre printed feels like cheating and then you realise just how wonderful it is to have them pre printed. It’s so easy and means you can just follow along. So simple and so enjoyable.


Perfect for when you feel like doing something but don’t actually have time or brain power to do anything complicated. I did plenty of these while I was just out of hospital.

So far I’ve just completed the stitching on the panels, I want to turn them into something useful but as yet haven’t decided what? Am slightly concerned that I should’ve stitched through both layers but couldn’t find out if that was I was meant to do or not? Suggestions welcome.


There was a time in my life when I would do a form of embroidery every day. I did big multi month pieces and always had a piece to work on.
Over time I got out of the habit and yet it was not replaced with something of substance. Endless scrolling for inspiration on my phone oddly left no inspiration and at nights end I had achieved nothing.

So this year I decided I was going to do more. I started with some sashiko pieces and kept fairly busy but now with weeks of enforced slowing down and beautiful wonderful time with zero pressure to do anything I have found an old friend. The meditative friend of embroidery.
I had lots of pieces pre planned for the time but an unplanned one has brought possibly the most inspiration?

While I was in hospital I was lucky to have some visitors one of whom was Maria aka Velosewer. She utterly spoiled me with a bouquet of flower chocolates, an array of magazines and yummy donuts! Such treats.
The issues of the New Yorker and Frankie Mag were shared through the whole ward but I kept my issue of Mollie Makes as it had the sweetest embroidery kit attached.

This simple Scandi floral hoop was an absolute joy to stitch and I love the colour palette.
After such enjoyment I’ve rediscovered my embroidery stash and will be adding more projects to my ever growing to do list. The advantage here is that these can be done while watching tv and will replace the endless scrolling.

And this simple embroidery? Am going to tuck in all the excess fabric, add a circle of calico to neaten the back and hang it above my desk as a constant source on inspiration.
Pattern: Scandi Florals Hoop Kit from Mollie Makes
Alterations: none
Fabric: included in the kit


