Posted on 14 Comments

Sewing Adventures – Malvarosa Dress

I hope everyone has had a good weekend? The highlight of my weekend was my attempt to cut my own fringe. It was getting a bit long and needed a trim. Turns out cutting hair is nothing like cutting fabric and I was in rapid danger of losing all my hair in trying to straighten up the original mess. So in a stroke of genius I stuck a piece of washi tape across the bottom of my fringe and then neatly trimmed to it’s edge. Unconventional yes but in a crisis, it worked.

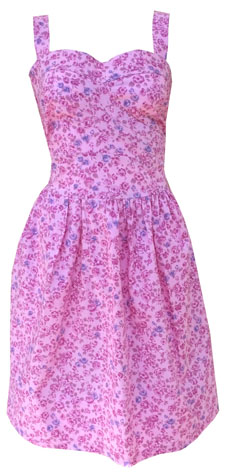
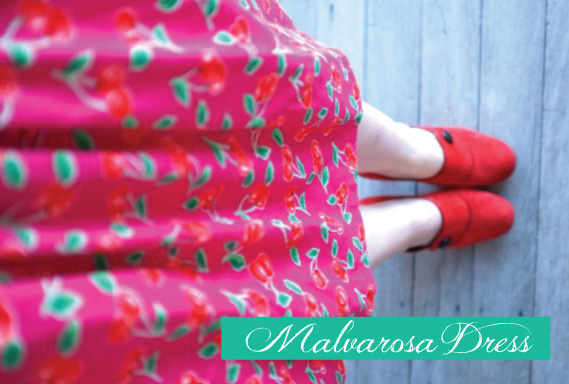
In other weekend matters I managed some sewing and made 4 kinds of soup so my freezer is now nicely restocked. Most of my sewing is of the pattern testing kind so I can’t share it all yet so instead I’m sharing my Malvarosa dress.

This dress was made all the way back at the beginning of the year and has been waiting to be blogged until I got some decent photos of it. I wore it to our first Sydney Spoolettes meet up. Thanks to When All you Need is for the photo.

SSBM_5

It appears however that my hate of getting my photo taken does quite clearly result in terrible photos.

DSCF6518

These are the best of all the ones taken, 3 different locations and just all blah. I really dislike being in front of the camera. So while the photos are a fail, the dress however is quite the success. I’ve worn it a few times and while there are some minor tweaks I will do if making it again I’m pretty happy with this version.

From the original pattern I made some changes

  • shortened the dress through the body

It was just too long for my torso. So I took out some of the length. From bust up I left it alone and only took out from lower chest to hip. I took it out in 2 sections as I took out around 12cm to 15cm in length.

  • shortened the length of the skirt

Even with shortening the torso it was still too long so I took at least an additional 10cm out of the skirt length. It was possibly more as I can’t quite remember if I re cut the hem before finally stitching it in place.

  • added a centre back seam

I was working with vintage fabric and there was no other way I could fit the pattern on the meterage I had. In future I think I will do this anyway as I have a slight pooling of fabric at my lower back and the centre back seam could be nipped in just at the base which would eliminate this pooling.

  • blocked in the neckline to narrow the opening

Even on my wideish shoulders I found the neckline just too open. I added in 4cm to each side and then reshaped that back into the original neckline.

  • lined the bodice instead of using the facings.

The pattern called for a neck facing and a sleeve facing. they would have overlapped under the shoulder seam and I thought it would look bulky and messy. So instead using a lightweight voile I cut an entire front and back and did a fully bagged out lining for the entire upper half. Is incredibly clean finish, adds a nice shape to the body of the garment and means zero handstitching too.

  • added width to the skirt.

I was using vintage fabric and if I had cut the required skirt width I would’ve been left with only 10cm leftover fabric. Instead I decided to make the skirt a bit wider so I could use more of the vintage fabric.

DSCF6519

Now to be fair most of these were due to me being just on 150cm tall (5 foot) so I had height issues to deal with, and because I was using a narrow width vintage fabric. So not everyone is going to need to make these changes. But I would certainly be checking the length before cutting any fabric as it seemed overly generous in length.

Overall it’s very very comfortable and easy to wear. The pockets in the drop waist seam are fantastic and really useful. I’m looking forward to making some cotton versions for next summer and am considering a winter weight version too?

Day 26Pattern: Pauline Alice Malvarosa

Fabric: Cotton pique purchased at Gardems in Brisbane during my first year of fashion college (and yes it’s old enough to be classed as vintage now..eek)

Shoes: Marc Jacobs suede booties


Posted on Leave a comment

DIY Christmas Decorations

Last Christmas season while pinning away on Pinterest I came across this fabulous DIY of covered baubles.

patchwork baubles

It got me thinking and soon I was raiding my small scraps tub for Liberty and Liberty style florals. Armed with my pinking shears I started cutting and cutting and cutting some more. Soon I had quite a bundle of small fabric swatches.

Next stop was getting some baubles. Off to reverse garbage I managed to score an entire box for under $5 and looking in the back of my own cupboard I found some very cute teeny tiny ones that are just so sweet.

Armed with an old paint brush and some watered down fabric glue I got to work. As I moved around each bauble I found that threading a bamboo skewer through the hanging section made it a lot easier to hang on to, not to mention way less messy, as by this time my hands were covered in glue.

Soon I had baubles on skewers propped up inside jars all over my desk. After a good 24 to 48 hours drying time I had so many pretty baubles.

Now some made their way to the new homes and trees last Christmas, but many more are on their way this Christmas (I so hope this post doesn’t spoil anyone’s surprise too much).

Posted on Leave a comment

Sewing Adventures

After last week’s musings on skirts I decided to jump right in and make one on the weekend.

green skirt layout

I had this pattern from one of those buy one get one free sales that Spotlight occasionally has. I had thought to make it up as a work skirt sometime?

The fabric is a vintage cotton with the pattern being printed on (including the green lines that appear to be the weave of the fabric, all printed!). I picked this up years ago at a thrift store and there was miles of it! So far I have made caps out it, dresses, this skirt and there is still heaps left. It is a great sturdy weight cotton and sews up a dream.

Now to the skirt. I omitted the waist tie as I thought this fabric would be too bulky for it to look good, and I added a contrast bind to the top edge instead of a self bind. Just for a bit of a pick me up on the duller green of the fabric. Fit wise the high waist takes some getting used to and the skirt is a bit too straight to be able to ride in (admittedly only an important factor if you ride your bike to work) but for general wearing is quite good.

One thing I didn’t factor in though? All my tops are prints! I have absolutely zero to wear with this skirt that doesn’t make me look like some kind of colour explosion (and  I mean more than I normally do).

So I’ll be keeping an eye out for something to match to this and in the meantime will also be keeping an eye out for other potential skirt patterns?

Posted on 1 Comment

Summer Sewing Adventures

It’s a sunny Monday morning and while the air is still just a tiny bit crisp, summer is about to hit and after such a mild winter it’s looking like a long hot summer! Yay!
I love summer, they always feel so full of potential (though inevitably in a few months I could do with a break from the constant heat).
As always, my plan this year is to get as much sewing done as possible before it gets too warm to even consider unfolding the fabric to cut it out.
So this past weekend while the sun was shining, the kitty was basking in the sun and the bread was rising I got to sewing.

First up this cute Simplicity built by Wendy pattern (now out of print).

bw simplicity top

This series came out years ago but quickly become one of my favourite tops to sew. Not only is it a breeze to make the fullness of the style means it is perfect for summer when sometimes you need a bit more ventilation and air around your body. I love pairing it with jeans or shorts. It is an essential piece in my travel wardrobe as it can be dressed up or down and can survive being crumpled in a bag. It’s also my go to top for a quick spin on the bike when I am off to the shops or the farmers markets.

As is usual for me with this pattern I have chosen a lightweight Japanese cotton. I love their hand feel and they are lightweight but not see through which is just about perfect for summer. This one was a lucky find at my local Spotlight.

I’m normally a very bright colours kind of dresser and it felt a little flat so I added a cute zig zag in a neon contrast thread.

In fact I have a whole packet of neon Madeira Threads so expect to see some more of them in future creations.

The second sewing project for the weekend was this Cynthia Rowley Pattern. Again it’s another tried and tested pattern for me.

pink floral dress

It fits me perfectly with zero adjustments being needed, so it is really a case of cut and sew and bam! Job done.

I choose a vintage fabric that I picked up at the Lismore car boot markets.

It’s very pink! And when I sent a quick happy snap to one of my best friends her response was “well if anyone can wear that colour it’s going to be you”.

And so it’s Monday and I am on the train to work, and already I am thinking,  what I can make next?