Posted on Leave a comment

Beginner Sewing – How to sew a Door Snake or Draft Excluder

Join me, Susan from Measure Twice Cut Once, as I take you through how to sew a Door Snake.

Door snakes are a wonderfull way to cut down on your bills, they keep warm air in a heated house and keep cool air from escaping in an air conditioned house. Plus they are a great way to use up the fabric scraps you end up accumulating during sewing.

We will be learning how to sew straight lines turn a corner, sew and end closed and a useful way to use up fabric scraps. It’s a nice way to start building up your skills and potentially cut down your bills all at once.

For experienced sewers they are a great way to use up leftover scraps of fabrics and they make great presents for young and old.

The pattern is available from the Measure Twice Cut Once website https://www.measuretwicecutonce.com.a…

2022 is my year of taking the Scary out of Sewing! I want as many people as possible to take up sewing so they can create, make, mend and more. To help take away the scary, every Friday there is going to be a new video with accompanying pattern for a project entirely aimed at beginners. Each week there will be different techniques to learn or go over and it’s going to be a super fun way to grow your sewing skills.

See more of my sewing and shop patterns at https://measuretwicecutonce.com.au​

Follow me on Instagram https://www.instagram.com/_measuretwi…

Follow me on Twitter https://twitter.com/_MeasureTwice​

Support me on Patreon https://www.patreon.com/MeasureTwiceC…

What I’m wearing

Dress Pattern: self drafted dress in silk from Pitt Trading

Earrings: Harry and Herne

Nail Polish: Octopus’s Garden by Hanami bag.

Posted on 23 Comments

Sewing adventures: making a bra

bra_header
I love Lingerie, from a simple cotton set to silk and intricate lace I love it all. So naturally once I conquered making my own knickers I wasn’t going to sit around with a drawer full of non matching sets (the horror! ha ha).

For a few months I’ve been gathering supplies. Foam for the cups, elastics, channeling for underwires and other bits and pieces. They’ve been sitting in a tub mocking me. Why mocking? because I kept putting it off. Too often we read/hear/get told that sewing is hard and certain things like lingerie are held up with this mystique of being difficult. For some silly reason I got spooked and didn’t want to start. Obviously I got over that and just got on with it.

The actual sewing of a bra is not that hard or difficult. If you can use a zig zag and a straight stitch you can do it. What is hard is getting the fit right. Due to my love of lingerie I own um…quite a lot of it. So I’ve been putting aside the ones that are starting to show signs of wear but haven’t completely disintegrated yet. These not quite dead bras (zombie bra’s if you will) have been photographed and then unpicked.

By photographing them I know what they are meant to look like when I reassemble but it also gives me a stitch template to follow. When to use straight stitch, when to use a zig zag. This is super helpful as you end up with lots of very small pieces and putting them together is a bit like a jigsaw so a visual guide is a saving grace.

Once unpicked I’ve been creating a pattern from them and this bra is the first toile I’ve made up from one of my zombie bras. I managed to re use the underwires, the hook and eyes and the straps from the original as well. That was a nice added bonus after all the unpicking.

sewing bras1

My lovely model as you can see, doesn’t quite fill out the cups. I do and the fit isn’t too bad for this style of rather simple bra. With only a few very minor tweaks it will be identical in fit to the original purchased bra before it started to wear.

The back needs a bit of an adjustment as it’s come out quite rounded from the strap placement down to the hook and eye. It’s not bad or wrong so much as it can be improved and so it will be.

sewing bras2sewing bras3

Where the front cup meets the strap it could do with a bar tack for extra strength.

sewing bras4

The original bra had molded cups, these aren’t always available and I can find the shape a little bit bullet bra for my liking. So I’ve purchased bra foam. It comes by the metre and is far far cheaper than buying individual molded cups. To take this into account I cut the original molded cup into 3 pieces, cut them flat from the foam and then zig zag seam them back together again. You can faintly see it through the mesh here. It worked really well sewing wise and I can’t wait to see how it wears as I feel like it could be a really good solution for when you can’t get cups or don’t like the shape they create.

sewing bras5

If you are looking to make your own underwire bras this is a great way to start for a few reasons
– you know the original bra fits. I should mention if you are going to unpick one try not to do it to one that is totally wrecked. It’s very hard to take a pattern off pieces that have stretched and warped. To the point where a wrecked bra would actually make it more difficult. While a new bra is a bit expensive to rip apart it is a good start point, or do what I do and go for one that is gently worn and be sure to allow for this when making your template pattern from it.
– the unpicking process gives you the reverse order of assembly so take notes and photographs to help with the sewing steps
– you can salvage hardware
– it’s a cheap way to see if you like making bras

Posted on 8 Comments

Just a sewing day

sewingday_header

I’m having one of those sleepy feeling days. I know I should be searching through my fabrics and patterns and finding something new to make. Today I just feel like sewing and skipping the whole getting organised bit.

Thankfully I can pull something out of my “to make” tub and its all bundled up inside its zip lock bag. Everything is there and all I have to do is start sewing.

So that’s what I’m going to do, hope you have an enjoyable day sewing too!

Posted on 23 Comments

Sewing Adventures: a tale of 2 dresses

2dressess_header

Over the past few weeks I have set myself the task of getting my “to do” pile of sewing down to a more manageable size. My usual way of preparing a garment to be sewn is to cut it out, include all the fabrics, trims, interfacing, pattern etc into a jumbo zip lock bag, seal it up and add it to the in progress box. This works great, it keeps things tidy, the cat is less likely to want to sleep on top of it and if I can’t get to it straight away then I can’t lose any of the pieces.

Cynthia Rowley detail

In working my way through the stack I came across 2 very pretty dresses. This Cynthia Rowley one from Simplicity in navy and the Gathered Sundress from Pattern Runway in white. Both cut out in Japanese Lawn. Setting aside some time I made them up, as it got closer to the time to add in the zips something became very clear.

I’ve put on weight.

These are not going to fit. Now normally this would relegate them back into the “to do” pile, but I need the space. So I finished the dresses. The navy Cynthia Rowley style only needs a zip in the side seam and it’s done. The white Pattern Runway dress needs a centre back zip and the hem to be done. So all in, these dresses need less than half an hours work to be wearable.

Cynthia Rowley, Pattern Runway

I however need more than half an hour. I’ve not been exercising as much and some incredibly high stress levels means I’ve been stress eating. In addition to weight gain this has also meant an increase in migraines and some other issues, most of which I know are more easily taken care of when I am being active.

So my plan is to pop them in the cupboard, work away with my fitness and my diet and in a couple of weeks try again. Then if they don’t fit, I try my fitness again, basically repeat until they fit.

gathered pocket

Now I want to be very clear, this is not about size, this is about fitness. When I am fitter my body has a different shape,  it gets stronger, it supports me, physically and mentally I feel better. After a winter of plenty of working from home (comfy track pants and loose tshirts may feel awesome, but they also hide when the weight starts to change), too much comfort food and not enough exercise has turned my muscle to pudge. Pudge sits on my body in a weird way and this is why things aren’t fitting the way they should.

Once again sewing has taught me to enjoy and use all the skills I have in all areas of my life. Because when one gets put off balance there are follow on effects. In this case it means dresses that don’t fit now, but it’s OK. They will fit later and in the meantime act as good incentive to get moving.

So has anyone else ever had the problem of not fitting into their projects? or anyone want to come and get fit with me?

Posted on 4 Comments

Sewing Adventures: stash busting (even the crazy stuff)

sewingknickers_header

Stash busting sewing was in full force this weekend using up some cute polka dots and checks into a few pairs of knickers.

The Lizzie Knickers with in check with elastic and lace from the stash. I can never get these to sit straight for a photo but they are very cute to wear.

pinkweb

The Georgiana Knickers using up the Kermit the frog green crazy coloured elastic. Because when you are serious about stash busting it all has to be used at some point?

blackweb

Closing in on yet another full year of stash busting and it doesn’t feel yet like I’m making a big difference? Am hoping the last few months of the year result in some big amounts being used or that when I re shuffle everything it will take up less fabric tubs than it currently does? Here’s hoping?

Edit Note: the original version of this post had the black knickers incorrectly listed as The Charlotte Knickers. They are in fact The Georgiana Knickers, a more bikini brief style than the fuller more coverage version that is The Charlotte. Apologies for any inconvenience this may have caused. I can only attribute the mistake to me being very tired and not thinking clearly.

Posted on 2 Comments

New Releases – additions to the Basics Collection

basicsblog2_header

Even though it’s technically meant to be winter here in Sydney it seems my brain and the weather have skipped straight to summer and so I thought a timely release of some summer tops was in order. So here are two brand new releases for the Basics Collection.

womens-tank-top-cover

Women’s tank top featuring bound straps and stretch band at waist. Sure to become a wardrobe staple as you layer it under jackets, wear it on it’s on in the summer time and mix it up with some trims to make cute sleepwear. A very versatile wardrobe addition.

Suitable for knits. Body ideal for combed cotton knit, jerseys,interlocks and single jerseys or knits with lycra. Need a minimum of 5% stretch. Binding can be self fabric, fold over elastic or woven bias binding. Band fabric Ideal for Rib knits, knits with an elastane/lycra/spandex content is necessary.

womens-baseball-singlet-cover

Women’s Baseball Singlet with scoop hem and low back. Featuring twin needle neck, armholes and hem. Perfect for a warm summer day with a low scoop back (not too low you can still wear a bra) and then the curved hems skim over the hip ensuring a flattering look over the stomach.

Suitable for stretch knits with more than 5% stretch only. Ideal for knits, jersey, interlocks, ribs and lycra blends. An elastane/lycra/spandex content is highly recommended for a better fit.

Both are available right now in the shop.

Posted on Leave a comment

Blog Hop

bloghopheader

The very talented Beth from Sew DIY has nominated me to be next in the Blog Hop. It’s aim is to share a little bit about the creative process and what inspires us to share and create. It’s been wonderful thinking over why and how I create. I highly recommended  if you are feeling a little chaotic or down, take some time to reflect on your makes. It will lift your spirits and give you a renewed sense of accomplishment!

about-3

Why do I write?

I write because it’s one of the easiest ways to communicate. I wish I could talk to everyone in person and explain all my ideas and designs. That however would take a lot of time and involve a lot of travel. So while that would be awesome, I can’t afford that much travel.

Instead I write and try and communicate my ideas and design philosophy that way. I love to share ideas and knowledge so I’m trying to communicate as much “stuff” as I think is interesting to people. Sometimes I get stuck, in that I have too many ideas and no way of knowing if people would find it deadly dull or really interesting? When that happens if I find it interesting, then it goes up.

What am I working on?

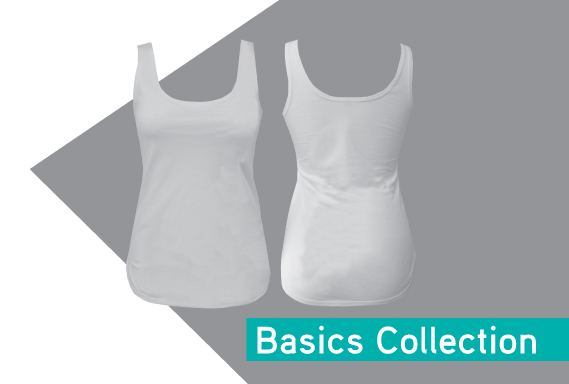
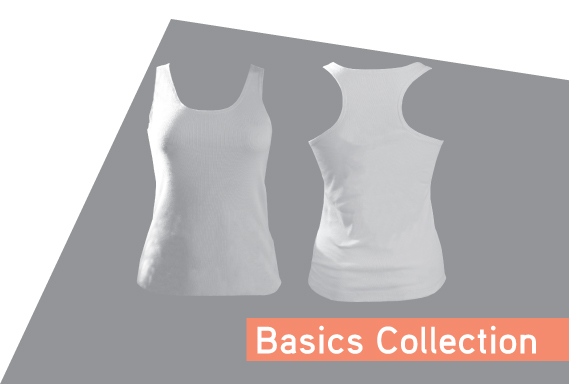
I’m working on new patterns, so many ideas and plans happening there. I have 2 new patterns releasing tomorrow!

So far I’ve been working at releasing patterns as mini style ranges and this idea is going to continue. I want everything to co ordinate together so it becomes part of a larger more cohesive brand philosophy. I’m big with planning and from working as a designer we tend to plan out our collections 12 to 18 months in advance. I’ve been taking this approach with Measure Twice Cut Once and have a release schedule planned out. This helps me to be organised and allows me to slow down a little too. Sometimes I want to rush and get it all out there. Then I sit back and look at the schedule and say to myself “no there is a plan here, stick with it”. I want the business itself to be sustainable but also fun. Sewing is enjoyable and I want to encourage people to sew and create their own styles in a way that is difficult to do when you have to rely on ready to wear.

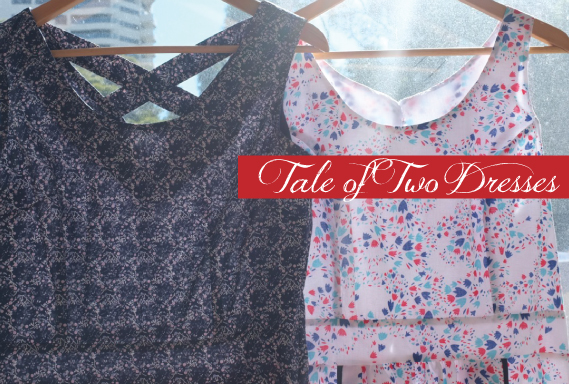
Personally I’m also working on some sewing of my own. I want to be ready for summer so I’m trying to add in some pieces that were missing last summer. Sewing for myself goes in cycles and it seems so much of my summer garments have just worn out, am looking forward to replacing loved pieces and finding new styles to try.

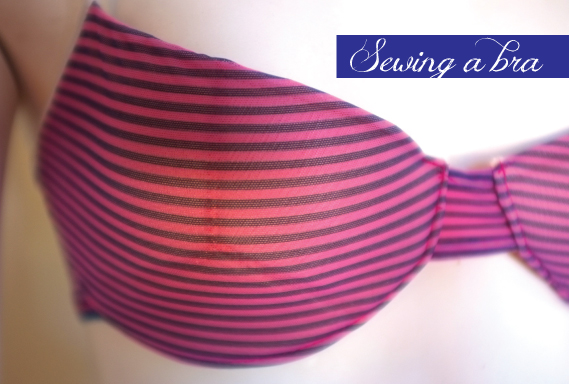
This year I also set myself some sewing challenges. One of which was making my own underwear, so I’m looking forward to finishing up some bras very soon. I’m also stash busting and have found some truly wonderful pieces that I have loved adding to my wardrobe. I’ve really liked setting myself a challenge this year, am thinking over what I should challenge myself to sew next year already.

bloghoppatterns

How does it differ from others of its genre?

I hope it does? I’m trying to share my knowledge of working within the fashion industry and how I mix that with my own sewing and of course, developing patterns.

I think I’m still finding my voice. Working on what I am trying to communicate. Long term I’d like to have the blog contain informative posts about the patterns, new release’s and hacks/DIY’s you can do with the patterns. Plus I’d like it to have more series and articles covering design and how things are approached from an industry viewpoint. I tend to pull inspiration from everywhere and feel like sewers could learn from industry in the same way knowing how to sew influences my design and industry practices. It’s not a case of one being better than the other, more of a collaborative duo that can benefit from each other.

I also want to show more of my own makes, I’m terribly behind on my own makes as I keep putting them aside for more sample testing or patterns. In looking back over the blog for the Blog Hop it’s the one thing that is glaringly obvious to me. I need to show more of my own pieces, not only to show the person behind the brand but also I genuinely enjoy the comment and feedback from the sewing community. So that’s a big challenge I am setting myself and have the determination to make sure I don’t fall behind on it again.

About1_header

How does my writing process work?

I open a post and write? I try to write like I talk, but I also like to be organised so there are plenty of pre written posts that get scheduled in advance. I want to try and share knowledge as much as possible so I try to write in a way of sharing and I hope that comes across?

I have lists and lists of topics I want to write about, so I write a list and then try and add it to a plan. Sometimes people will ask a question or mention something in passing and that sparks an idea so it all goes on the list and then I filter it out later when I sit down to write.

To keep myself on track I have an iCal colour co ordinated schedule so I know what posts are going live on what dates. This way if work or life gets in the way there is always something happening on the blog. I deliberately leave gaps though as I want to be spontaneous and celebrate things as they happen too. I work as a freelance designer a lot, so I will go from weeks of non stop to to a break of a few days or a week and then back again. It can be tiring but it also forces you to be organised about everything. From buying groceries to getting the washing done. So in the quiet work times I like to bank as much work as I can here on the blog so that the creativity of my day job feeds the blog and vice versa.

As part of the Blog Hop I get to nominate the next creative person to join in. I’m choosing the lovely Erin from Dog Under My Desk, not only does she do the most amazing bag patterns, she is soon to take the big leap and come to live in Sydney! I can’t wait to finally meet her in person.

Posted on 4 Comments

Basics Collection – information schedule

basicsblog_header

Thank you all for the great response to the release of the Basics Collection yesterday. I’m so glad that the concept of wearable everyday Basics is so appealing to everyone.

To help you out with fabrics and planning for your new Basics there are some posts coming up that are filled with information. Here is a brief rundown of what you can expect

  • Choosing fabrics for your Racer Back singlet
  • Types of stitching
  • Ideas from the Designer Manual
  • Additional inspiration
  • Sewalong dates

Requests have already been coming in for pieces that people want as everyday basics so if you have a special request pop it into the comments and we will see what we can do for you.


Posted on Leave a comment

Everyone Deserves Pretty Knickers – The Jane Knickers Sewalong Part 1

What a week! Seriously it’s been a whirlwind of excitement. With seeing peoples makes and being featured designer on Kollabora. It’s all just been fantastic and one of those times where I’m supremely happy to have made the leap to share my love of sewing with everyone. Thank you to every single person who has supported Measure Twice Cut Once in any way, I truly appreciate it.

Today kicks off with The Jane Knicker sewalong. If you haven’t got your pattern yet, you can pick it up with a 20% discount until the 10th of June over on Kollabora.

Fabric choices are fairly varied for the knickers which is great as it means you can go as fancy as you want and it’s brilliant for stash busting too. Look for lightweight cottons like voile, cambric or lawn. Quilting cottons and dress cottons are very nice too. Lightweight silks and satins are also lovely and have the added slinky feel to them.

Avoid anything that doesn’t have a good bias stretch to it, is too bulky (like denim or canvas) and if in doubt make a test version before using up your best fabric.

As an indicator of fabric quantity I’m cutting out the size 18 pattern and this is 112cm wide fabric. For sizing, try going by your hip measurement not your waist measurement. The fabric I’m using is close in handling to a voile and has a printed floral on it. Again it’s a stashbusting piece but I know it came from Spotlight a few years back and I stole it from my sisters stash (um, Hi!).

As with all of our woven knicker patterns The Jane Knicker is cut on the bias. With right sides together fold your fabric in half and ensure that the grainline run parallel to the selvedge.

1

I then folded back just one layer until the selvedge is at 90 degrees to where it was to create a bias fold line. On this I placed the yoke and cut a single layer.

2

All pattern pieces are now cut.

3

Taking one lower front panel and one back panel. Match inside leg seam with right sides together and pin. Repeat for remaining leg panels.

4

4a

Using a straight stitch sew a 1cm seam along pinned edge. In a never before seen occurrence I am sewing with non matching thread to make it easier for you to see and apologies to Nan (my Grandmother) as I can hear you mentally tsk tsking me for non matching thread. It’s just for the photos I promise Nan!

5

Clean finish raw edge by overlocking/serging or zig zagging.

6

Repeat the last 2 steps for the other leg panels.

With right sides together match the joined panels. At the inside leg seam push the seam allowance to the back. Pin in place.

7

8

Using a straight stitch sew a 1cm seam allowance.

9

Finish raw edge by overlocking/serging or zig zagging.

10

Tune in tomorrow for the remaining steps and don’t forget to tag your in progress photos with #everyonedeservesprettyknickers


Posted on 2 Comments

Everyone Deserves Pretty Knickers – Inspiration

knickers

One of the reasons (and there many) that I like making knickers is that I get to choose my own style.

The shape that suits me, the fabrics that I like, trims, ribbons it’s all my choice. My version of pretty may not be the same as yours and that is wonderful. It’s down to you to choose what you want because you get to make it.

If however you are stuck for inspiration, I’ve been doing some research for you. For research like this Pinterest is my weapon of choice as it’s so easy to gather the information and draw from a wide amount of source material.

This lingerie board covers a wide range of styles in a variety of fabrics. I’ve also included bras, cami’s and even some cover ups in here as well. I find it helps to envision and entire wardrobe of beautiful pieces to really get inspired.

2edd144fbca36cfe5dcece730a001cc5Take a look at the shapes of the knickers to see which ones you like. If you regularly wear a full coverage knicker you could be a bit daring and go for a skimpy or even bikini style? Or if you are used to a tiny style perhaps something like The Jane Knicker might be a welcome change?

Once you’ve decided on the shape of your preferred knicker, start looking at fabrics and trims. A Swiss dot paired with a satin ribbon. A floral woven with a lace trim. Raid your entire fabric stash to find all the trims and fabrics you’ve been setting aside for a special occasion.

If you are using a Measure Twice Cut Once pattern then there are individual boards set up for each style showing all the versions that have been made so far. Sometimes it’s easier to see a version so you can see if yours will work?

The Charlotte Knickers

The Georgiana Knickers

The Lydia Knickers

The Jane Knickers

The Lizzie Knickers

The Mary Knickers

Gather together your fabrics and trims and get ready for our first sew along starting tomorrow.

images via Anthropologie, BHLDN