Posted on Leave a comment

Sewing Adventures – Matching Rash vests

Due to an enormous backlog of finished projects to share, I’ve decided to dive right in and not adhere to strict chronological order. Mostly because if I don’t start now I never will and also because it doesn’t matter when they were made only that they were made! So let’s get to it!

A trip to Fiji (2023) is a pretty mind blowing thing to prepare for, not only is it not the normal type of holiday for us to go on it was also preceded with a super busy time period. Having now been on the holiday it was amazing, we loved it and would do again!


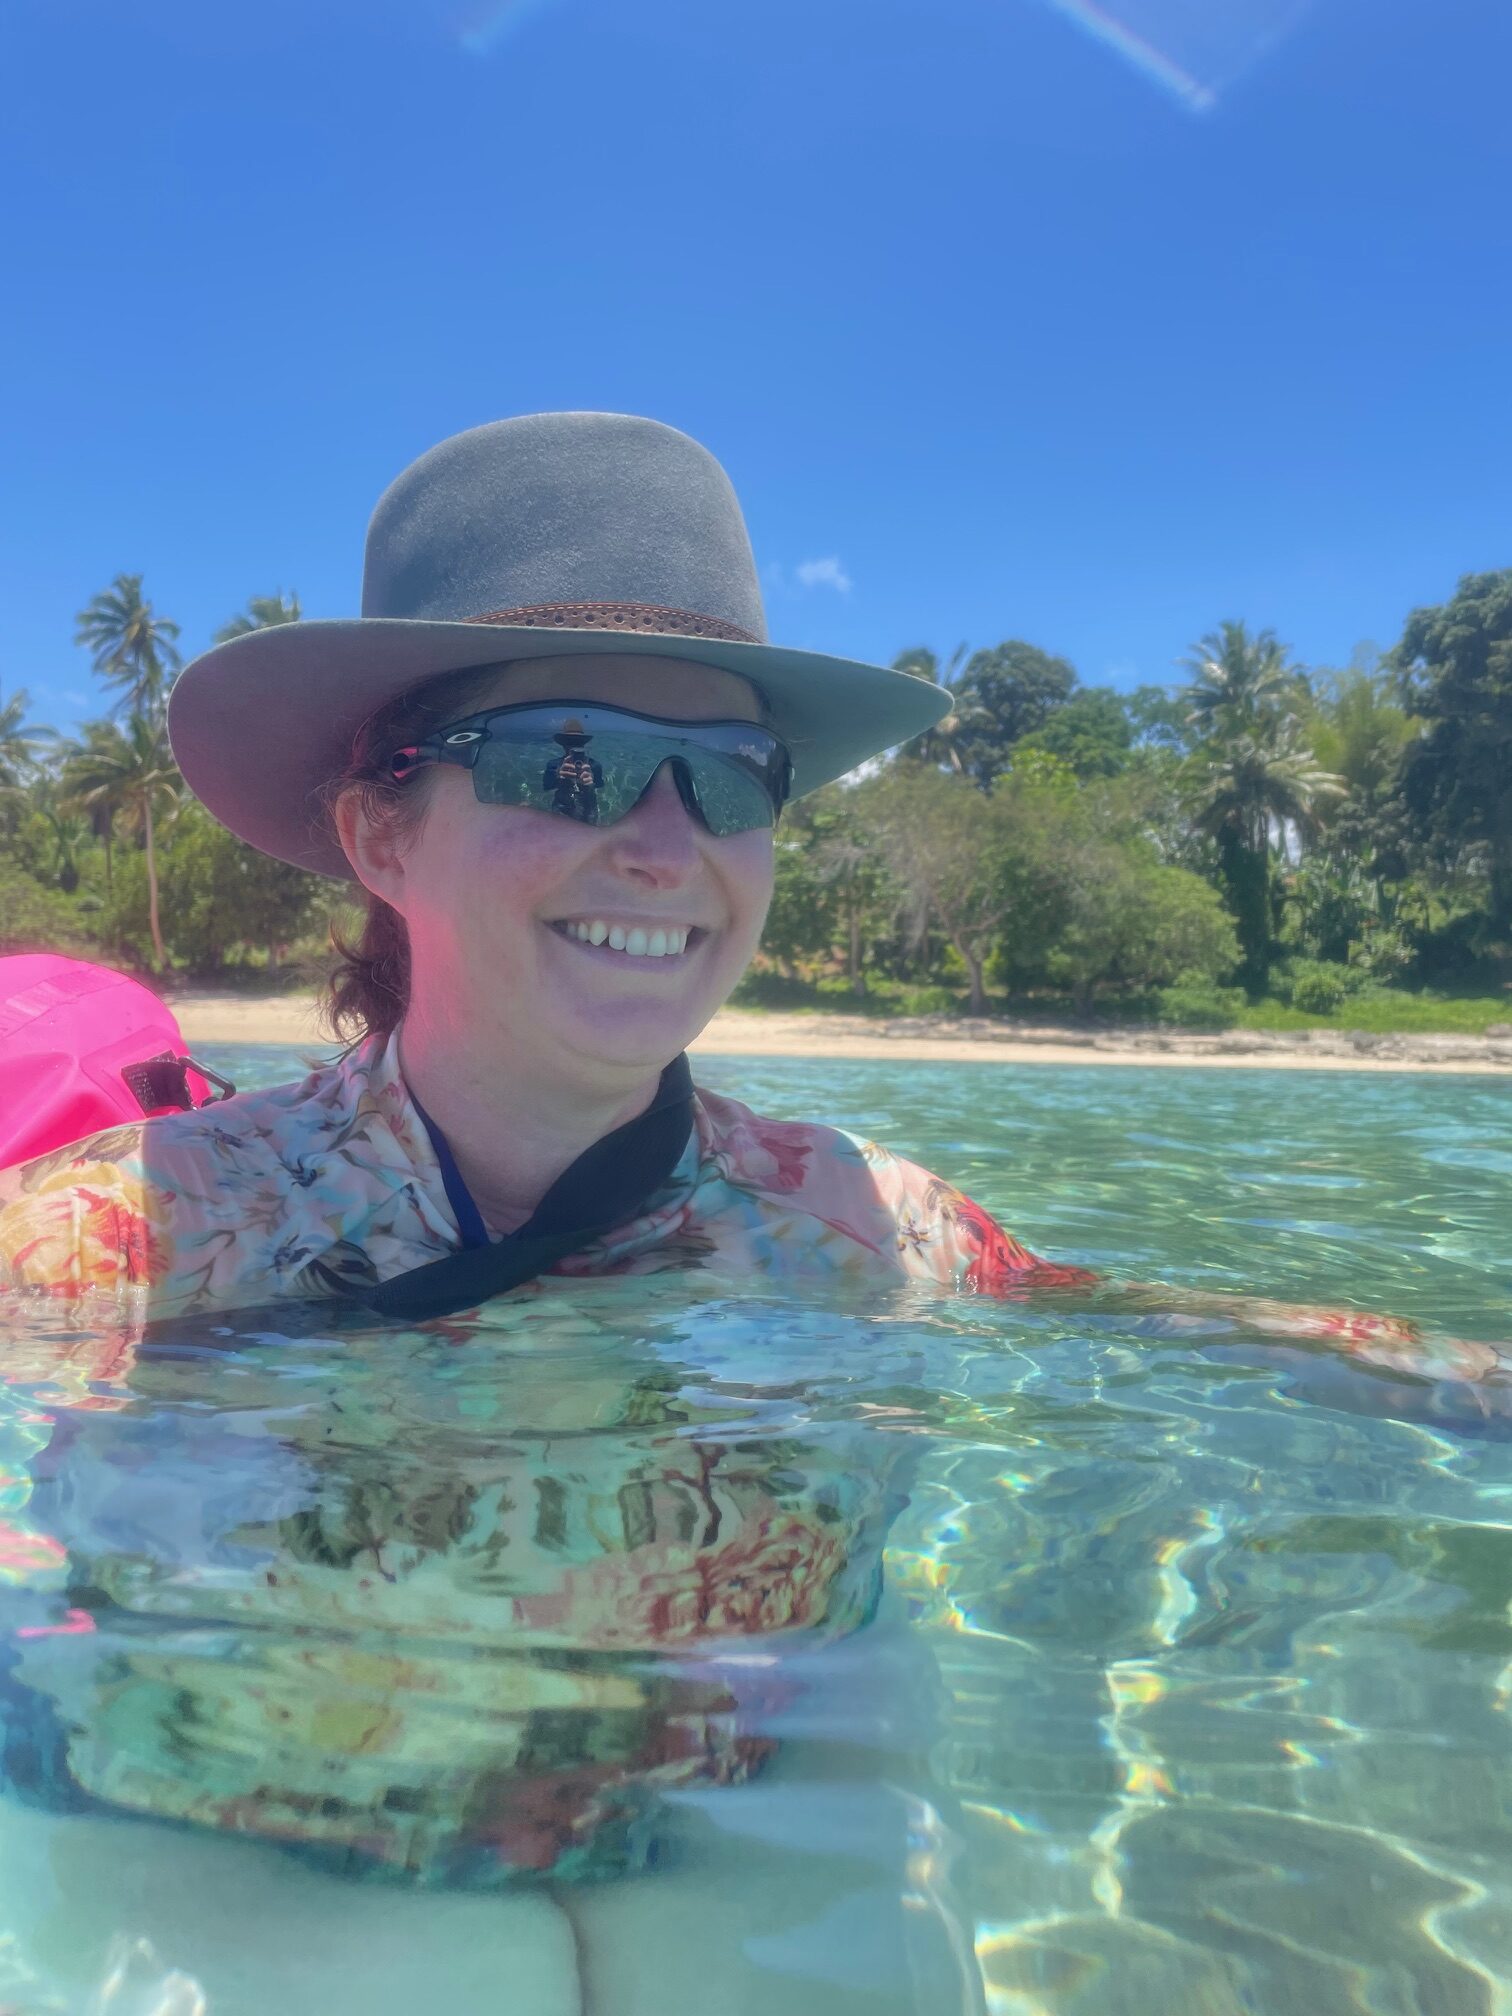
Being the water lover that I am I knew I’d be in as much as I could and thought a second long sleeve rash vest would help protect me from the sun. Using Jalie Valerie I quickly whipped one up from this gorgeous pink swim lycra from the stash (originally from Pitt Trading now The Makers Society) my only changes were to make the arms longer than I normally do and make the neck band slightly wider.

and yes hats and sunglasses in the water were very necessary for anyone wanting to avoid some sun. The water is very calm so it’s not like you are going to lose everything when a wave hits you or anything like that.

Sewing wise I did the entire of the seams using my overlocker and then hemmed the sleeves and body using my coverstitch machine, super speedy nice and secure.

In some of these photos I’m wearing my previously made Jalie Valerie in a white and blue floral lycra also from The Makers Society.


At the last minute the day before we flew I decided to make one for The Englishman in whatever I had on hand which was some navy swim lycra and some athletic lycra in a sharkskin type print for the side panels.


Am so glad I did because we practically lived in these things as we explored the waters around the resort. we had an absolutely wonderful time and we didn’t get sunburnt so winning all around.

Can also highly recommend reef shoes, these are a neoprene upper with a rubber base and it made climbing through rock pools or traversing sand littered with coral a breeze. A must for anyone who wants to explore and swim.

Pattern: Valerie from Jalie – made my sleeves longer and wider neck band for me (in a previous version I have blended the sizing from my bust size out to my waist and hip. I found doing this stops it from riding up while paddleboarding, this is now my base pattern I use), no changes for The Englishman

Fabric: embroidered cotton lawn and plain cotton lawn both from the stash originally from Pitt Trading

Changes: pattern changes as noted above

Posted on Leave a comment

Visiting the Sydney Craft Show 2022

The Sydney Craft show was on recently and I got to go and hang out on the Brother stands and the Pfaff stand.

I also bought some pieces so I’m showing you all about it. During the show they played music non stop, I don’t want a copyright issue so I have muted all sound on those sections.

Shops I visited BeBe Bold https://www.bebebold.com/

East meets West

Wonderfil https://shopwonderfil.com.au/

See more of my sewing and shop patterns at https://www.measuretwicecutonce.com.au

Follow me on Instagram https://www.instagram.com/_measuretwi…

Follow me on Twitter https://twitter.com/_MeasureTwice​

What I’m wearing Self drafted dress in fabric from the stash originally from The Fabric Store

Earrings – Harry and Herne

Nail Polish – Octopus’s Garden by Hanami

Posted on Leave a comment

Sewing Adventures – Rifle Paper Co, Travel Pouches

Planning for travel seems like a foolish notion right now but at the beginning of lock down I went through my stash and pulled out some fabrics that need to be sewn up. One of which was this gorgeous hand drawn map fabric from Rifle Paper Co.

I love a hand drawn map, whimsical with promises of exploring it’s right in the wheel house of things I enjoy. Add to that the fact The Englishman spends a great deal of his day looking at or drawing maps as part of his day job and well, a bit of map based fabric stood no chance around here.

Originally purchased from Miss Matatabi I’ve had it stashed away waiting to be something. As always I had elaborate plans and then decided that simple was best. Using a ruler and a rotary cutter I sliced it up so that I could fold each panel. add a zipper, sew along the bottom and the side and have a pouch.

Zips were from the stash hence why there are different colour zip tapes and I used some of the selvedge to neaten off the ends of some of the zippers to give a better finish to the top.

With travel off the cards for quite some time I’ll put these to use as project bags for my embroideries and dream about a time when we are free to explore once again.

Pattern: none just winged it

Fabric: printed panels by Rifle Paper Co originally from Miss Matatabi

Alterations: none

Posted on Leave a comment

Sewing Adventures – Plane Blankets

Oh no these are not just some lovely pieces of fabric I’ve just picked up. These are our brand new plane blankets, well they were in December when I made them for our trip to England.

Lets face it, international flying is you stuck in a tin can with lots of people endlessly for hours. It’s not some glamorous thing as portrayed in the ’60’s. So I do what I can to make it slightly less grot and more enjoyable.

Step one, ditch the polyester scratchy plane blankets that’s been over who knows how many thousands of people and bring your own.

Previously I’ve used scarves and it’s worked well but this time I wanted something a bit bigger. Hunting through the stash for something entirely different for another project I came across these 2 pieces of double gauze. I love them but they just never seem “right” for a project, they are however perfect for this project, lightweight, soft, wash well.

I quickly hemmed the 2 raw cut ends using my Coverstitch and hey presto, 2 soft snuggly plane blankets. They roll up small so don’t take up much space in our carry on luggage and yet are big enough to cover an adult while sitting.  Extra benefits of being made with a breathable fabric like cotton meant that you could keep covered even when the plane felt like it was stifling hot and lacking in any kind of air movement. Highly recommended to add some comfort to any plane journey.

Pattern – hemmed all raw cut ends, left selvedge edges as is
Fabric – from stash but both originally from Miss Matatabi
Alterations – none

Posted on 1 Comment

Traditional Japanese Textiles

traditionaljapanesetextiles_header

I’m in the midst of planning a trip to Japan for next year. I’m a little (ok maybe a lot) obsessive about planning for trips. I love reading up on places to go visit and making itineraries and finding fun things to do. This time we are aiming to go see a few more places that we’ve never been to before so I’m thoroughly enjoying my research.

One of the places I’ve found to be an excellent resource is YouTube. Lots of great documentaries and travel shows and an equal amount of truly tragic ones too. Along the way I’ve found some good pieces that cover Japanese Textiles so I thought I’d share them with you. Some of them are a bit old and a little high school video lesson about them, but that also makes them a little bit charming too.

https://youtu.be/oYG0u-SNQoE


https://youtu.be/FQuuFIEgvjo


https://youtu.be/D7oFkDJbGss

Posted on 14 Comments

Dressing up in Japan

dressing up in Japan fan

Yesterday I shared some photos on Instagram of some of my favourite holiday memories.

Dressing up in Japan.

It should be ultra cheesy and horribly touristy but it’s not. It’s fun and you get to choose your kimono from an entire roomful of gorgeous colours.

Japan lilac

I’ve had photos done on 2 different trips to Japan, each done at the same place Maiko Henshin in Kyoto. I originally discovered it, as one of my best friends lived in Japan for many years and on a visit he suggested it as something fun to do.

You need to book in advance but unless you are there in peak holiday time you can normally book only a day or so in advance, other times it can be over a week before there is space. The staff have limited English so the first time my friends booked for me and the second time I asked my hotel to help me with the booking.

dressing up in Japan

When you arrive you are shown into a locker room and given a chemise to change in to. Take off everything but your underwear and pop on the chemise. All of your belongings put into a secure locker and you get a key on a stretchy cord to wear around your wrist. If you want to take your camera with you, you may have to ask permission as normally they ask even your phones to be locked up. Photos are not allowed until after you are fully dressed and finished with the professional photographer.

From there you go up a few floors to get your makeup done. The makeup feels weird. It’s a thick white paint and just a little cold when being applied. The staff are all lovely and each time they have gone to great lengths to tell me to take out my contacts. After awhile I managed to convince them that my blue eyes were not contact lenses but just my eye colour.

After make up you go down a floor and led into the most amazing room absolutely bursting at the seams with kimonos of all colours and patterns. You are asked to choose a kimono and an obi. It is overwhelming and you want to steal them all (well I certainly did, want to that is, I didn’t actually steal them).

In the next room a small army of women dress you. You lift your arms when told and they swarm around you. The idea is create a square silhouette so extra padding is applied. You feel like a couch!

All too soon you are dressed and they are tying up your kimono with a decorative belt. Then it’s time for a wig. Each time I have been very blonde (the first time was actually blonde and pink) so I get a full wig. In some of the photos I can just spy little bits of blonde at the back. Seeing myself in dark hair is always a little bit of a shock.

71060004

The photography room is adjacent to the dressing room. Here is a tip my friends gave me on the first trip and it’s so good I just have to tell everyone. Don’t smile with your teeth in the photos. Closed lip smiles only. Why? The white make up is so astoundingly white, you look as if you have terrible yellowed teeth even if you have fabulous teeth. So practice a closed smile. Oh and go with a neutral nail polish or none at all. It really shows up in photos and can clash with the traditional look.

The photographer poses you with a variety of props. Fans, umbrellas, bags and a Temari (embroidered ball). They pose you, tell you where to look at the wall (there are numbers on the wall for you to follow) and all too soon you are done.

kimono and temari

You can pay for an extra package which allows you time to walk around outside. I’ve done this both times. First time was fantastic as it was beautifully sunny and wonderful to pose outdoors amongst the traditional buildings. The second time it was raining and well lets just say that photos in the foyer are not very spectacular.

Japan outside

All up it takes a couple of hours and is a really wonderful experience. It’s not exactly cheap and be warned they don’t take credit cards only cash so come prepared. After you are done with the photos you get undressed (with help) and then back to the locker room. Using many many many wipes and a hefty dose of baby oil you can get the white make up off.

Oh and it’s not just for the ladies, the men can also get dressed up too, with The Englishman choosing to dress as a Ronin.

dressing up in japan couple