Posted on Leave a comment

Sewing Adventures – a matching set

Much of the fabrics I use come from Pitt Trading, some of that’s because I used to work there and I stashed a fair bit of stuff and some of it is because they sell some of the most amazing fabrics and trims available. When they asked did I want to give one of their Crystal lycra kits a try I didn’t hesitate to say yes.

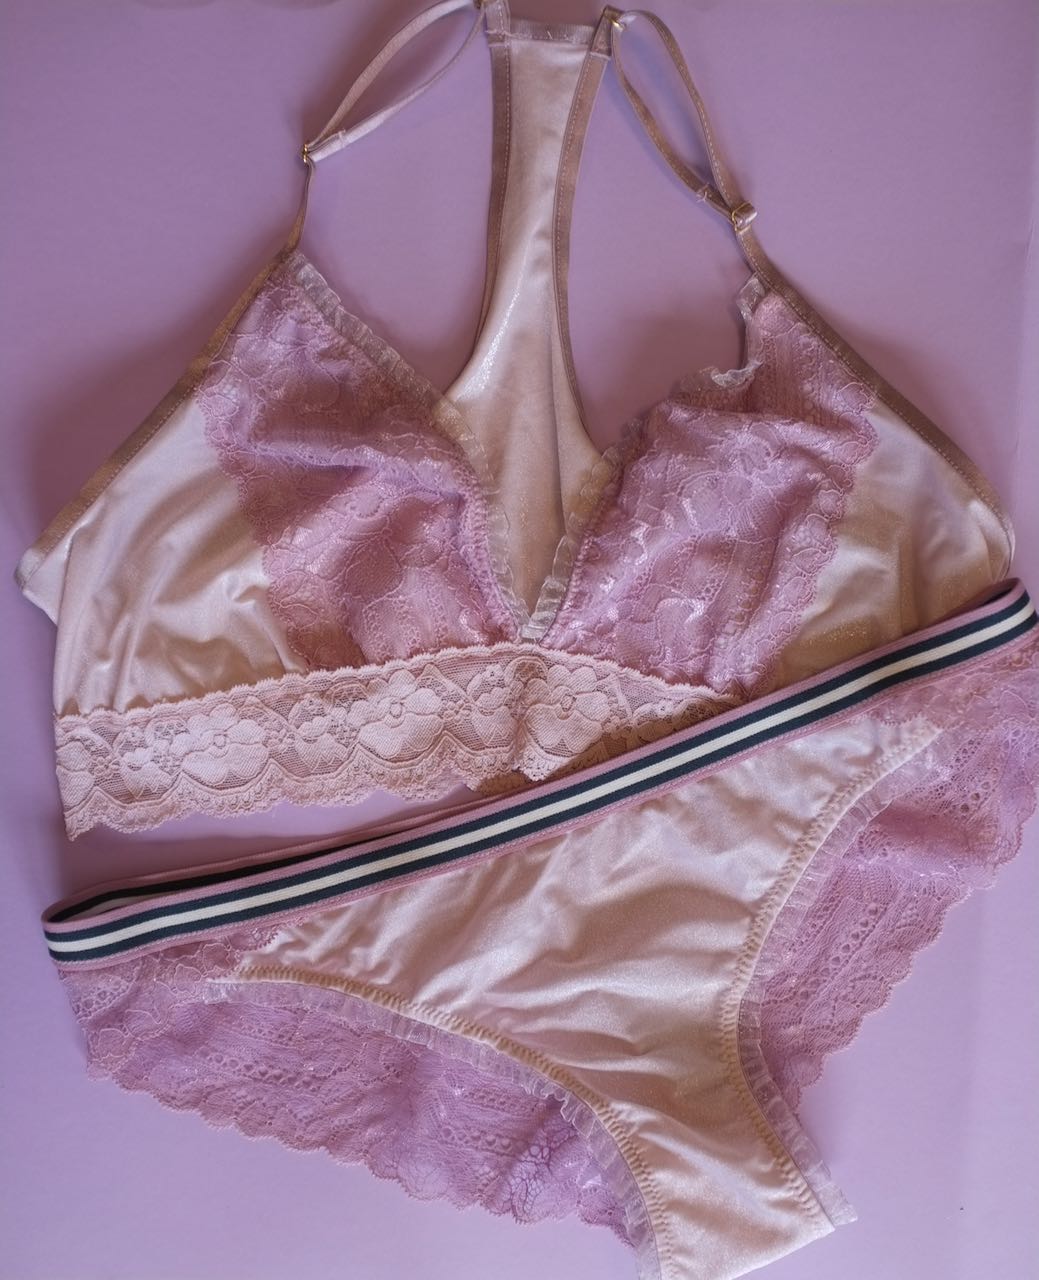
The kits are generous, you could easily make 3 to 4 pieces that co ordinate together. I decided to go all out and use as much as I could on an Emma bralet (pattern available via the shop) and matching it wth some Evie La Luvie Esme knickers.

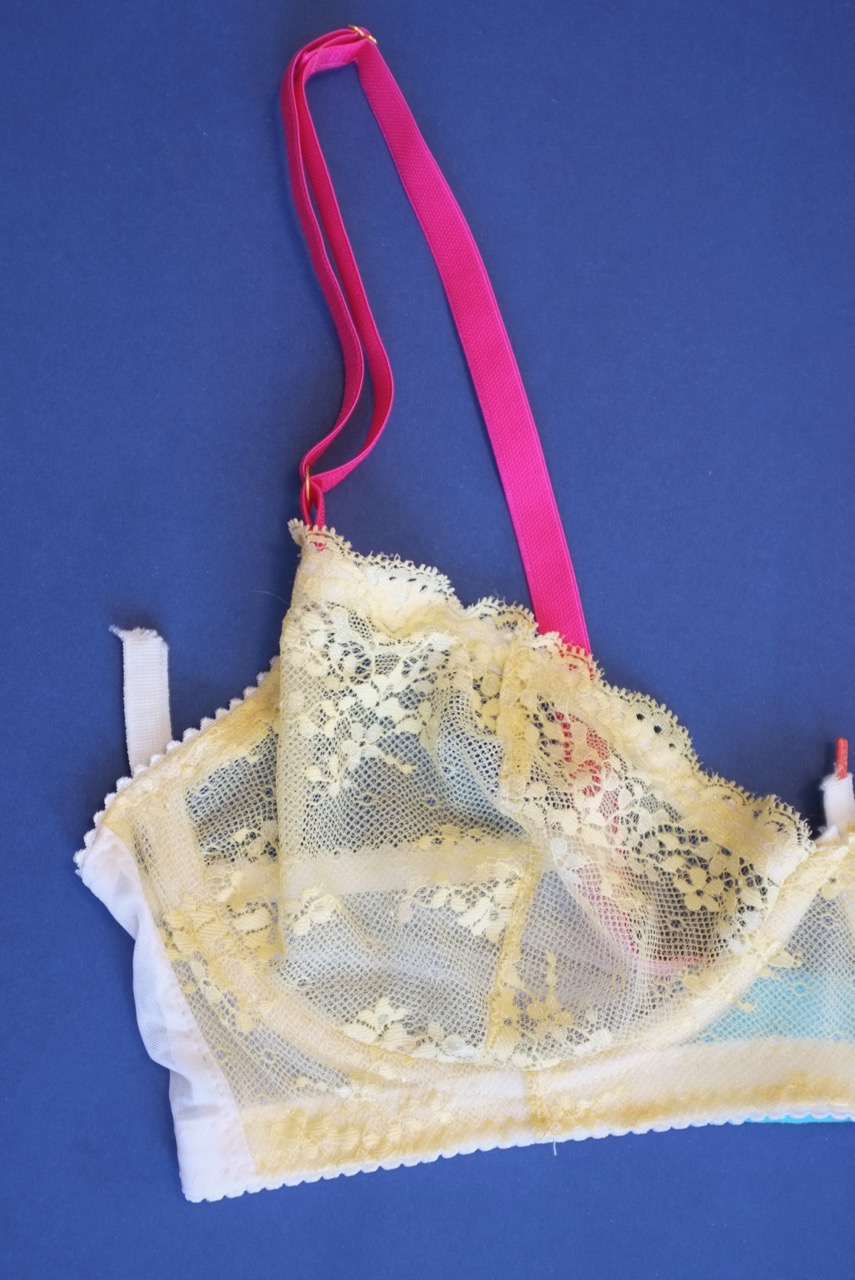
I love the knicker shape it’s super cute and a great use of lace. However I don’t love how the crotch gusset is smaller than the outer knicker panel along the sides. Unless your sewing is super precise it’s so easy to miss a bit when you are stitching it down. Honestly I’ll just be cutting it wider in the future to make the sewing more enjoyable and less fraught with worry that it won’t be caught in correctly.

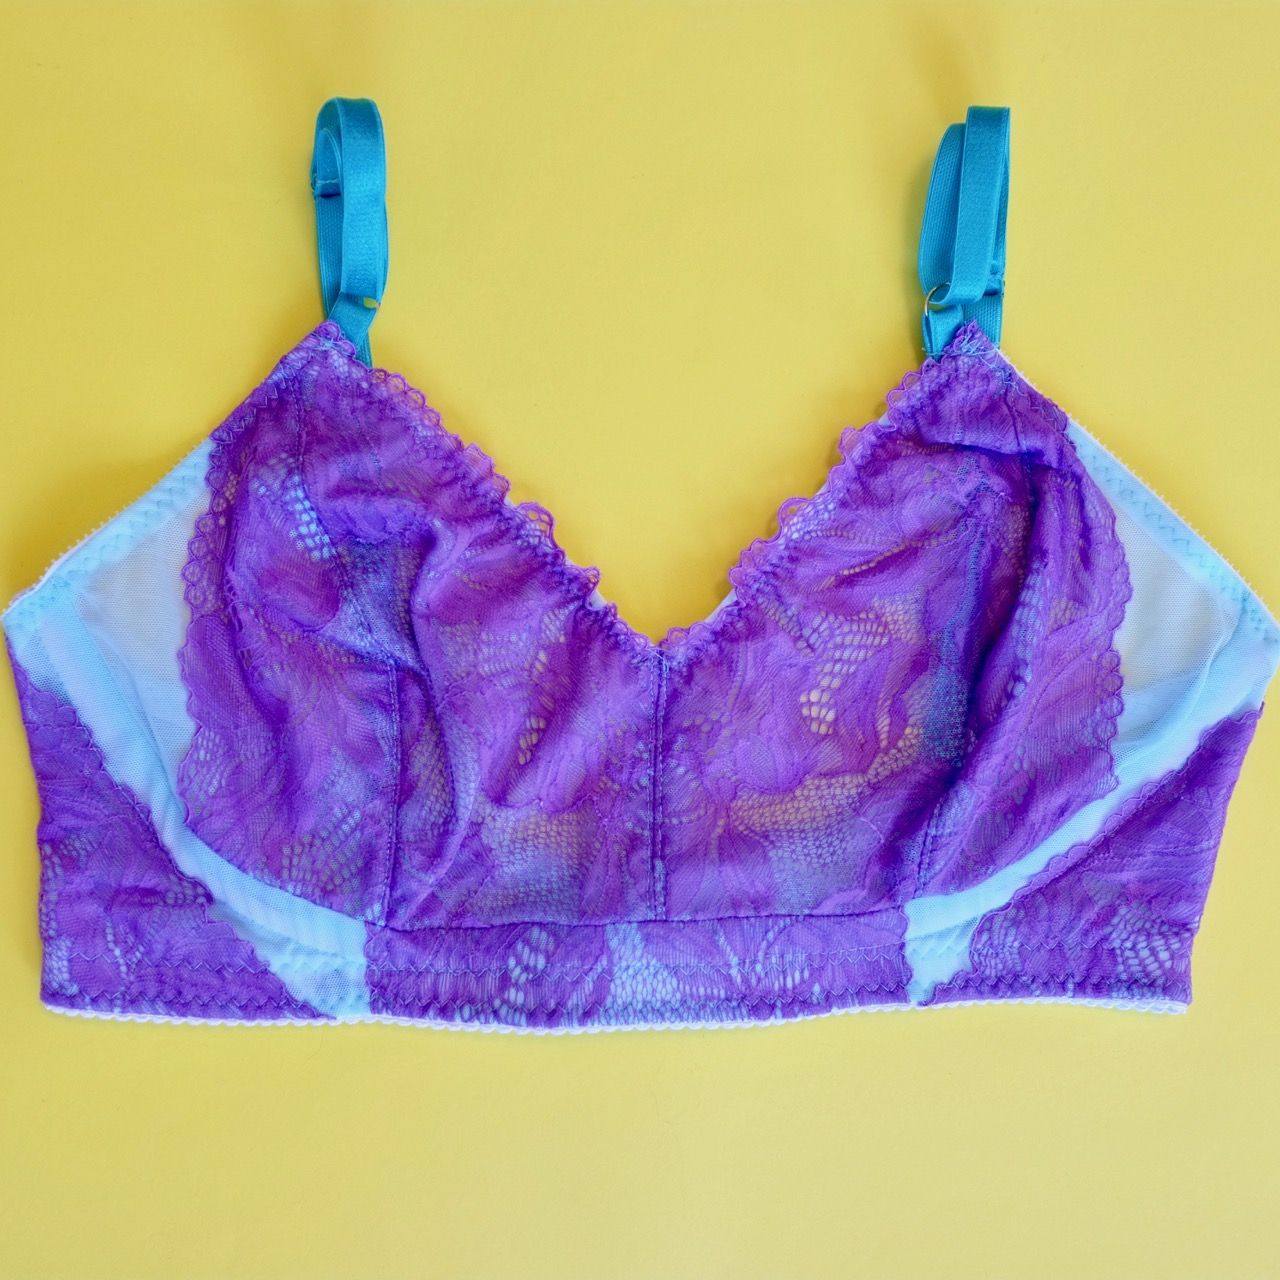
I do however love the entirely lace back, it’s so pretty, particularly with the stripe elastic I do like a bit of sporty style mixed in unexpectedly.

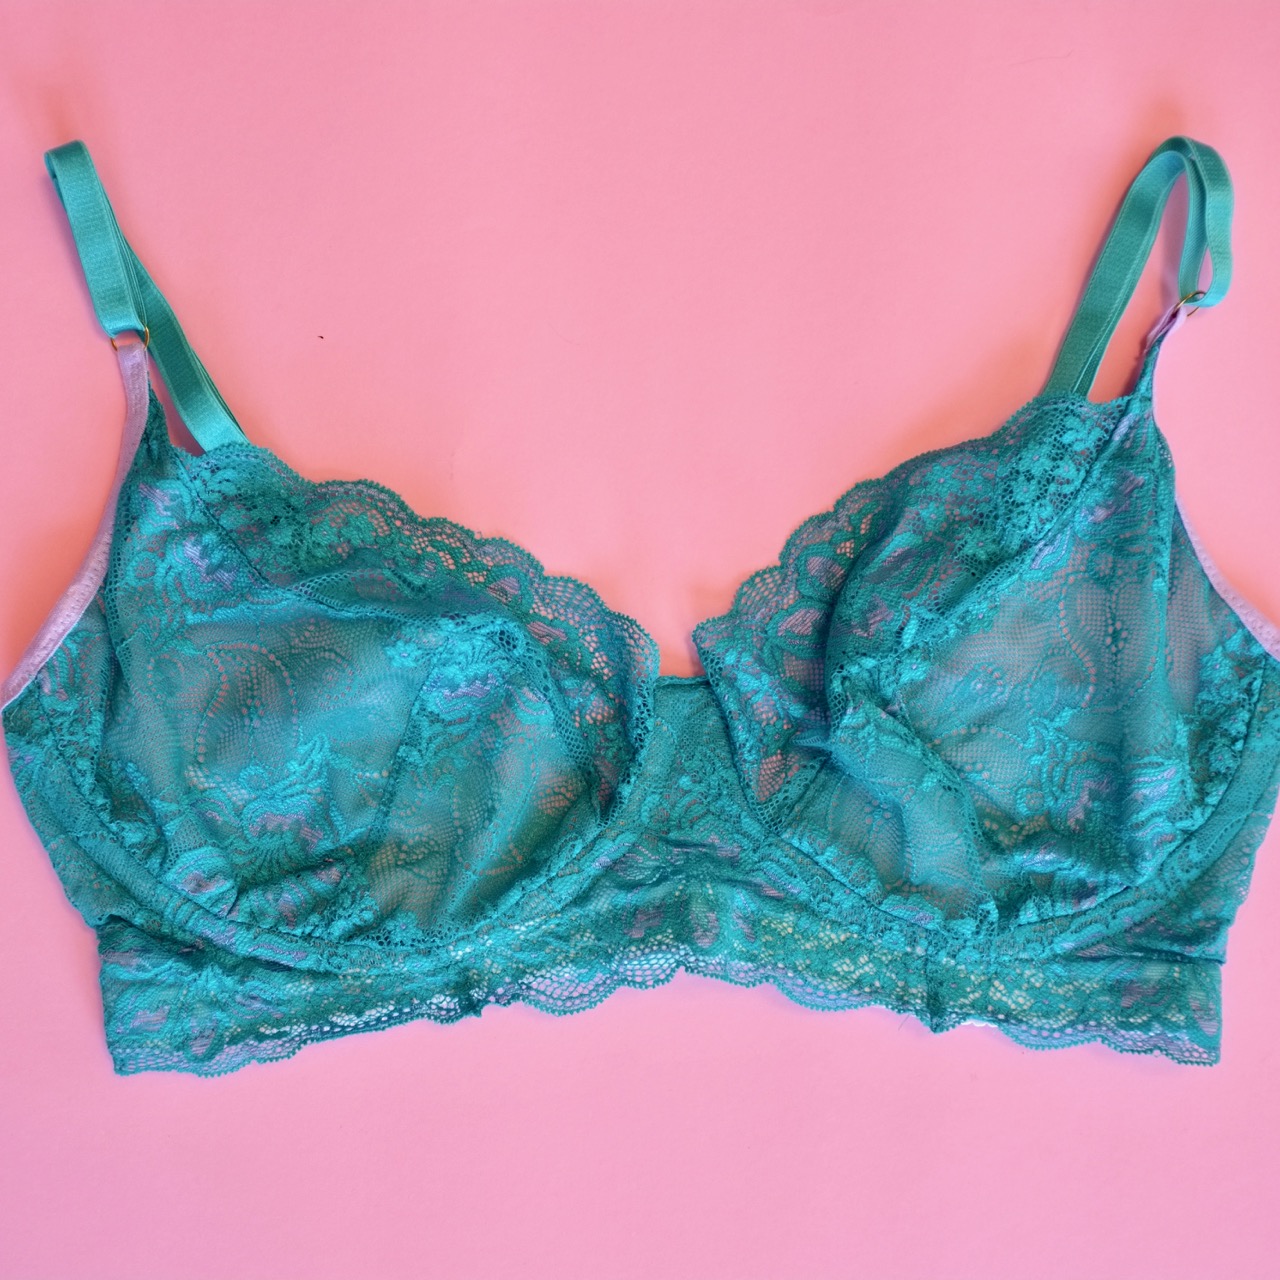
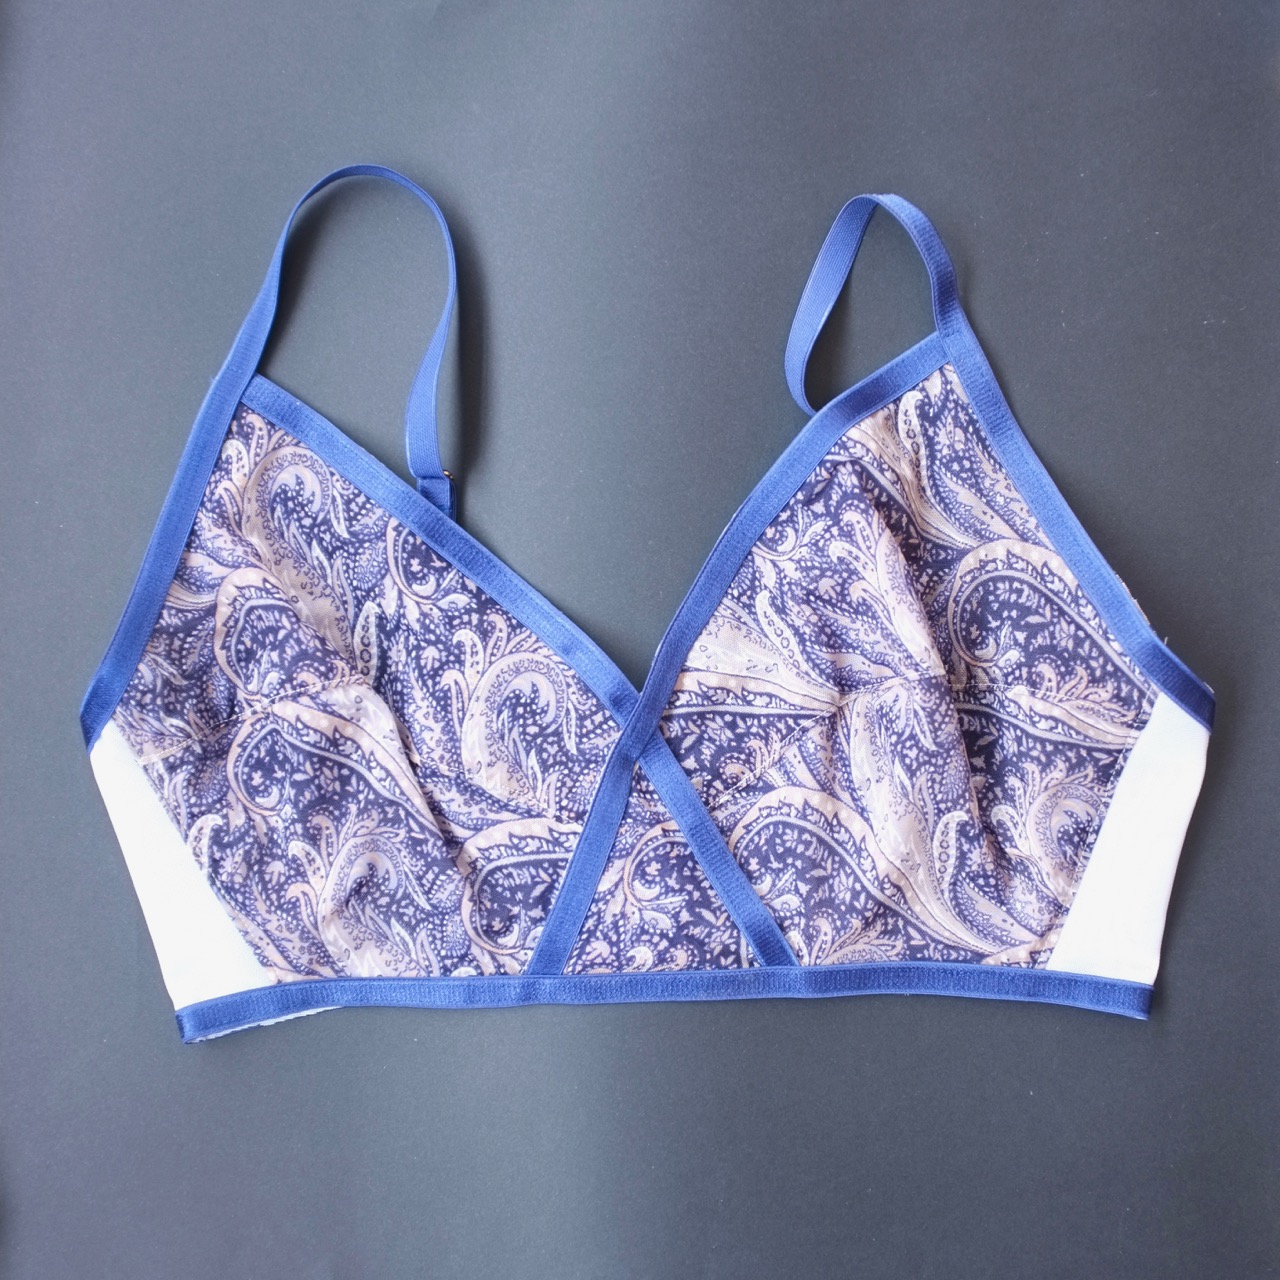
The Emma I have made multiple times before but this is the first time I’ve added the lace to the lower hem. For myself I don’t do it as I’m so short it just folds up but this one is for someone else and it looks so cute I think I want to try a narrower lace version for myself. Sewing on the FOE was a dream as this one is so lush and thick it’s like an elastic ribbon it’s so satiny. Absolutely gorgeous.

All in all it was a wonderful set to sew and I hope the person I made it for will love it too!

Patterns: Evie La Luvie Esme knickers, Emma bralet by Measure Twice Cut Once

Fabrics: Crystal lycra lingerie kit from Pitt Trading

Alterations: fix the width of the crotch gusset before I use the pattern again

Posted on 1 Comment

Sewing Adventures – more Mara Bralets

Any long term readers will know I’ve been on quite the bra sewing kick this year. Mostly because I needed new ones but also with lockdowns and COVID restrictions I just haven’t needed new dresses or other new clothes as much. I’ve been enjoying wearing what I have and filling the other holes in my wardrobe. However it has meant my blog and Instagram have been fairly Bra heavy on posts with lots of comments.

One person who sends me messages every time I post a new bra is my cousin Sarah who lives in Canberra. She keeps threatening to come steal my bras so I offered to make her some of her own. She sent me her measurements and I was shocked to find we were almost matching in our sizing. So I grabbed my patterns and got cutting.

I’ve started with the Mara bralet as it’s so comfortable and because I can’t get to Sarah to check the fit I thought it would be easier to start with a soft bra rather than dive into an underwire.

Rummaging through the stash I matched laces to printed meshes and came up with these combinations. Sarah said she didn’t mind if I stuck with my stash and made things in my non matching style.

Now to send them off and fingers crossed they fit!

Pattern: Mara bralet from Studio Costura

Fabric: Meshes, laces, trims all from the stash but most likely originally from Pitt Trading. Back closures from stash or Booby Traps

Alterations: let’s see how they fit?

Posted on Leave a comment

Sewing Adventures – Liberty Tana Lawn Harriet Bra

Summers seem to be getting longer and hotter, in fact it was the ongoing heat of last summer that seriously kicked me into gear over making my own bras. No longer did I want to wear padded non breathable sweaty inducing bras ever again. As such I’ve been working with lace, lightweight lining and basically anything that is going to get my bras feeling lighter and more breathable.

Naturally the next step was to try and make a cotton bra. Never one to waste time on making an ugly bra, I used some Liberty tana lawn scraps for my experiment. Normally the pieces are placed in order to cut with the greatest stretch, to do this with a women fabric I used the bias as my greatest stretch. Apart from the fact I’m using a woven fabric everything else was the same construction as I would regularly follow for a Harriet bra.

But did the experiment work? Well yes and no. It went together well and looks super cute but when I wear it I have a ripple of excess fabric along the apex where the seams meet. The shape is also much exaggerated and looks very pointy. My guess is that the bread tissue normally sits down much lower into the cup due to the greater amount of stretch. This would result in a rounder shape that pulls the fabric down rounding off the shape (the Harriet isn’t a totally rounded shape it does have a definite angle to it).

The upper cup panel I did in a woven broderie anglaise trim. It looks super cute but due to the lack of stretch it does dig in the tiniest amount on my bigger side. I’m hoping it will loosen with wear.

To try and fix it I want to try and pinch out the excess fabric and baste it in place then re try it on and see if that solves the problem. My hunch os that the lower cup is going to need to be split and have a bit more volume put in it as well. When trying to solve any pattern making/sewing issues I always try and solve one problem at a time. That way if it goes right you have done it in the least amount of steps/time and if it goes wrong you can pinpoint where it went wrong and walk it back to that step. Trying to fix everything at once can actually create more problems that are harder to solve than going step by step.

Pattern: Harriet bra from Cloth Habit

Fabric: Liberty Tana Lawn – leftovers from a dress, elastics and trims from Pitt Trading

Alterations: keep working until I find a solution for a good fitting cotton bra

Posted on 1 Comment

Sewing Adventures – Black Beauty bra in black mesh

I’ve been on a roll with the bra making and absolutely enjoying it! When Erin from Emerald Erin released the Black Beauty bra I put it on my “to make” list, I just didn’t expect me to take so long to getting around to trying it out.

One of the frustrating and wonderful things about bra making is that you kind of need to make an almost finished bra in order to see if it actually fits? Sometimes I make up a toile in fabric I don’t care about and other times I dive straight in.

This is one of the times when I dove straight in.

The bra itself went together really well, everything lines up and the instructions (when I used them) are easy to follow.

Sewing a see through bra is a challenge, you really have to be careful as all the flaws show up. If you look closely along where the channelling is applied at the front you can see where some of my cutting was less than stellar. Still it’s nice to be challenged to level up and keep getting better. It’s one of the things I genuinely love about sewing, you can always get better.

But how did it fit? hmm not good. The band is good and quite comfortable but the cups are enormous. I felt like I was sitting on a shelf that was supported from underneath and just nothing above. Getting past the initial disappointment I decided to put it aside for a bit and try it on again and analyse what’s wrong.

When I did that I found the upper cup is too long, leaving the entire cup sagging and not holding anything. If I add in a dart I might be able to fix this one and then next time I think I want to try this band size with a smaller cup size? I do know I’m not defeated I just need to work out a solution to getting it to fit me.

Fabric: Black mesh, patterned fold over elastic from Pitt Trading, other bits from my stash, back hook and eyes from Booby Traps.

Pattern: The Black Beauty by Emerald Erin

Changes: work out how/why it doesn’t fit and try again

Posted on Leave a comment

Sewing Adventures – Teal Lace Harriet Bra

By now I’ve made so many Harriet bras that I’m mostly including them here to help document all my makes as I don’t have any more insight into the pattern or construction. Each time I make one I challenge myself to be neater, to cover internal seams and generally just get better at sewing.

This teal and lilac one is super comfortable and I really like the fact I took the time to allow the lace to have a scalloped edge on the lower part of the cradle, it just adds another level to the bra and helps improve my skills.

Pattern: Harriet Bra from Cloth Habit

Fabric: lace and trims from Pitt Trading

Alterations: same as previous versions of this bra

Posted on Leave a comment

Sewing Adventures – mint and lilac Mara bralet

I love the finished version of my white Mara bralet so much that I dove right in and cut another one straight away, like straight away straight away…did I learn from my mistake of not sewing after receiving distressing news? no of course not. Stupid me.

Ironically I even made some of the exact same mistakes again. Like putting the cup elastic on upside down. So silly.

Despite the fact there are a few mistakes and some of the sewing is a little crooked it did make me feel better to have achieved something on what was a pretty crappy day. I also think that maybe we beat ourselves up a bit about everything being perfect all the time. I know I want to be better every single time I sew but that’s not always the case.

As it is, 2 beautiful bralets, some distraction in the form of sewing, its not all bad.

Pattern: Mara bralet by Studio Costura

Fabric: Lace and trims from Pitt Trading, hook and eye closure from Booby Traps

Alterations: none

Posted on Leave a comment

Sewing Adventures – Mara bralet in white

This bralet has been on my sewing list since I saw the beautiful versions that Birdy_sew_obsessed on Instagram has made of it. I had printed out the pattern and had it sitting by for ages before I finally grabbed some lace and made a toile. Sometimes I make a toile in something I don’t care about and other times I just jump right in, this is a case of jumping right in using some white lace and thinking I can always dye it to a colour later.

Side note: does anyone else struggle endlessly with keeping white clothing white without using a tonne of chemicals? as soon as I wash this I feel like it will go the same dirty grey colour all my whites go unless I soak in some heavily chemical laden product which makes me feel icky because I don’t want that many chemicals near my skin and I certainly don’t want to put it down the drain into the water supply.

Between sewing the panels together and adding the elastic I got some stressful news. In a bid to distract myself I thought I’ll keep sewing…not my best decision. The picot along the upper cups is actually sewn in upside down, I couldn’t find my white strapping so used khaki but forgot to change the thread colour and then when I went to unpick it left marks in the elastic so I left it white. Then for my final mistake I’ve sewn the back hook and eye on the incorrect sides…yep totally distracted and stressed. Thank goodness I had only basted in the back hook and eye to test the fit so at least it will be easy to unpick.

Stupid mistakes aside I really like the shape and the fit is really good. Like really good. I should stop being surprised that well fitting wireless bras give a good shape but each time it feels like a wonderment of surprise that the myth that wires are the only option is broken.

Due to some accidental pattern matching I got a perfect flower at centre front which was 100% not planned and quite a lovely surprise.

Pattern : Mara bralet by Studio Costura

Fabric: Lace and trims from Pitt Trading, back hook and eye from Booby Traps

Alterations: none

Posted on 2 Comments

Sewing Adventures – Queen of Suburbia Adrian bra in yellow lace

Ever make anything that you absolutely love not only in terms of fabrics, colours and look but also be so proud of the quality of your sewing? that’s me on this project. I love the lightness and colour of the lace, the electric pop of colours with the pink and the blue and I am super proud of the sewing. It’s all absolutely gorgeous.

The pattern is a new one from Queen of Suburbia or QofSpatterns, a Canadian based lingerie brand that is starting to make patterns for the home sewers. I’ve long loved their style so I was super excited at this pattern and snapped it up. It’s a half cup, not full coverage and I like that more styles of bras are being offered because while full coverage is lovely it’s a bit old fashioned feeling some times when you can’t get the patterns to match the styles you want to buy from the shops.

It went together super well, I was trialling some bra tulle from my stash for the cradle but discovered it was too stretchy. Using some white tricot I had on hand I cut another cradle and added it to the back of the existing one to help stabilise up the whole area. Apart from that slip up of my own the whole thing went together super easily and the instructions were good.

So all in all a complete WIN of a sewing project….except for one small thing. The cups don’t fit me.

The band is a great fit but the half cups are a little too low and on one side it cuts me in half a little (that side is bigger so I normally have that issue to deal with anyway). My idea is to make another one one or two cup sizes up and try again.

How did I get the wrong size? well I measured as per the instructions and then compared the pattern pieces to the Harriet bra I use a lot to check the sizing. Where I went wrong was I forgot it was a half cup and wouldn’t have the upper band along the top of the cup as the Harriet does…seriously don’t make pattern decisions when you are tired people because this is what happens. Now I’m the first to say when patterns don’t work but in the case it really was user error and no fault of the pattern.

So for now I’ll start again and maybe I’ll pin this one up near my sewing machine as an example of something I love and am proud of….even if it doesn’t fit

Pattern: QofSpatterns/ Queen of Suburbia Adrian bra.

Fabric: Lace and elastics from Pitt Trading, tricot from Greenfields

Alterations: get sizing right – I made the 34D (am including that here in case I forget and go to make the wrong size again)

Posted on Leave a comment

Sewing Adventures – Lexington Bras

Some things are impatient and just push their way to the front of the sewing queue, these bras were certainly one of the ones that jumped the list. With the pandemic continuing and the potential for more lockdowns coming the need for some comfortable work from home bras was increased.

I’ve made the Lexington Bra from Orange Lingerie twice before. The first time was as the pattern was as, the second time I split the lower cup to add in a little more volume. This time I kept the volume on the lower cup and shortened the lower cup, front triangle and back bands by 5mm.

On the ones I had made previously I was finding towards the end of the day the lower elastic had flipped up. At first I put this down to it being too tight but after some investigation I realised the bra was too long for me. I’m only 5 foot tall. I’m well used to having to adjust patterns to my proportions. In hindsight it’s actually surprising I didn’t pick this up earlier.

Technique wise I tried something new, using my overstitch machine I attached the elastic using the single needle chainstitch. The outside looks so neat and I’m so pleased, the inside I’m less pleased with as the loops of the chain stitch shows up so much on the mesh. I’m hoping it wears well but am already thinking I’d like to try the wide twin needle to attach the elastic with as well. It’s always neat to be able to keep trying and learning new things.

As it is a few hours sewing, 2 more beautiful bras and my lingerie drawer is well on it’s way to being the riot of pattern and colour I’ve always wanted. As always I’m using what I have on hand so the back clasp on the blue one isn’t 100% the correct shade of blue and on the blue/grey I went with a contrast of a peach closure. I love the fact it’s not 100% matching as I feel better about having something using up what I have already.

Pattern: Lexington Bra by Orange Lingerie

Fabric: patterned mesh, power mesh and lightweight mesh, elastics, hardware all from Pitt Trading, back clasp from Booby Traps

Alterations: so far pretty good but lets see how these ones wear in

Posted on Leave a comment

Sewing Adventures – Ohhh Lulu Romy Bra

Another week, another bra! or more accurately my need for more comfortable pieces now I’m staying in all the time. The Ohhh Lulu Romy has been on my to make list for forever and the other day I had the machines all set up to sew lingerie so I grabbed some extra pieces and cut this one out. It’s really small pieces so I even managed to cut it out of some scraps left over from other projects which is fantastic as it’s yet another pattern that can be used to reduce waste.

It went together really well. I’ve lined the front cups with the same soft pink mesh that the upper panel is out of. This meant all the internal seams could be clean finish which not only looks nice is also super comfortable.

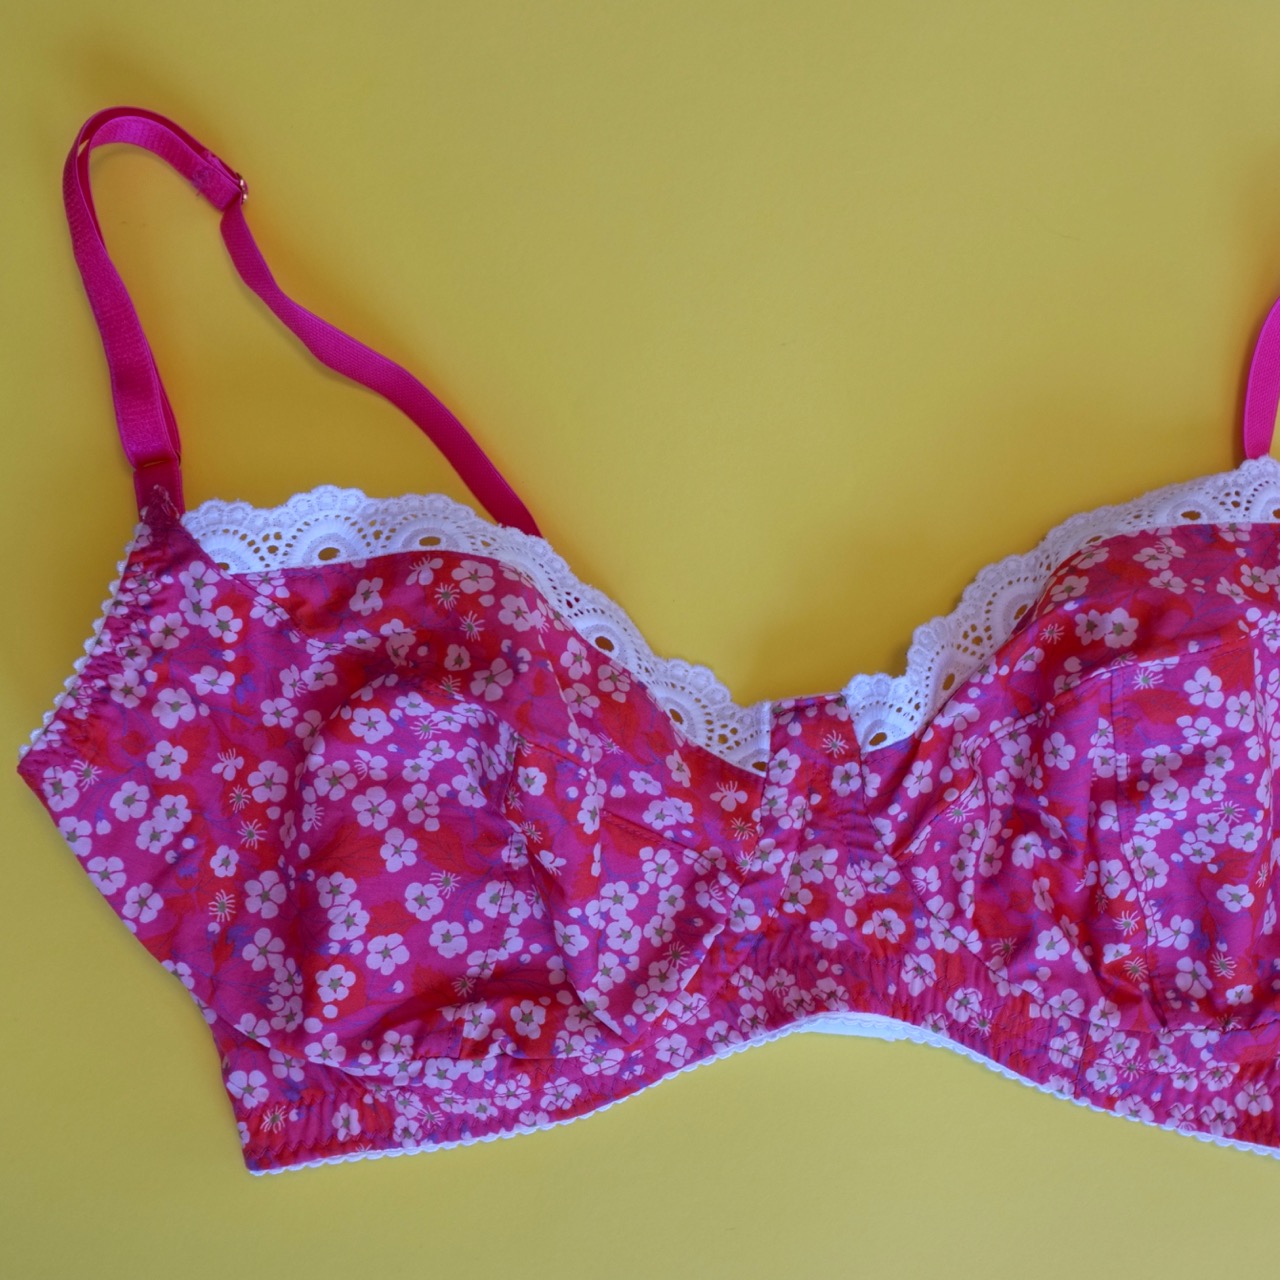
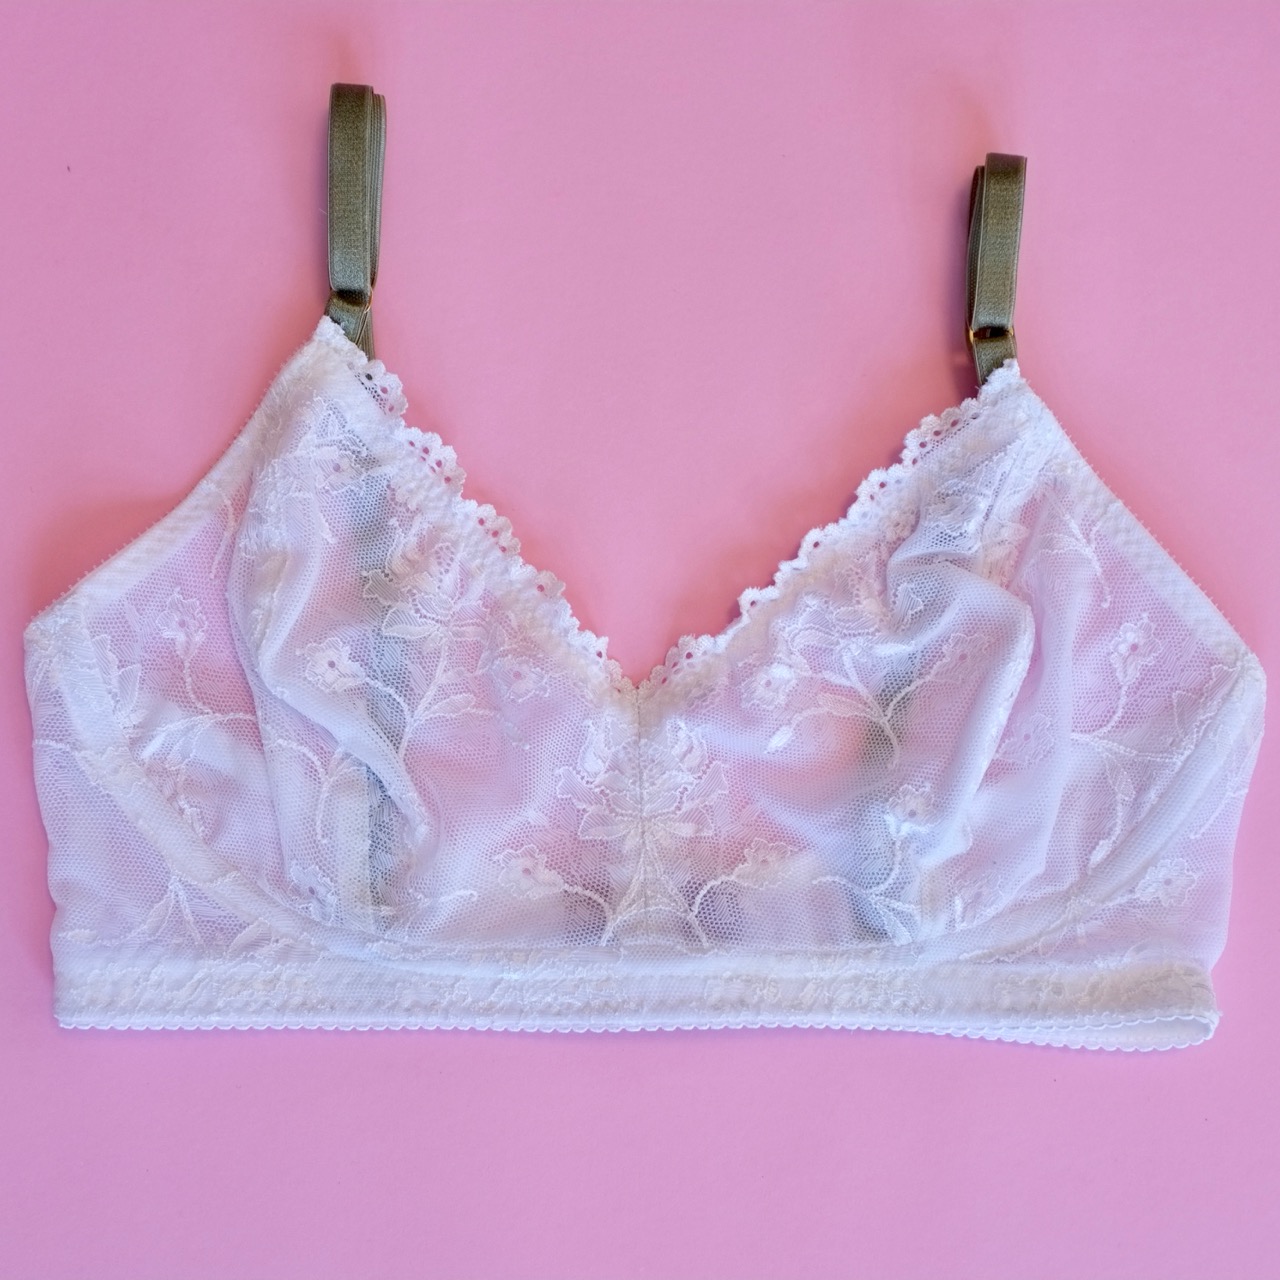
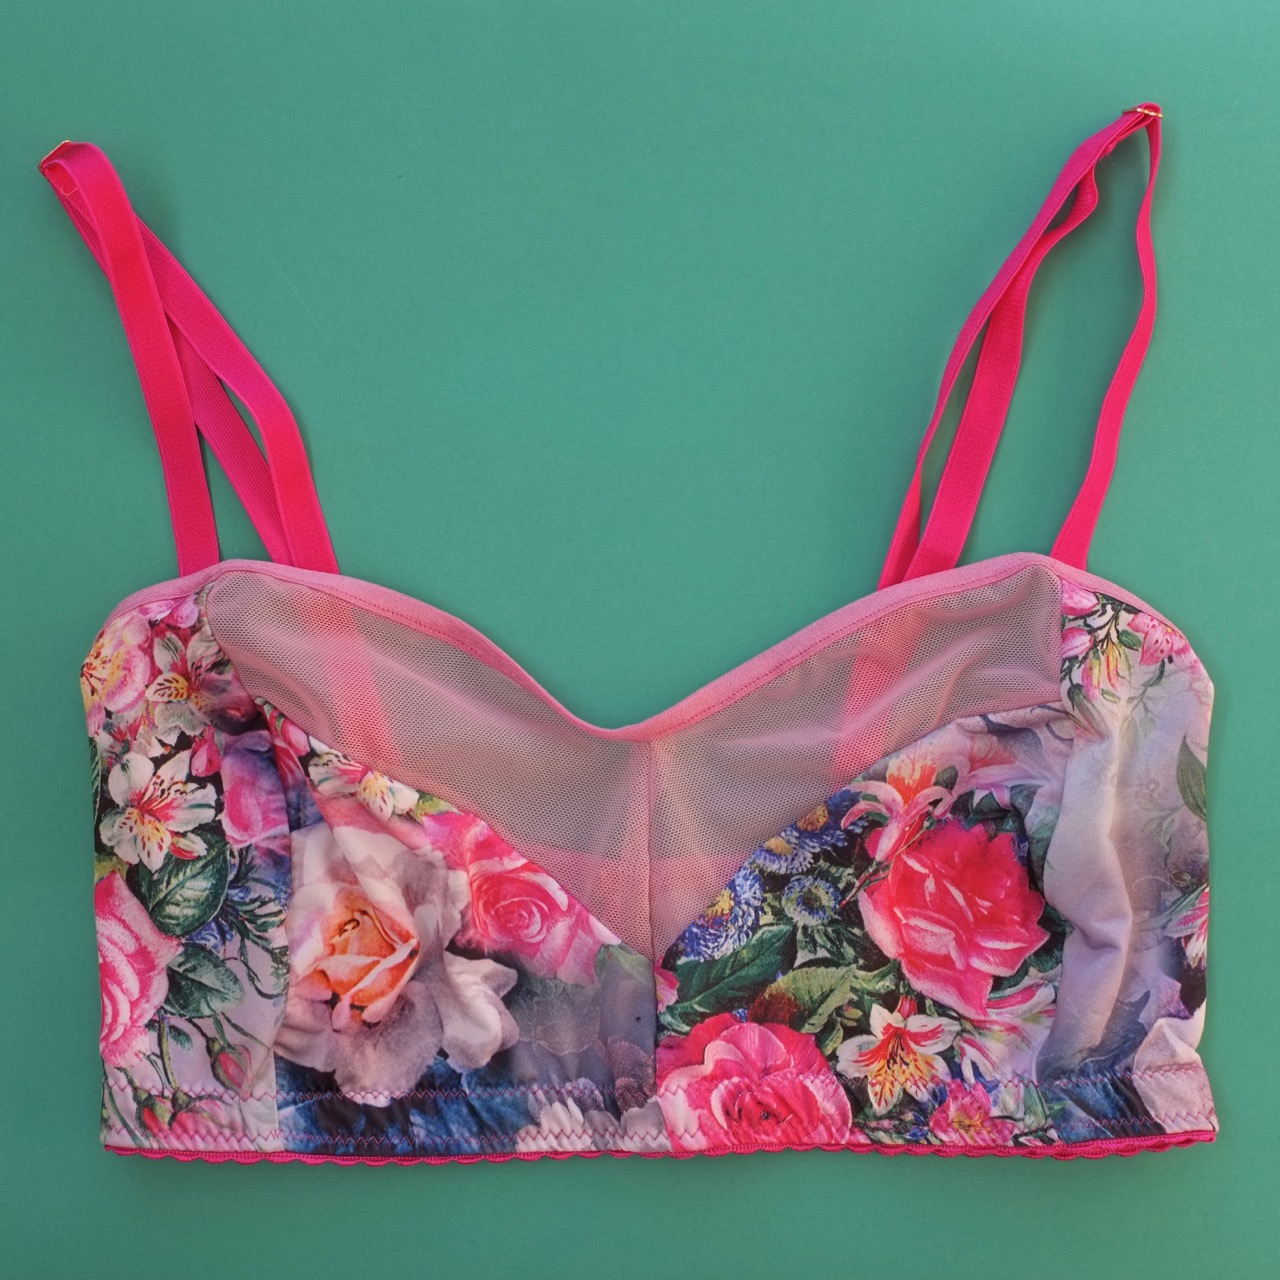
After attaching the lower picot elastic I thought I should check the sizing and while the cups were ok, the band was way too big. Mostly because the fabrics I’m using are super stretchy, especially the floral it’s got lots of give to it. So I cut the panels back thinking I’d swap it to a pull on style as this is essentially a tester to see if I like the style and if it’s comfortable. Cut off what I thought was excess and finished it all off. Now it looks small and it’s a slight wriggle to get on. Have I made it too small now?

I’m going to wear it for awhile and see what I think. In the meantime it’s looking super cute and I’m hoping I have enough leftovers to make matching knickers!

Pattern: Ohhh Lulu Romy pattern

Fabric: floral – poly jersey knit I got from Cabramatta, Pink mesh and elastics from Pitt Trading

Alterations: made it pull on by cutting off some of the back – wear to see if that works