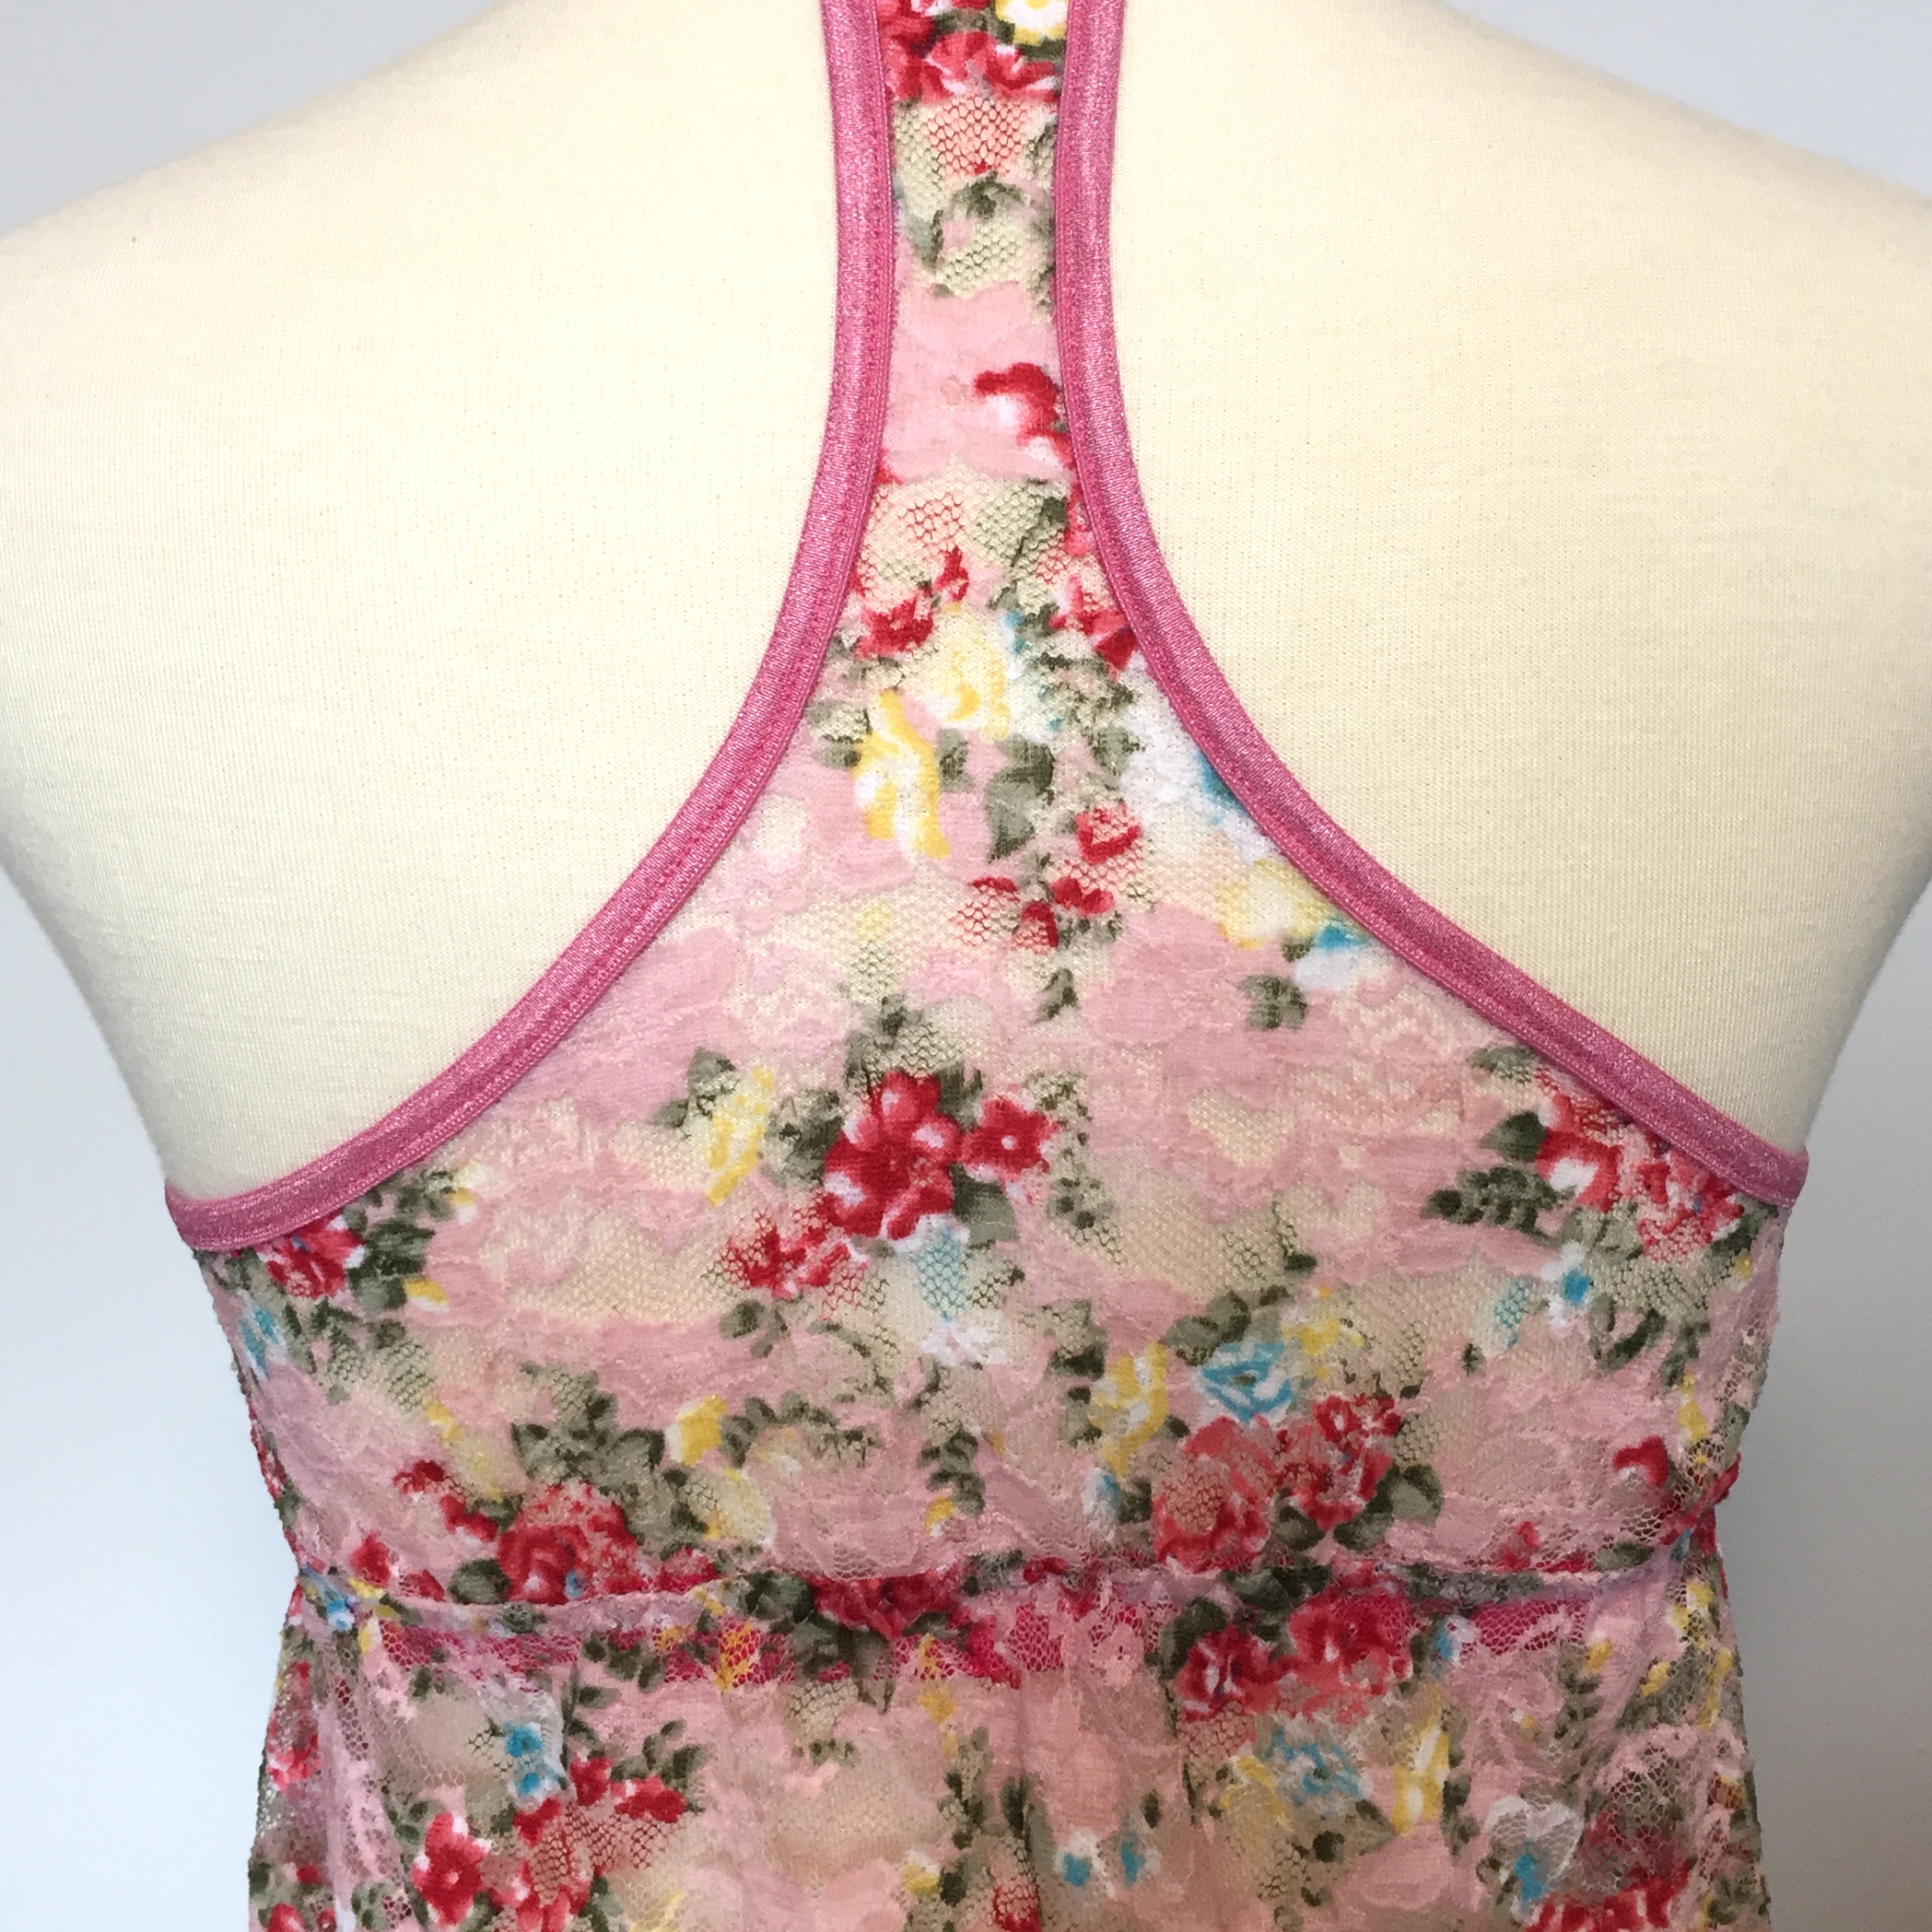
This whole bra could be used a lesson in something you really wanted to be excellent but some silly mistakes and sewing while tired means that it just falls short of your expectations.
 It’s the Harriet Bra from Cloth Habit with the adjustments mentioned here and here. Essentially this is meant to be the same as the blue printed mesh version I made but here are just some of the mistakes I made
- I forgot to sew the bride SA smaller to give me a wider bridge
- in my haste I sewed lining into the app cups which gave me a lovely quad boob look till I figured out what I had done wrong and cut it out. Fixing the quad boob look but leaving me a slightly irritating upper cup seam
- forgetting to change the colour thread back correctly and sewing one at night and one during the day which means the underarm is sewn on in 2 different thread colours
- instead of placing the bra flat before cutting off the casing at the underarm I cut it while holding it, resulting in cutting it straight and not on the angle to line with with the elastic. Had to rescue it/sew it closed with some stitching below the elastic
Honestly I know it’s all small stuff but it looks so pretty and then I see the issues and just shake my head at myself. Don’t sew while tired/stressed/annoyed at yourself.
 Apart from the issues it looks amazing and I really like the fit. With a limited amount of lace I feel like I managed to cut it so it looks like it was planned that way and not just a result of “making it work” I’ll definitely be using similar methods in the future.
 Pattern: Cloth Habit Harriet Bra – with fitting modifications
Fabric: Mint Powermesh, hot pink lace, strapping all from stash but originally from Pitt Trading.
Alterations: Slow down, take more care!
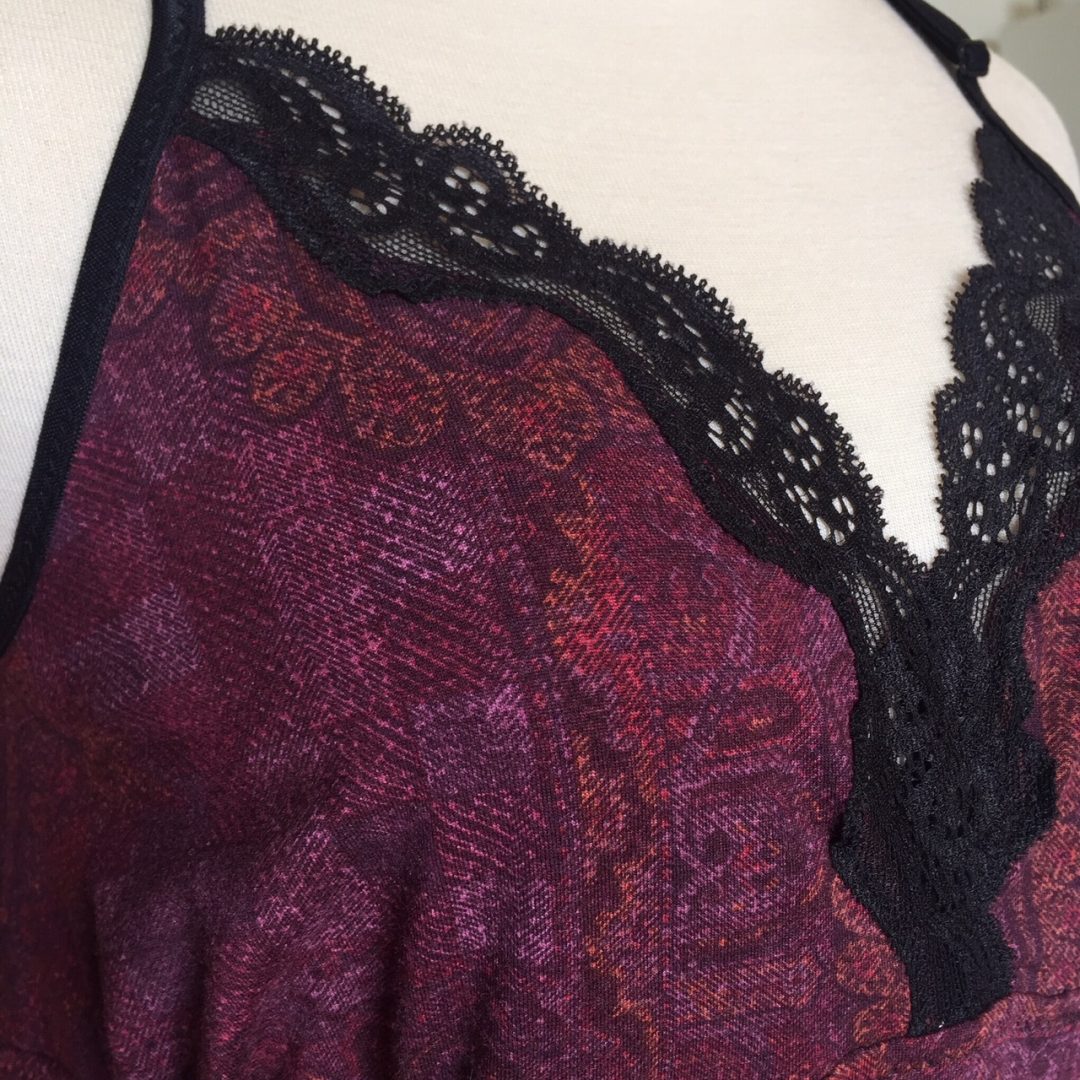
 Lower cups are lined in bamboo jersey with the upper fabrics being pink stretch mesh and printed stretch mesh. I basically used whatever trims I had in the stash that matched though I’m quite pleased at being able to use that little ruffle elastic for the neckline.

 Keeping the straps long I turned them into a cross over back which seems to suit the high neckline. It’s good on really hot days but the single line of elastic along the base can be slightly irritating. Next time I want to try adding a different back to see if it helps alleviate the slight cutting in feeling I get along my sides.
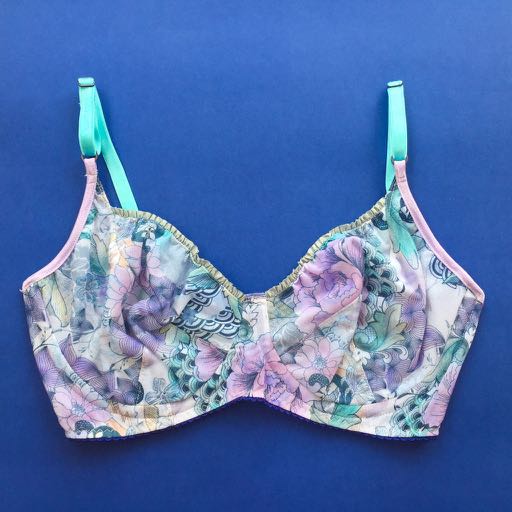
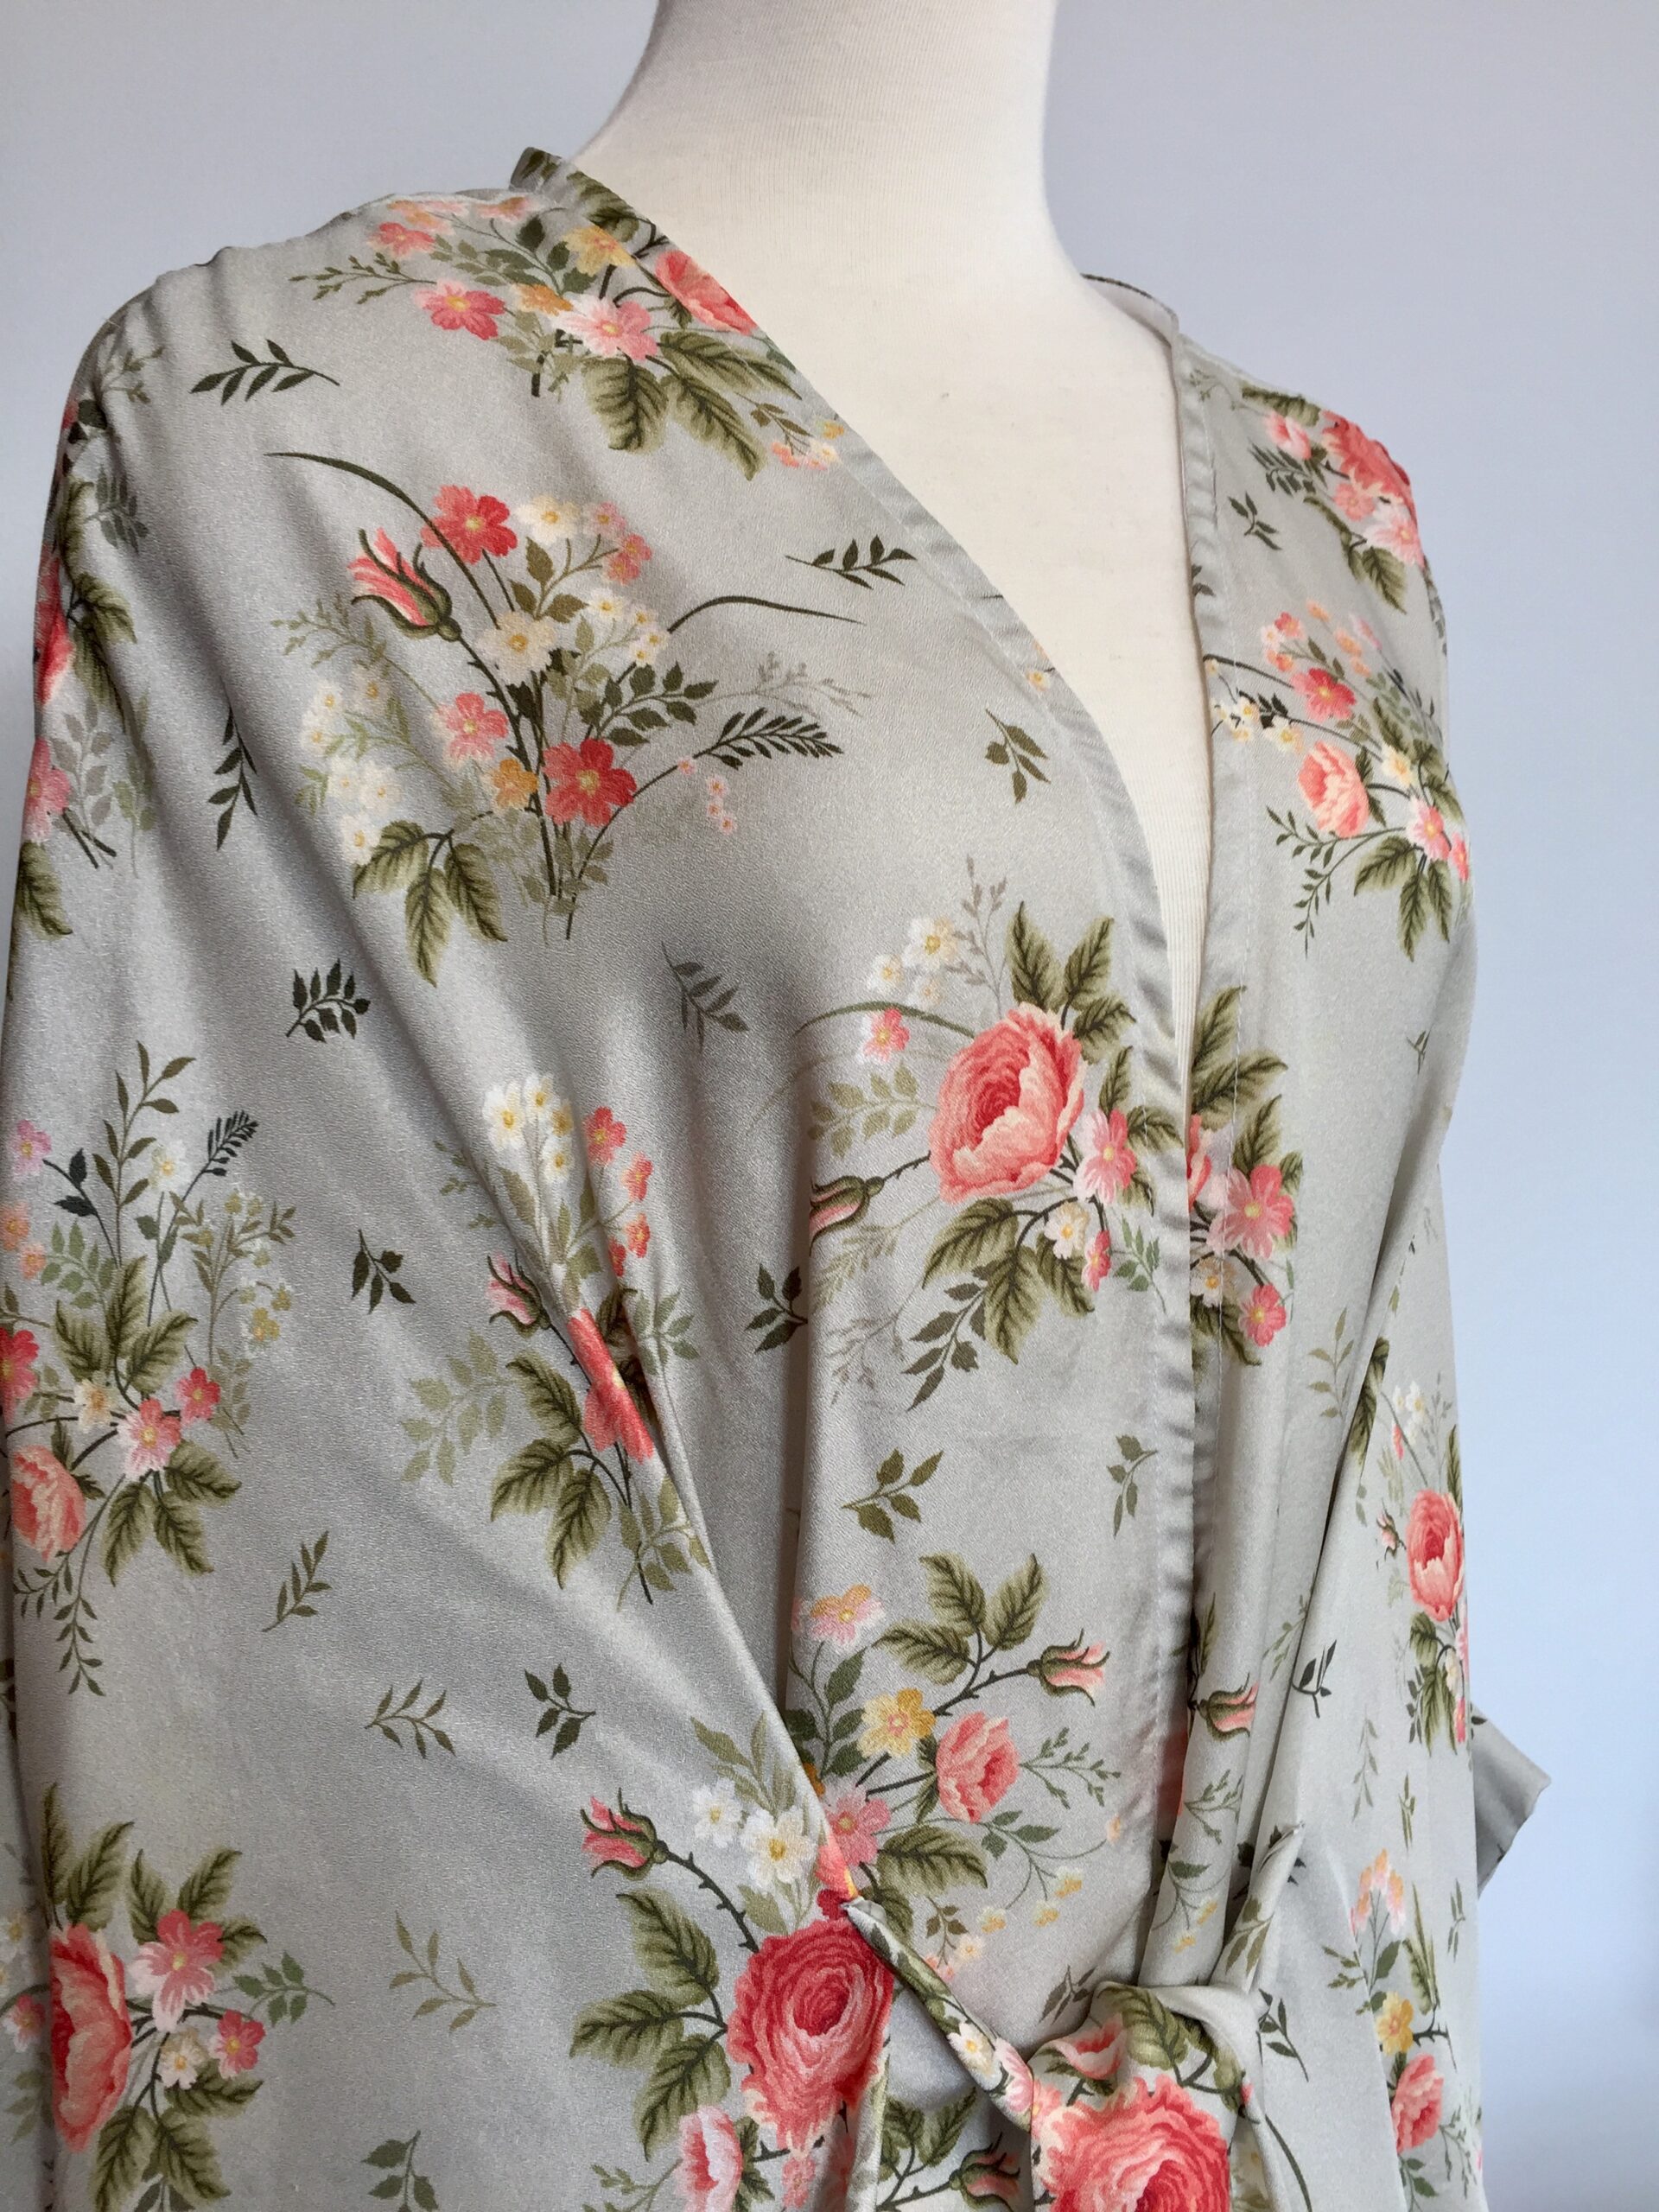
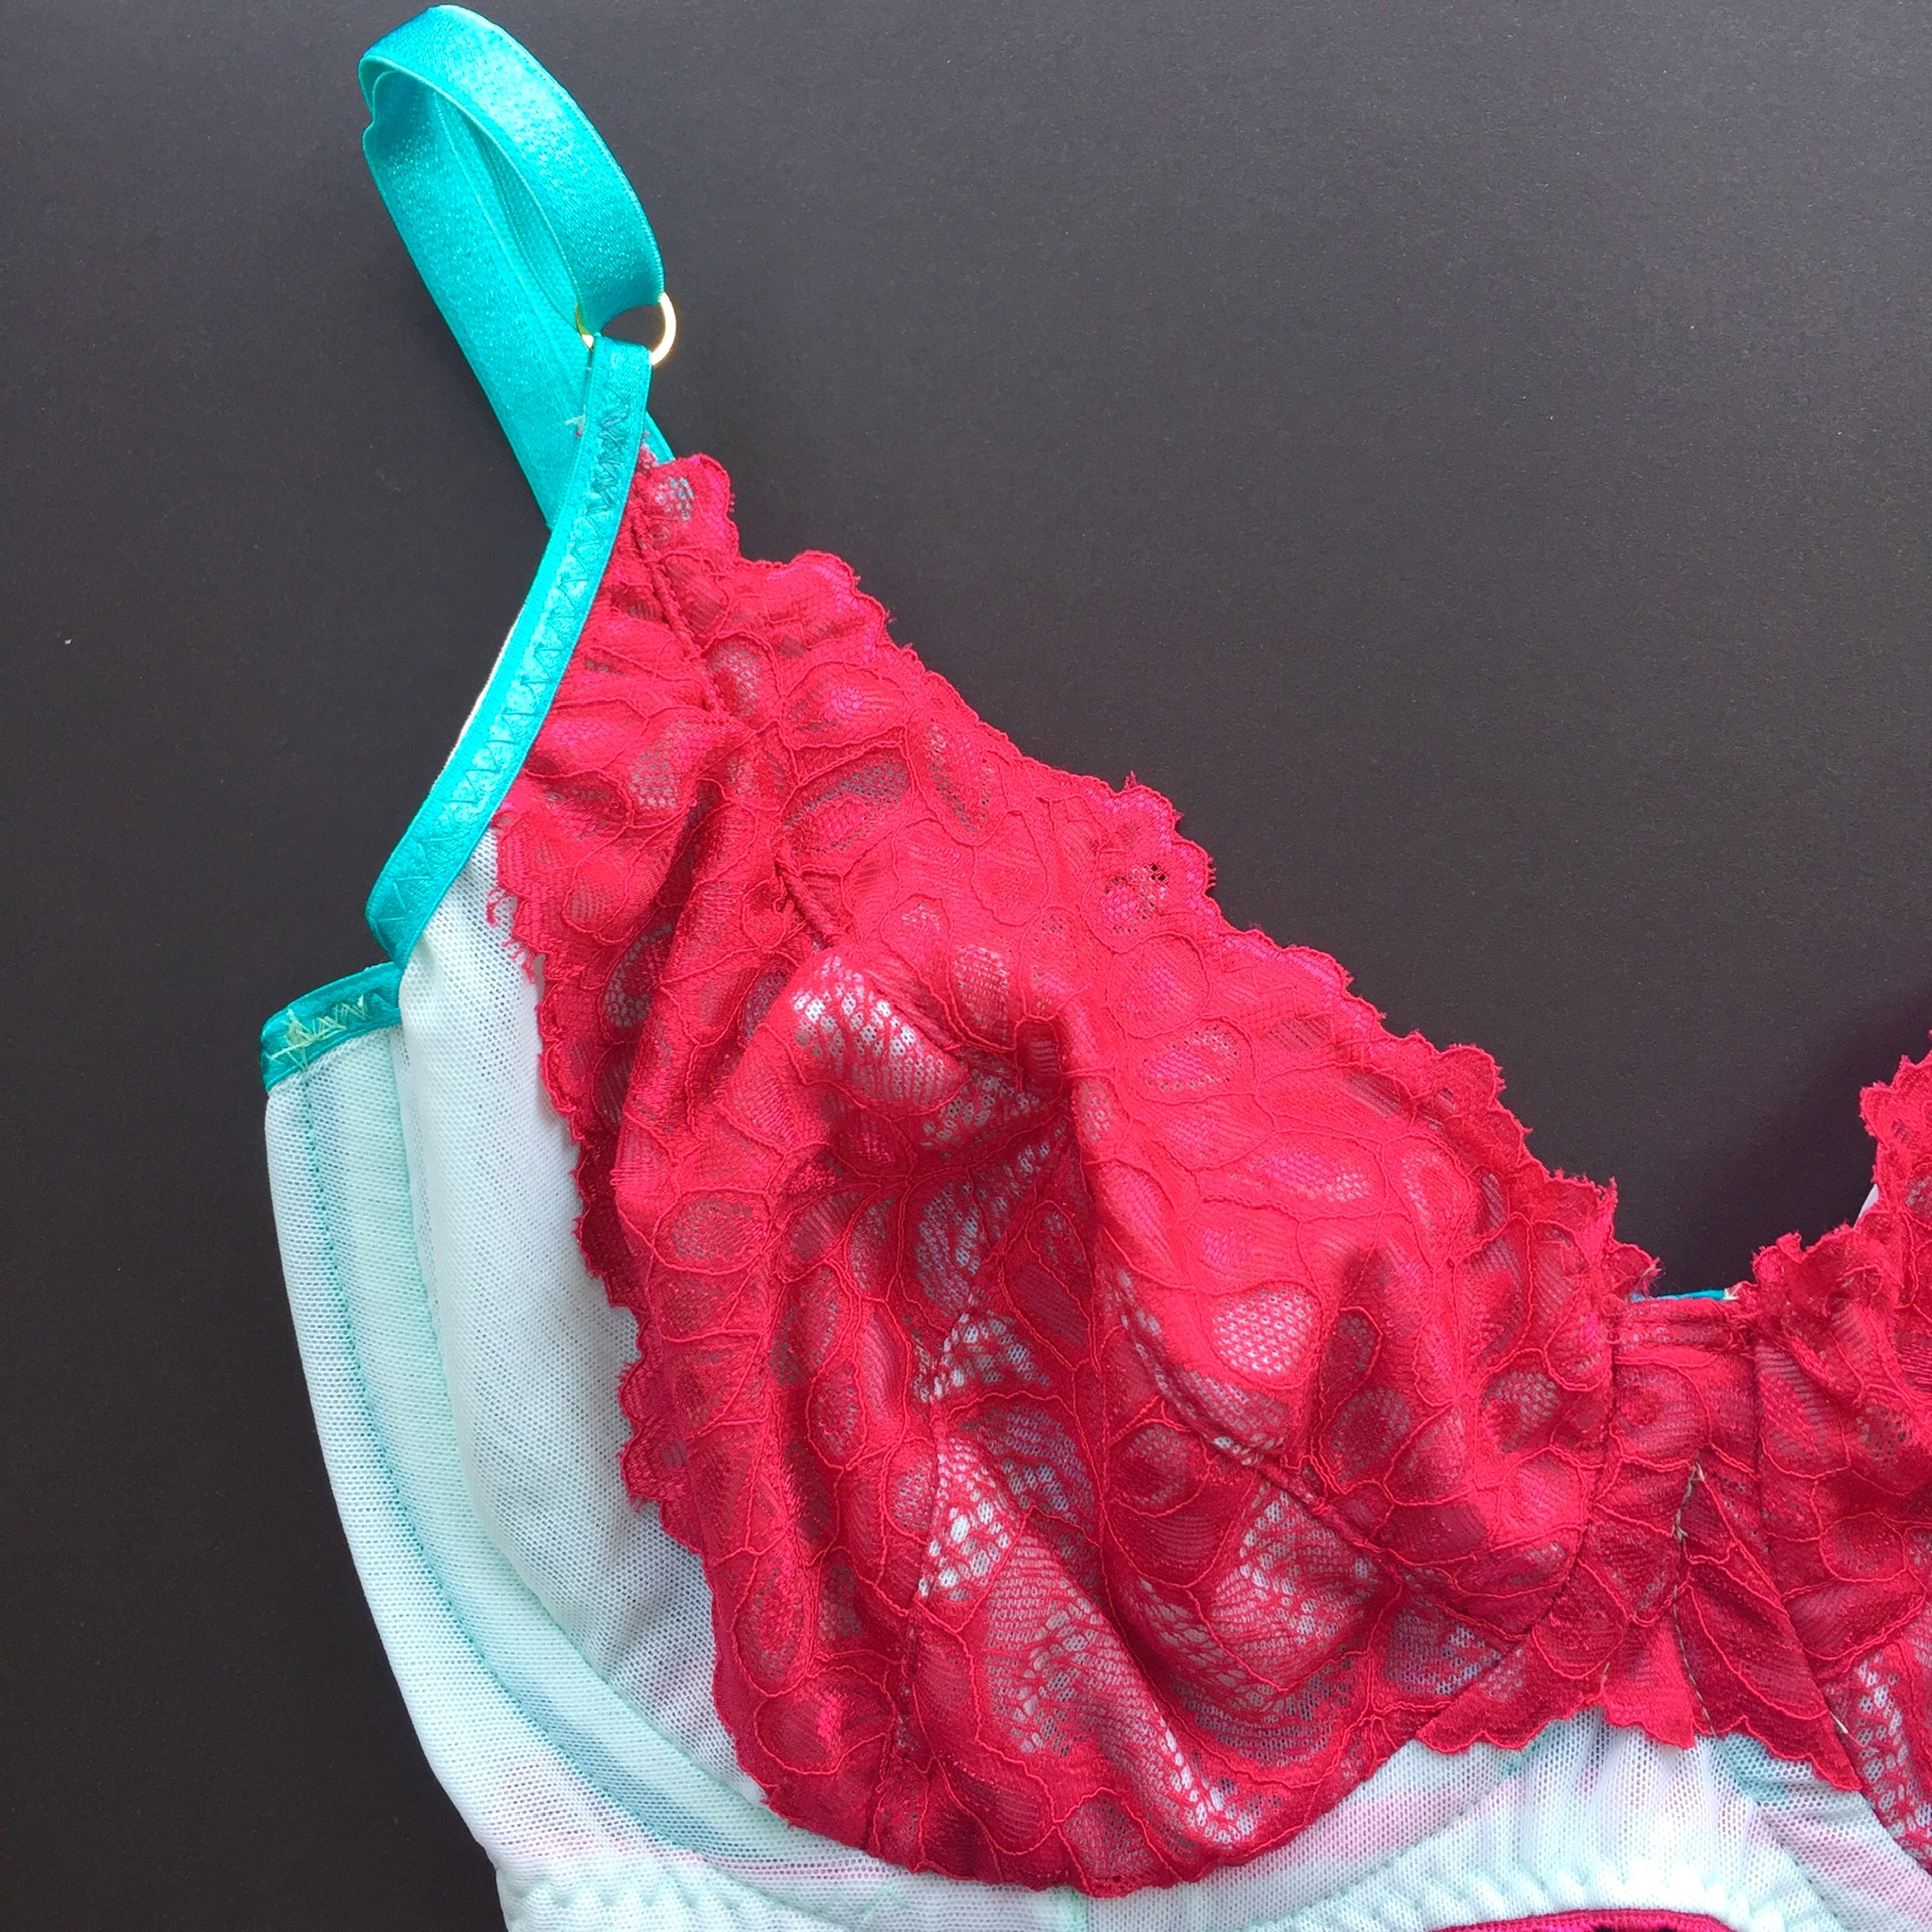
 Every so often I fall in love with a piece of fabric, colour and print and big motivating factors and well this fabric it was one of those swoon at first sight type moments. It came in during a shipment of designer fabrics when I was working at
  Then when making this bra I decided to take the multi hued elements of the print and step further and use non matching trims to make the bra. Bt rights, this many colours, types and print mixed together should be a dogs breakfast. But it’s not it all came together in one of my most favourite makes ever.
 The pattern is another Cloth Habit Harriet Bra with a few extra modifications. On my original I added some extra to the lower cup so I sat down into the cup more and adjusted the seam allowance at the bridge to allow it to be fractionally wider so the wires didn’t sit on top of each other.
 These changes I was happy with but I want a little bt more projection and lift. When I wear the pink one I totally want to pinch out a section at the top to bring everything up. So I did, well sort of. Using
  With these changes I think I’ve got the fit almost perfect for me, they are super comfortable to wear and I like the shape they give me, it’s not the high rounded shape of a full moulded foam cup but honestly am over that look anyway.
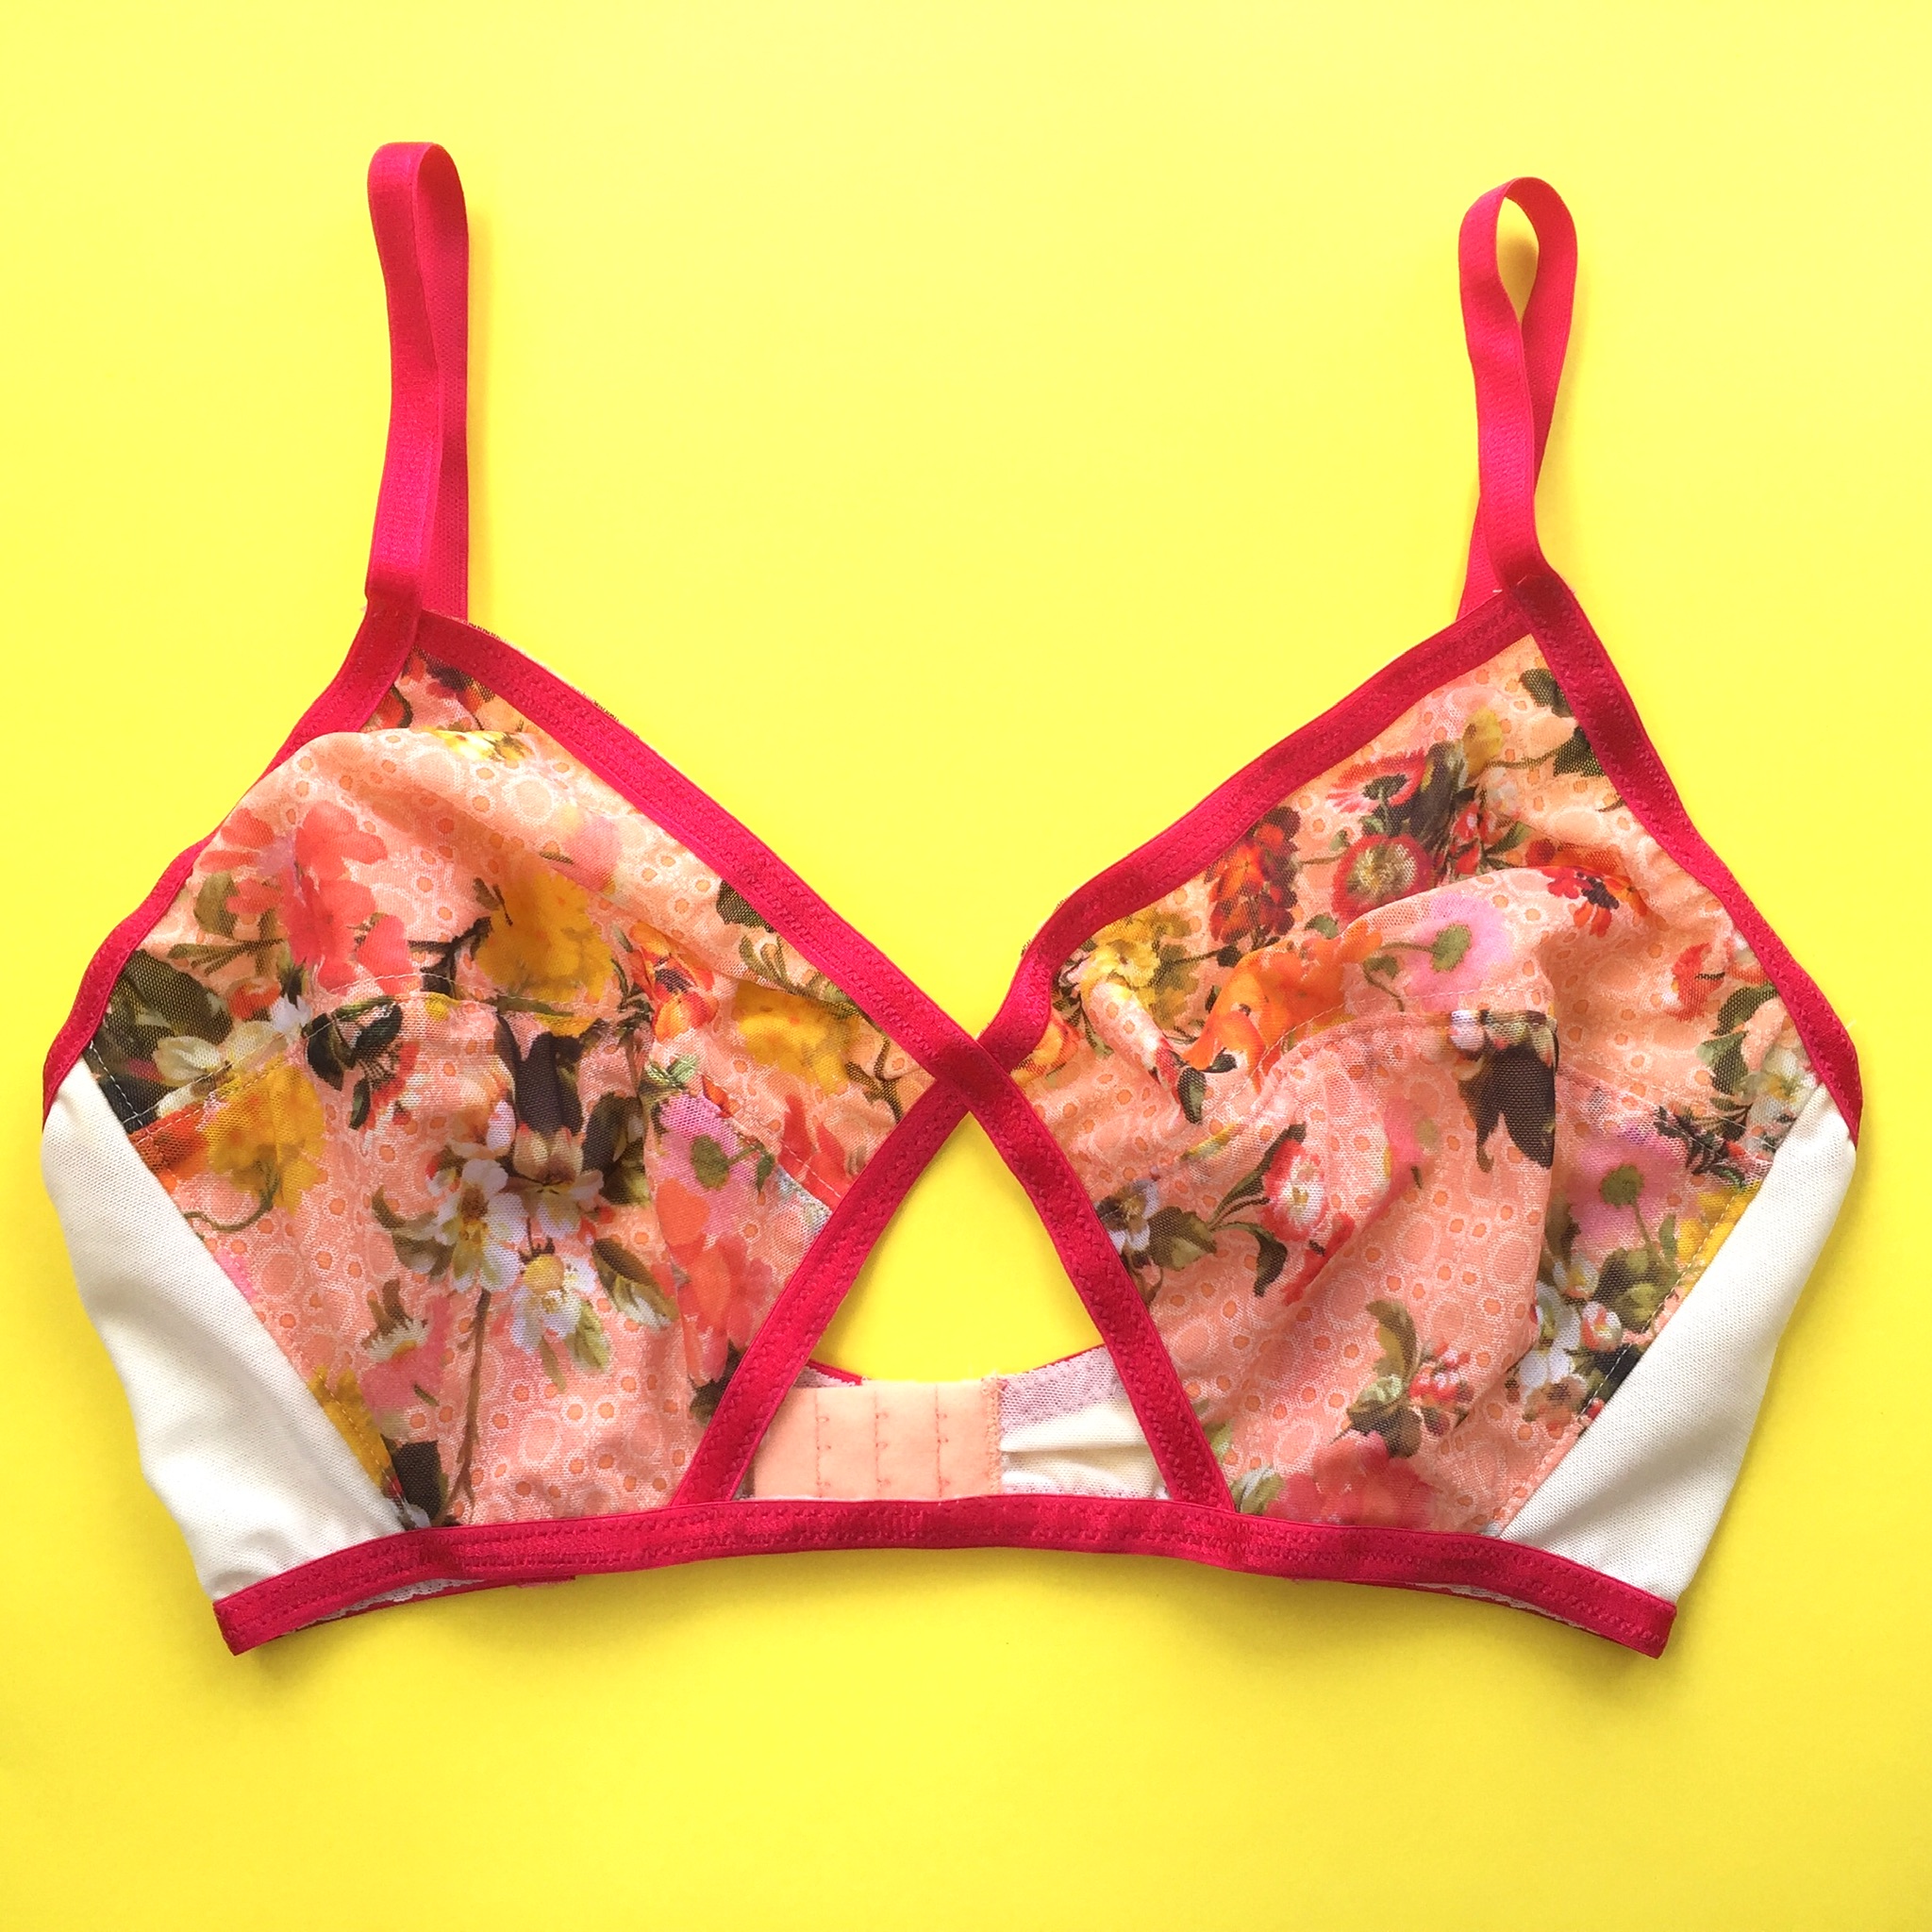
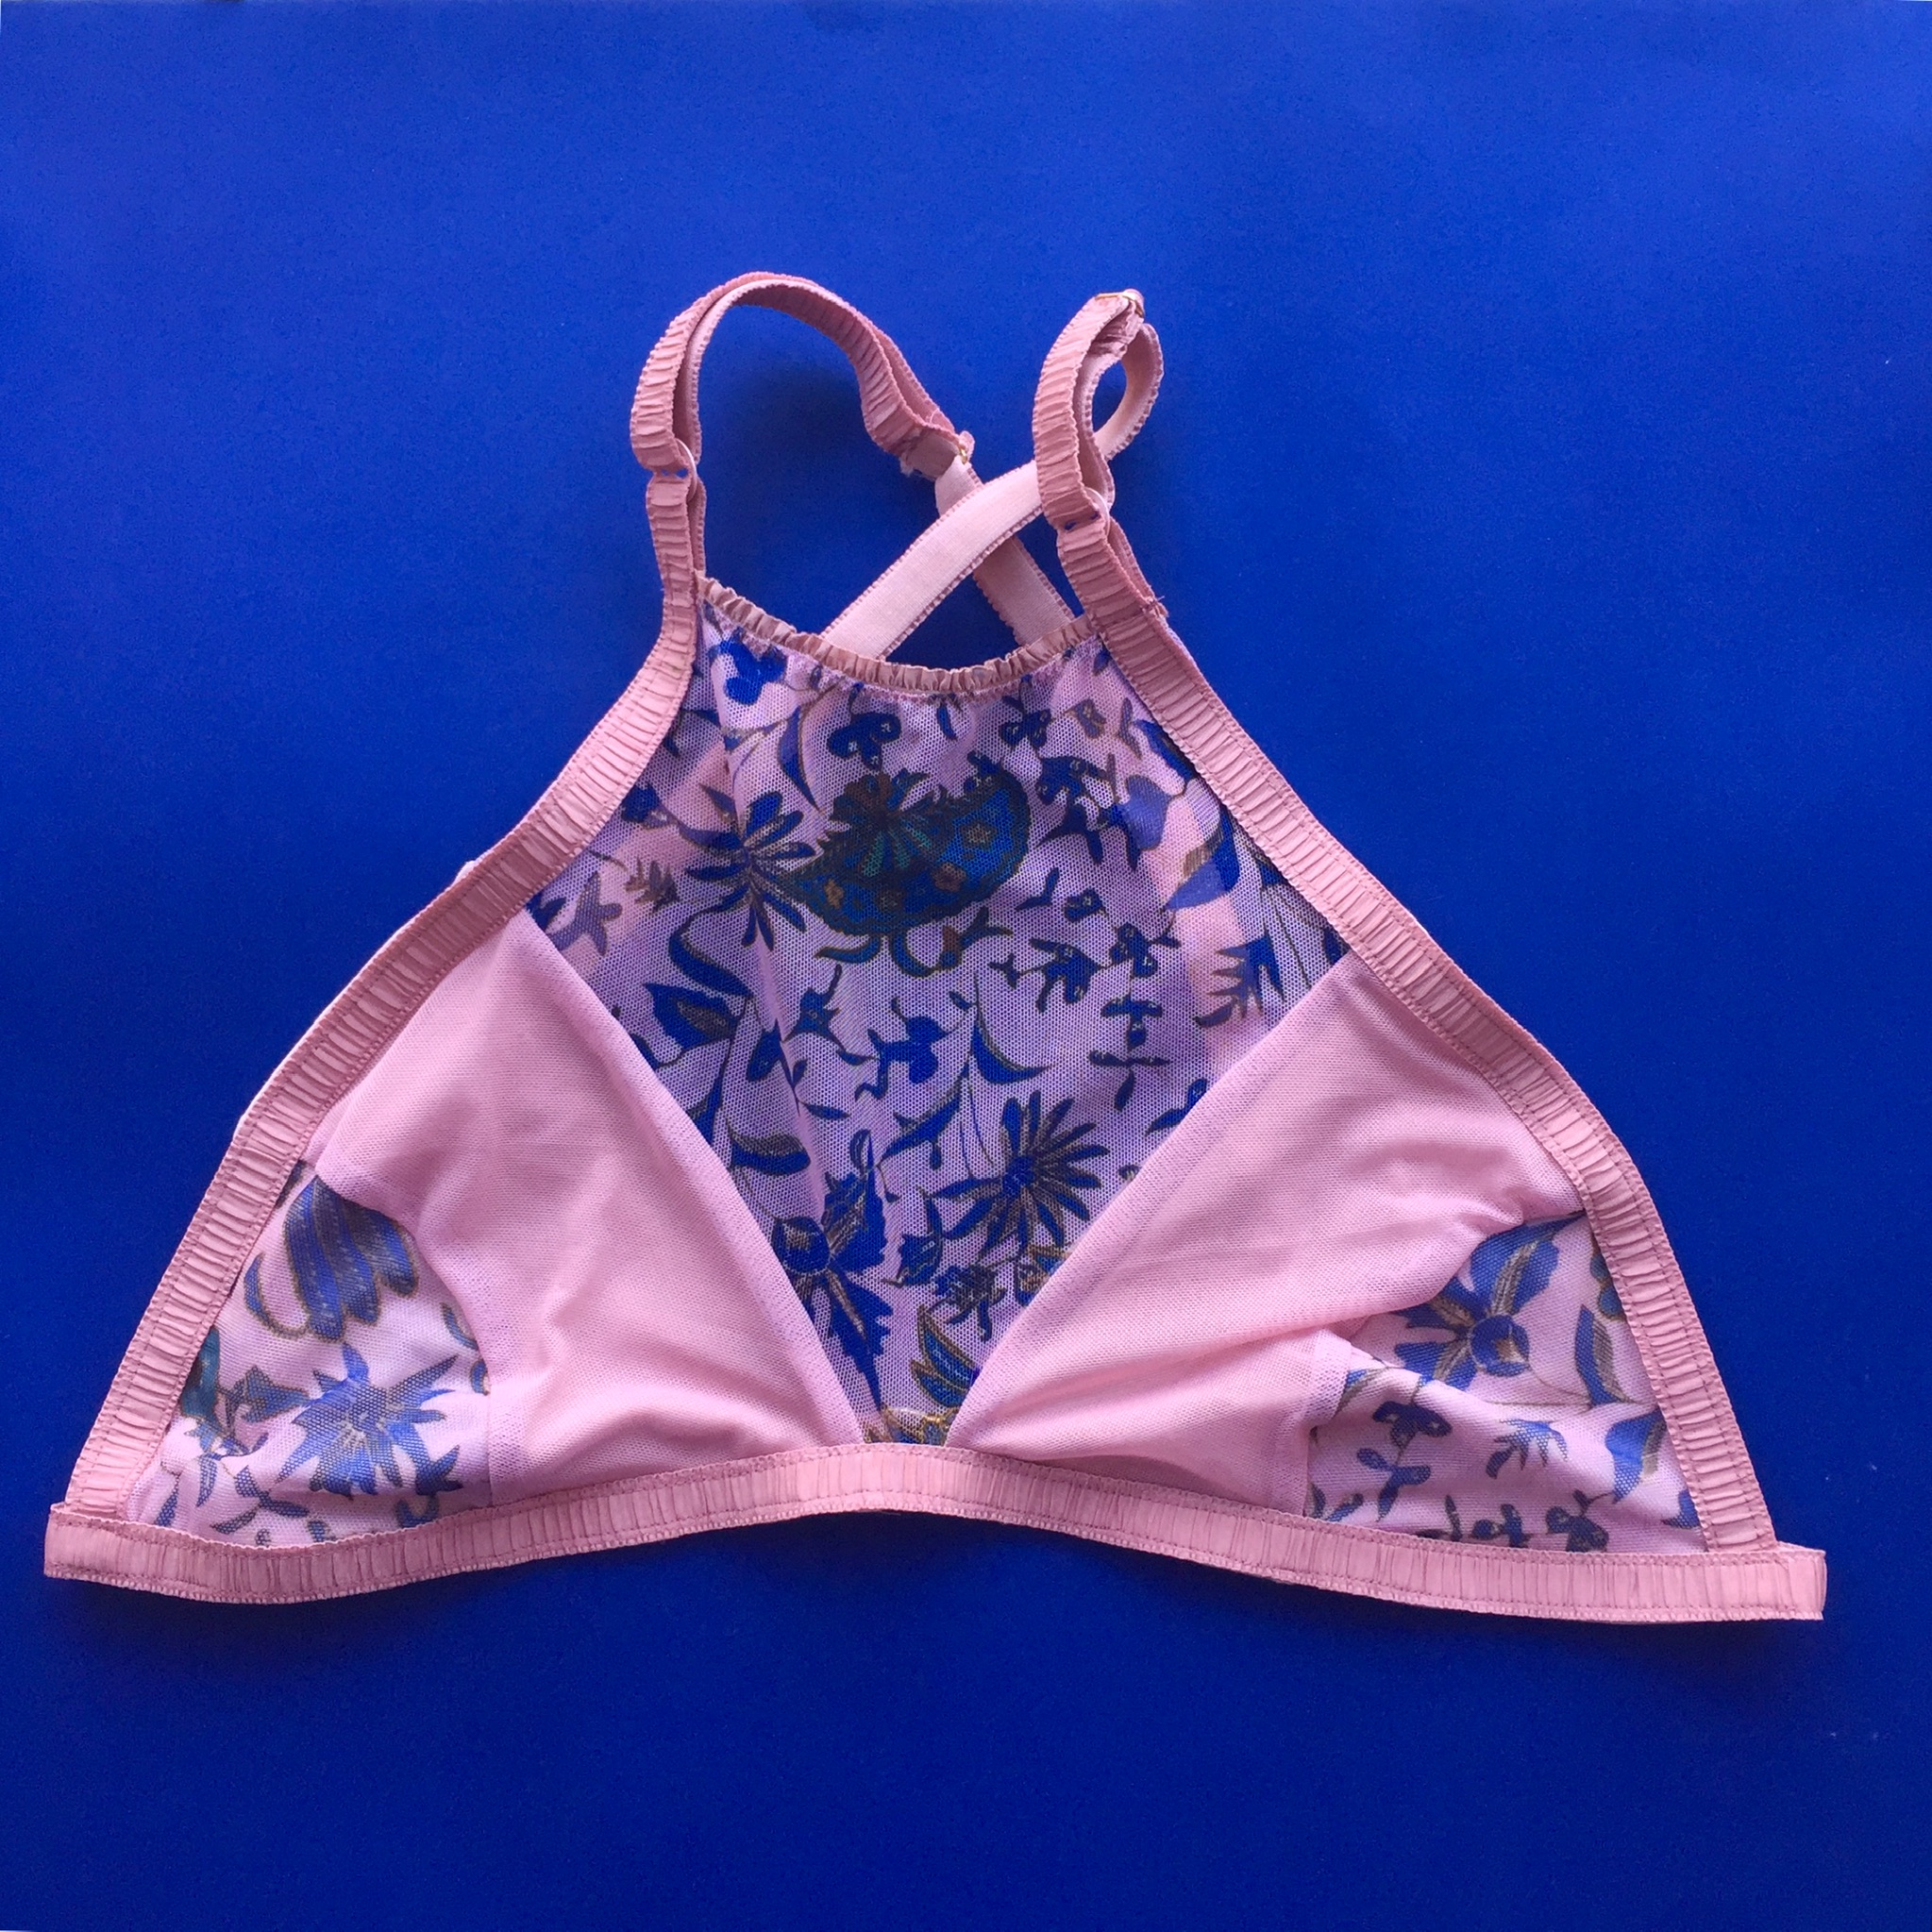
 The Lexington is a non wired bra that uses bra strapping to give shaping and definition with its cute cross over style. I had purchased it pretty soon after it came out with the hope that I could get it made up in time to wear on the plane for our trip. Sadly I ran out of time for that to happen so I was pretty glad when I had some spare time a few weekends ago to cut one out.
 Using a printed stretch mesh as the outer, a crystal lycra as lining and cream power mesh for the back (all from Pitt Trading). Initially when I cut the pieces they looked so big that I was a little worried. That feeling of them being too big lasted all the way till the first time I wore it and once it was on, it was so comfortable that I forgot about that entirely. It is very full coverage and I might slice the top down fractionally but it doesn’t look bad just kind of lots of fabric.
 Constructionally it went together well and the instructions are nice and clear. I also followed the online sew along on the blog that explains how to get the central cut out. The way the cut out is done is a bit clumsy, sewing a section in and then cutting it out just felt weird. You can see the remaining fabric around the central cut out. It looks kind of cute from the outside but the size of the cut out is way bigger than I was expecting. I like it but I think I want to try a version without it as I hope I like that even more.
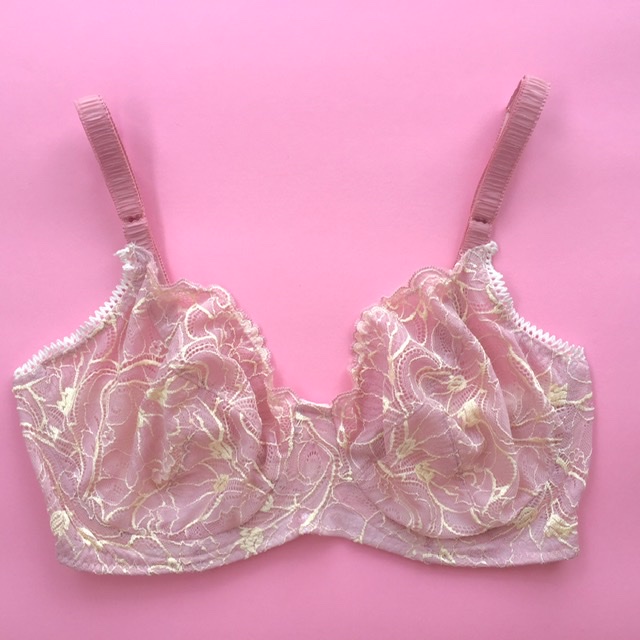
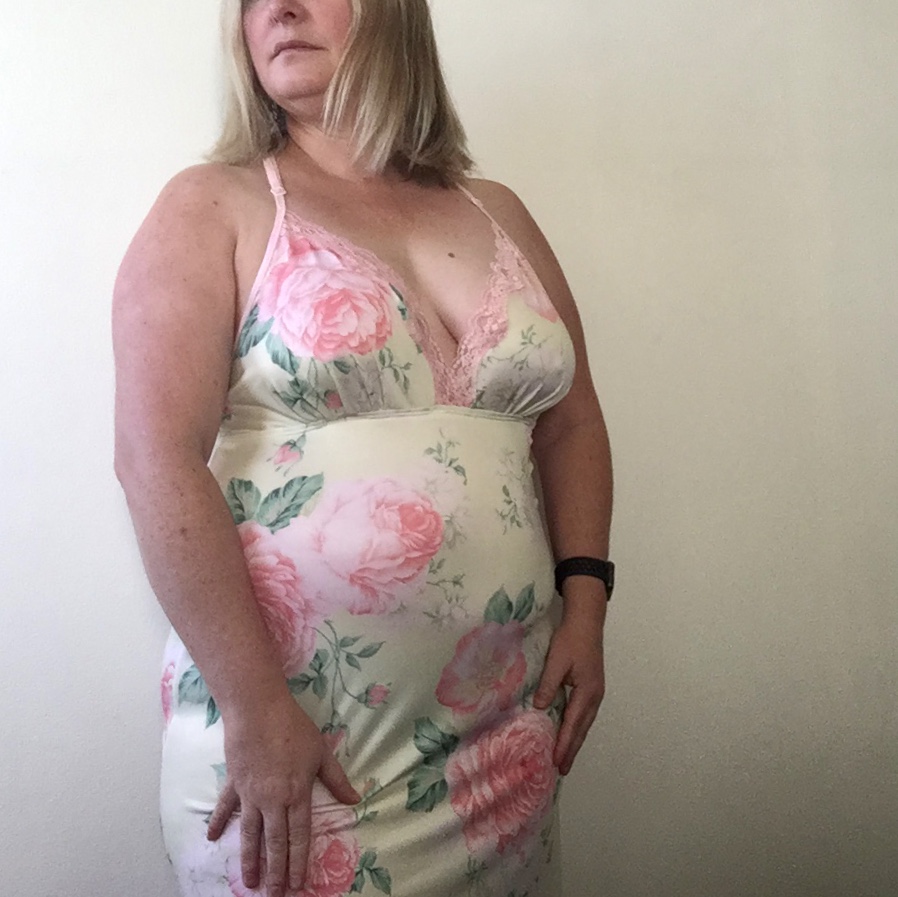
 The heat of summer is getting hotter and longer. Last summer I promised myself it was going to be the last summer I wore foam bras, they are sweaty, hot and generally just add to feeling hotter and sweatier.
 Measuring myself against the size chart I went with the exact size the chart told me to do. To check the fit I cut out a tester version in plain cotton with the Direction of Greatest Stretch being the bias of the cotton fabric. Once cut I quickly sewed it together without elastic then basted in the power mesh back and back closure.
 Once it was together I tried it on, the band was ok sitting flat without too many wrinkles, the lower cup however was all wrong. I had a flat section above the wire casing and I was spilling at the top of the cup.
 Writing my notes and annotations directly onto the pattern I cut out this pink lace. It’s lined with cream non stretch mesh and for construction I followed the very excellent instructions though in a moment of “what was I thinking?” I managed to sew the wide picot at the base of the band on incorrectly. Something I didn’t notice till I had also sewn in the underwire casing so I just left it. The pretty underarm edge (shown below) made up for my mistake.
 Once done I was really happy with how it looked and fit but I wanted to wear it a few times before I decided if it was good enough? After a few wears I’ve noticed
 Pattern: Harriet Bra by Cloth Habit