Posted on 2 Comments

How to create a gusset with a concealed back seam

The Georgiana Knickers, The Charlotte Knickers and The Lydia Knickers all have a cotton gusset that has a concealed back seam.

To make it a bit easier to understand here is a step by step construction method for you.

Before we start a few guides

Right side – the face, front or outside of the fabric

Wrong side – the interior, inside, back of the fabric

Step 1 – Front, back and gusset all right side up.

step-1

Step 2 – Gusset right side up.

step-2

Step 3 – Gusset right side up with front edge finished. I’ve overlocked it, you could overlock/serge the edge or zig zag.

step-3

Step 4 – Front panel, right side up.

step-4-a

Front panel with back panel placed on top. The right sides have been matched together so the photo shows the wrong side of the back panel facing up.

step-4-b

From the photo above, we have now added the gusset with the right side matched to the wrong side of the back panel. Photograph shows the wrong side facing up of the gusset.

step-4-c

Step 5 – pin at crotch seam.

step-5

Step 6 – 1cm seam allowance, straight stitch seam.

step-6

Step 7 – finish raw edge of seam, again I have overlocked but you could overlock/serge the edge or zig zag.

step-7

Step 8 – place seam flat and press. Photo now shows the wrong side of both front and back panels but the right side up of the gusset.

step-8

From here you can follow along with the rest of the instructions to complete your knickers.

I hope this makes it clearer and if you have any questions, please let me know.

Enjoy making your knickers!

Posted on 8 Comments

Behind the Collection

behind-the-collection

Good design should empower the wearer. It should make them feel like they are the most amazing person and even if no one sees it, the wearer knows it to be true.

For me, my best design work comes from a need or a want being fulfilled and finding inspiration in the things around me.

So how did I end up designing a range of knickers?

I’ve had a rough start to the year. I’ve been unwell and instead of being out enjoying the amazing summer, I’ve been stuck indoors trying to get better. In doing so I did a few things

  • pledged to make a huge go of destashing my enormous amount of fabric
  • cleaned out my closet including the underwear drawer.
  • read Pride and Prejudice for the millionth or more time
  • got totally hooked on The Lizzie Bennett diaries – a You Tube series of the modern day version of Pride and Prejudice, highly addictive and awesome

In no particular order these things made me realise that there is a little bit of the Pride and Prejudice characters in all of us, that the story is still relevant in modern times and that miles of pretty fabrics and trims could be turned into really lovely practical, cute and sexy knickers.

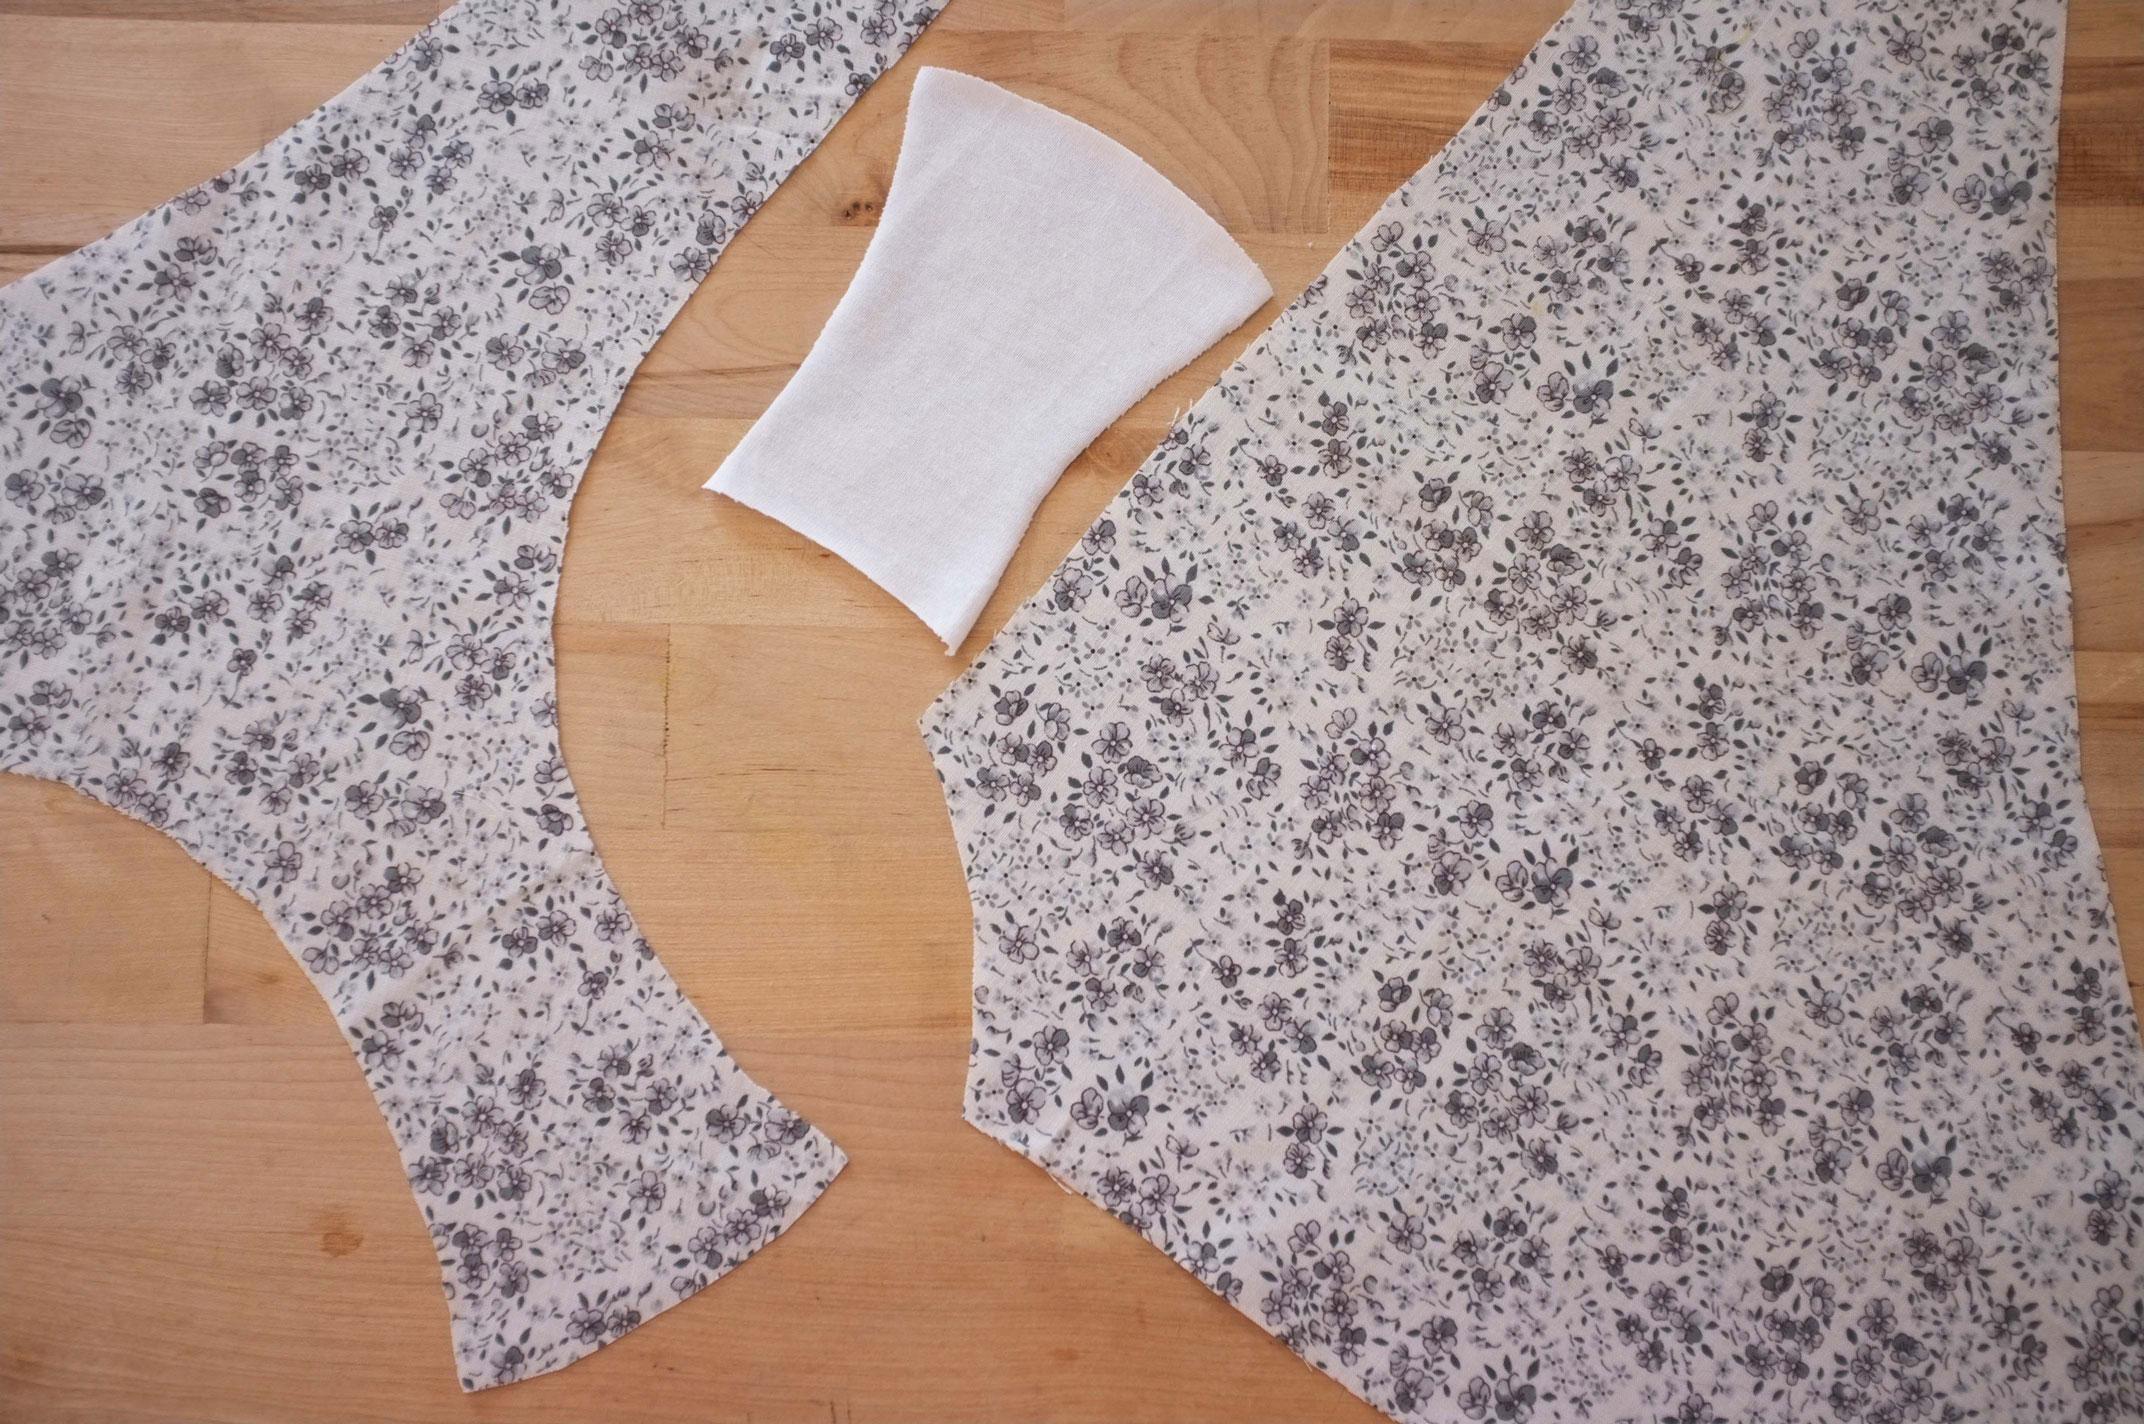
Teaming up with my sister a professional patternmaker we got to work. I did the designs, she made the patterns, I made the samples, she did the alterations, I wrote the instructions. It was very much a back and forth with each of us using our strengths.

Now I like pretty knickers, but I know that for lots of people they just want something simple, no fuss, easy and that’s what I want some of the time too.

So how to design a product for the no fuss practical ladies and the ones who might want a bit more?

Easy, we have included you in the design process.

In each pattern pack you will get
1 – the pattern in sizes 6 to 18 (Australian sizes)
2- the instruction booklet. For many of them you can have your choice of woven fabric and sew it up as per the instructions and you will have a totally serviceable pair of knickers.
3 -The Designer Manual. Here we teach you the tricks of the trade, where you take a simple silhouette and you build on it with trims, colours, fabrics. You even get a page of silhouettes for you to come up with your own ideas.

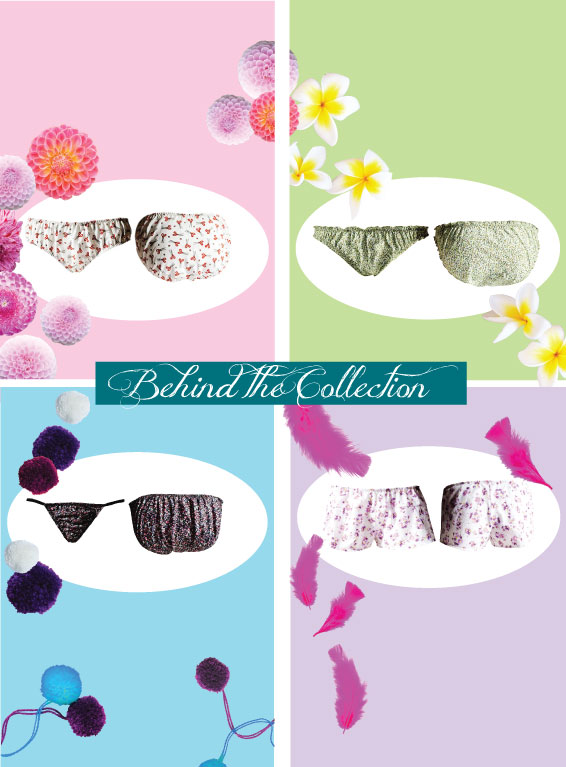
Each style has been named after one of the amazing ladies of Pride and Prejudice. If you find yourself more like the wild and free Lydia then there is a style for you. More like the conservative and practical Charlotte then there is one for you too. You can see my Pride and Prejudice Pinterest board here and each style has it’s own Pinterest board as well so we can add all the variations of the style to help inspire you more.

Hopefully everyone finds a little bit of themselves in these styles and rewards themselves with some pretty knickers and a chance to try out being their own designer.

Take the inspiration from you around, from what you love, what makes you smile and design something that will make you feel like the amazing person you are.


Posted on 6 Comments

Sewing Adventures – Pleated Playsuit

I’m all about the stash busting at the moment and have so many projects finished up. Rather than one huge post I’m breaking them up or you would be here for days reading just one post.

pleated playsuit

So I want my stash busting efforts to not only reduce what I have but to result in things that are useful, needed or wanted. This one in addition to being wanted is just plain cute!

One of my nieces seems to have inherited the fashion gene and loves a good outfit. Previously I’ve made her this but when I saw the pleated playsuit pattern over on Petticoats and Peplums I thought it would be just the thing for my niece’s next outfit.

The pattern is free from Elegance and Elephants and it’s really cute. Slightly frustrating in that you have to print, tape and then trace which is time consuming but I also had a few issues with the pattern. Nothing major just little things like the lengthen here line is not in the same place on the front and back pant patterns. Thankfully I figured that out before I cut my fabric or I’d end up with legs different lengths. Like any pattern just be sure to check it before you start cutting your fabric.

Despite these few setbacks it went together very quickly (helps when you have the Olympics to watch while sewing). The fabric is a printed quilting cotton from the stash. This seems to be the never ending fabric. I’ve made at least 2 dresses, a top and numerous small projects and I still have miles of it!

I didn’t make facings but just cut the front and back bodice panels in a lining fabric of a lightweight printed cotton from the stash and fully lined the bodice. Much easier and less fussy than making facings. I also didn’t make my own shoulder ties but used some velvet ribbon from the stash.

So a very cute outfit made entirely from the stash! Slowly but surely am going to make a difference.

Posted on Leave a comment

Pattern Runway

A few weeks back I was having a completely horrid week at work and outside of work there were so many things going wrong. By Friday I was completely wrung out and just wanted a good nights sleep and some quiet time sewing.

To help brighten my day I picked up these patterns from Pattern Runway.

pattern runway

I still haven’t gotten around to sewing them up, but even just knowing they are there waiting for me makes me smile.