Posted on Leave a comment

Beginner Sewing – How to sew Not Paper Towels


Join me, Susan from Measure Twice Cut Once, as I take you through how to make Not Paper Towels, these are a great eco friendly sewing product that helps you reduce the amount of single use paper you use in the kitchen.

Once sewn they can be used in the place of paper towels then throw them in the wash to use again and again. Your best fabric choice is some cotton flannelette (try using old flannel sheets or pillowcases if you can’t find the fabric). You’ll be learning how to cut a straight line, sew a straight line, turn corners and finish the edges with a zig zag to help with longevity and reduce fraying in the wash.

The pattern is available from the Measure Twice Cut Once website https://www.measuretwicecutonce.com.a…

2022 is my year of taking the Scary out of Sewing! I want as many people as possible to take up sewing so they can create, make, mend and more. To help take away the scary, every Friday there is going to be a new video with accompanying pattern for a project entirely aimed at beginners. Each week there will be different techniques to learn or go over and it’s going to be a super fun way to grow your sewing skills.

See more of my sewing and shop patterns at https://measuretwicecutonce.com.au​

Follow me on Instagram https://www.instagram.com/_measuretwi…

Follow me on Twitter https://twitter.com/_MeasureTwice​

Support me on Patreon https://www.patreon.com/MeasureTwiceC…

What I’m wearing Dress Pattern: Self drafted in Liberty Lawn fabric

Earrings: Harry and Herne

Nail Polish: Junie by Hanami

Posted on 2 Comments

My first paper pattern!

It’s a big day, today I release my first paper pattern! It’s been a long journey to get here and I’m very excited.


The pattern is the Maree swimsuit. A great beginner piece to get started on your way to sewing all the swimsuits. I released it some time ago as a digital copy and it’s been a firm favourite since then. It will always be available as a digital option so you can choose which you prefer.

Sizing for this pattern is Australia size 6 to 18. It will not be released as a plus size. Sure I could grade it up and tell you it would work as a plus pattern but I know it won’t. It doesn’t have the necessary structure expected of a plus size swimsuit and trying to retro fit that in now would be disingenuous. I’m not going to give you an inferior plus pattern just by making something bigger, I’m continuing to work on my plus patterns and blocks and when they are ready they will be released digitally.

To start with paper patterns will be sent out each Wednesday, I’m getting them printed on demand here in Sydney. This means we don’t have to carry much stock and it helps give local people a job in a time when everyone needs as much help as they can get it. By shipping once a week it also helps me limit my times I need to leave the house, which I’m still keeping to a minimum despite the situation in Australia being better than it is in other places.

I can’t wait to hear what you all think, please don’t hesitate to drop me a message or leave a comment.

Susan


Posted on Leave a comment

Sewing Adventures – Mary knickers

It’s been too long since I used my Mary Knickers pattern. I forgot how much I like th low slung on the hips fit and the little almost legs to them.

As part of my Make nine topics was “Operation Lingerie Drawer and I couldn’t be more pleased with how these first 2 pairs of Mary Knickers have gone.

The lace is a super soft floral print from Pitt Trading. The fabric stretches one way but not both ways. The Mary is great for this type of fabric as it doesn’t really need too much give through the height but it does mean these ones are ever so slightly cheeky but I’m ok with that. If you want to avoid that just cut them with a longer back rise. Always be sure to cut with the greatest stretch going around you.

I’ve used an organic cotton jersey also from Pitt Trading as the gusset, you can just use the lace but I prefer the cotton.

Make wise I just overlocker them all together. The gusset is actually a floating gusset but I decided to use my coverstitch machine and stitch it to the lace. Sometimes with a delicate fabric it helps give them a little extra strength and longevity.

At the last Pitt Trading pop up store I got some of these beautiful patterned elastics and put it to the Instagram hive mind to see which one got to be the waistband.

Stripes won and I attached it using my coverstitch. I often get asked about my coverstitch machine and it is my least used machine but I’m going to try and use it more and basically get better at using it. Sometimes I forget to have time to just practice at getting better so I’m going to see if I can squeeze in some practise time with it.

Now I had a metre of this fabric and I’m determined to leave no scraps unused so after I had cut some other bits and pieces I had enough for another pair of Mary’s. This time I just used a picot I had on hand for the waistband. It’s fine and very functional but not as cute at the stripes.

Pattern: The Mary Knickers by Measure Twice Cut Once

Fabric: stretch printed lace from Pitt Trading, patterned elastic from Pitt Trading

Alterations: none

Posted on Leave a comment

Sewing Adventures – Nina Lee Kew Dress in vintage embroidered cotton

This is more of a wearable toile but I’ve been wearing it so much despite a few issues that I thought it was well worth it’s own blog post.

Last year when Pitt Trading did their Summer Soiree Nina Lee offered a discount code so I picked up the Kew Dress after seeing so many lovely versions online.

Because I wanted to make a wearable toile I used this vintage embroidered cotton from the stash. It’s got marks on it after the fire and while I loved the fabric it’s so very close to my skin tone that it was destined to be a dress I wore at home only. To combat the eyelet holes it’s fully underlined in white cotton voile.

The pattern itself went together with ease, all the seams line up and things just fitted which is such a pleasure in a pattern.

This one I cut without any alterations and in hindsight there are a few things I’d fix. It wrinkles at the back, the straps are too long for me (though I have a sneaking suspicion I actually cut them at the wrong length) and I need to adjust the position of the straps to cover my bra.

You can also see where it pulls at the centre front on the waist seam. This is not a pattern problem, this is because I’m lopsided after surgery and it causes things to gape there. Honestly I’m not that bothered about it on a dress I had always intended to wear at home or over my swimmers going to and from a swim. If it was intended for fancier purposes then I’d do something about it.

However, it has been such a great dress in this heat. It’s easy to wear and move about in, I particularly like the slightly dipped back hem. The buttons (awesome unicorn shimmer ones from Pitt Trading) also mean it’s not as tight feeling as a zippered dress which is good when you feel like a sweat puddle.

Pattern: Nina Lee Kew Dress

Fabric: vintage embroidered cotton from the stash originally from the Fabric Cave. Buttons from Pitt Trading

Alterations: next time shorten straps, eliminate back gaping and potentially look at under bust wrinkles (or just stand up straight!)

Posted on 2 Comments

Sewing Adventures – Modified Myosotis in blue and white with insertion lace

When I first made the Deer and Doe Myosotis I had no idea how much I would enjoy wearing it. I’ve made mine in a more relaxed fit and it is ridiculously comfortable. The two Liberty ones I made last year are in high wardrobe rotation.

So when the hot weather started to kick in before Christmas I had this idea to make a floaty barely there dress with tiny straps and no fuss that would be perfect for those days at home where it’s just so hot you can’t do anything and just spend the whole time drinking cold drinks and reading books.

This “Chia Blue” dense cotton lawn with embroidery and Japanese shibori style printed motifs from Pitt Trading was perfect for such a concept. So I didn’t have to worry about underwear colour I grabbed some cotton voile to line it with.

Then this gorgeous circular insertion lace came in at Pitt Trading and suddenly my idea morphed into something else and I found myself reaching for the Myosotis bodice and skirt.

The skirt is the longest length main skirt of the Myosotis and the ruffle is the width of the fabric just gathered in to fit. It’s possibly a little long but I ha thought of adding more rows of insertion so wanted some extra length so I could cut it and add the insertion without having to worry about adding and subtrcting seam allowances.

As it was I ended up only doing one row and now it sometimes feels slightly long but not enough to stop me wearing it. The insertion lace I cut where I wanted it to go, overlocked the raw edges of the fabric, turned it up and then stitched in the insertion. Doing it that way hides the tape along the side making it look more integrated into the garment and not like a trim plonked on top.

The bodice is the Myosotis without the collar, with the neckline modification I figured out the second time I made it to reduce the weird neck wrinkle I get. I also laid my own bodice block over it to reshape the shoulder and armhole to make it a more appropriate shape to being sleeveless.

The bodice is fully bagged out with the cotton voile and the skirt is lined to just above the insertion trim. I don’t actually need to undo the buttons I can pull it on over my head so I just stitched them on through all layers.

It’s light and breezy and perfect for hot weather.

Pattern: Myosotis by Deer and Doe

Fabric: Chia Blue purchased at Pitt Trading as was lining and insertion lace

Alterations: longer skirt, added insertion, no collar, re shaped shoulder and armhole for sleeveless, eliminated need for button holes and scooped out neck to fix neck wrinkle.

Posted on Leave a comment

Sewing Adventures – Grainline Yates Coat

This fabric in all it’s buttery soft lushness arrived at Pitt Trading last year as one of the amazing pieces they get from Designers. It’s the kind of fabric that you just never see for sale in the sewing sphere unless you go somewhere like Pitt Trading which has access to incredible designers and their fabrics.

A double sided faux suede was always meant to be for a special project. Initially I had intended it for a Deer and Doe Lupin Jacket but I lost the paper pattern in the fire.

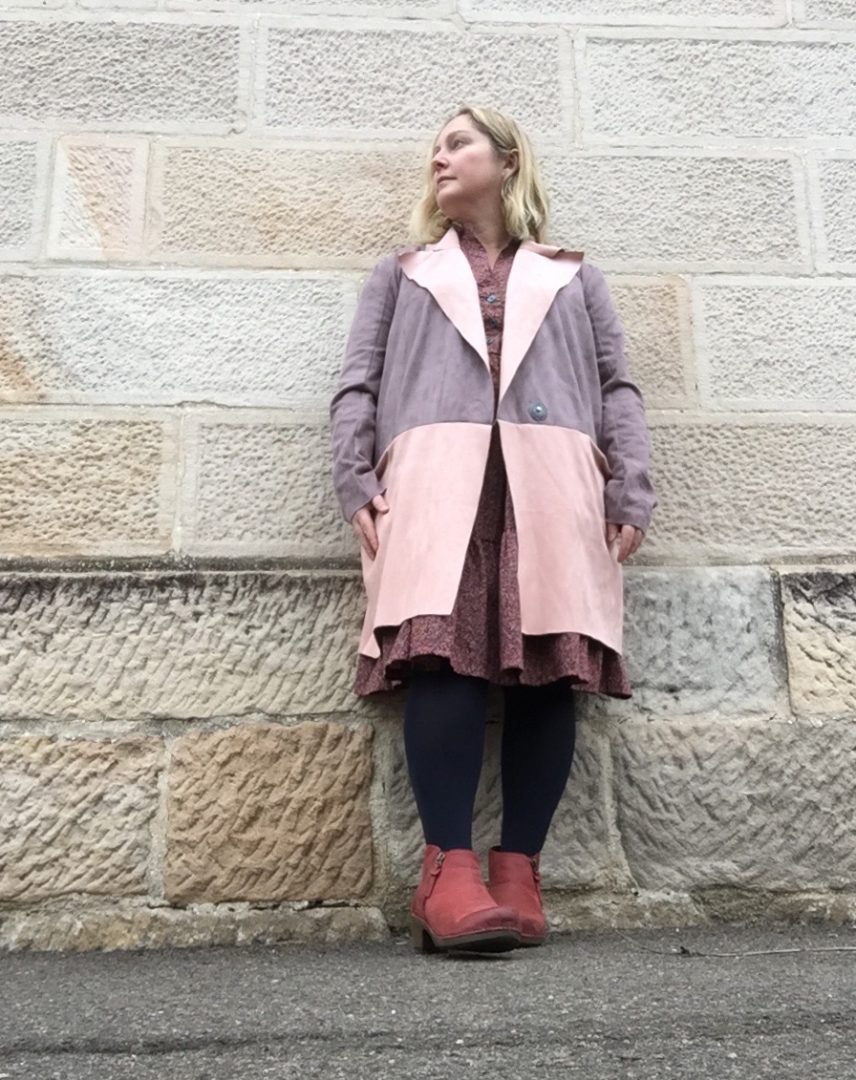
So this time round I wanted something that could utilise the double sided nature of the fabric. I’d seen a picture on Pinterest of a colour blocked coat that reminded me of the Grainline Studio Yates and thats when I decided to grab the pattern and go for it.

Once I had the pattern I did some adjustments before I got started. I shortened the coat, I did this above and below the horizontal seam. Because I’m only 5 foot tall I wanted to maintain the proportions of the style but ensure that the coat finished above the hemline of my dresses. This would prevent my dresses being tangled with my coat, and me either flashing my knickers or looking like a flasher.

I didn’t want any topstitching as the coat would not be lined in any way and the edges would be raw cut. So I modified the pocket to have a folded edge instead of a seam.

The arm length was also shortened though truthfully I should have shortened it even more and will no doubt end up cutting the ends of the sleeves shorter.

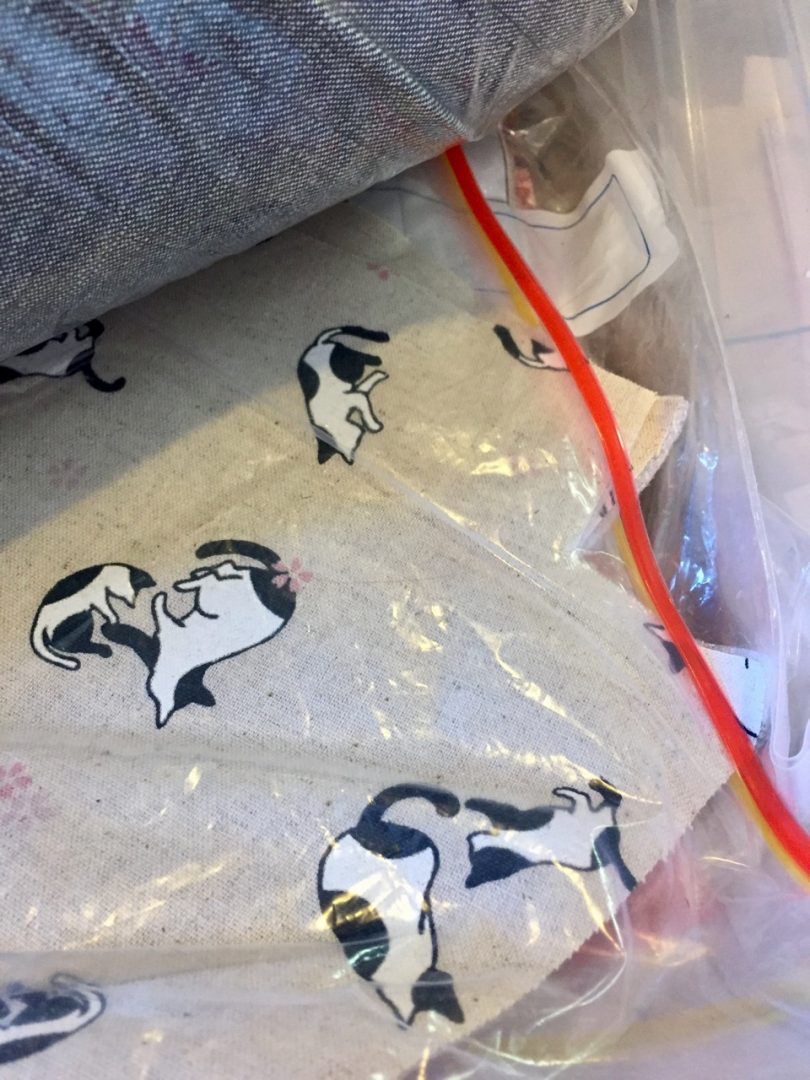
Cutting the pattern out was interesting as I couldn’t use pins, then I remembered I had a chalk tracing wheel from Prym and once I started using that it was brilliant. Left a chalk mark but no other marks so just perfect for the job.

Altering the pattern didn’t take too long but I felt like I spent about a day doing prep work on the coat. This meant once I was cut and started to sew the whole thing came together in under 2 hours so it was prep time well spent.

Suede is notorious for being a bit shifty to sew, to help me out I used these leather needles from Prym. They were fantastic and I didn’t have a single issue with any of the stitching for the whole coat.

When it came to the actual sewing it was all very straight forward. The other 2 places I had to do some differening techniques was the sleeve. I used a gathering stitch to pre curve the sleeve head like you would if you were easing it in. But I had to roll the sleeve head under in order to get it to curve enough. Am kicking myself for not taking more photos of this step as the sleeve head looked way over manipulated but as it was attached the pressure of the machine foot pushed it down and the sleeve went in with no problems. Some pegs were used to help hold things together on their way to the machine.


The second area of change was the collar, as it was going to be raw cut and only one layer the upper collar is attached upside down so the seam allowance is on the outside of the garment. This means I have a clean finish neckline and as the collar lies flat over the seam you’ll never see it from the outside. The way the collar edges roll bugs me a little so am considering hand stitching them in place with a few tiny invisible stitches?

I finished it off with a large oversize snap from Prym in a grey colour which blends in not too bad, am considering adding another snap further up to help hold in closed in cold weather. Without lining or interfacing it takes on a slouchy more relaxed silhouette which I’m quite enjoying.

Pattern: Yates Coat from Grainline Studios

Fabric: From stash purchased from Pitt Trading 2017, trims and sewing accessories from Prym

Changes: shortened body length and arm length, changed pocket and collar construction. For next time shorten arms further.
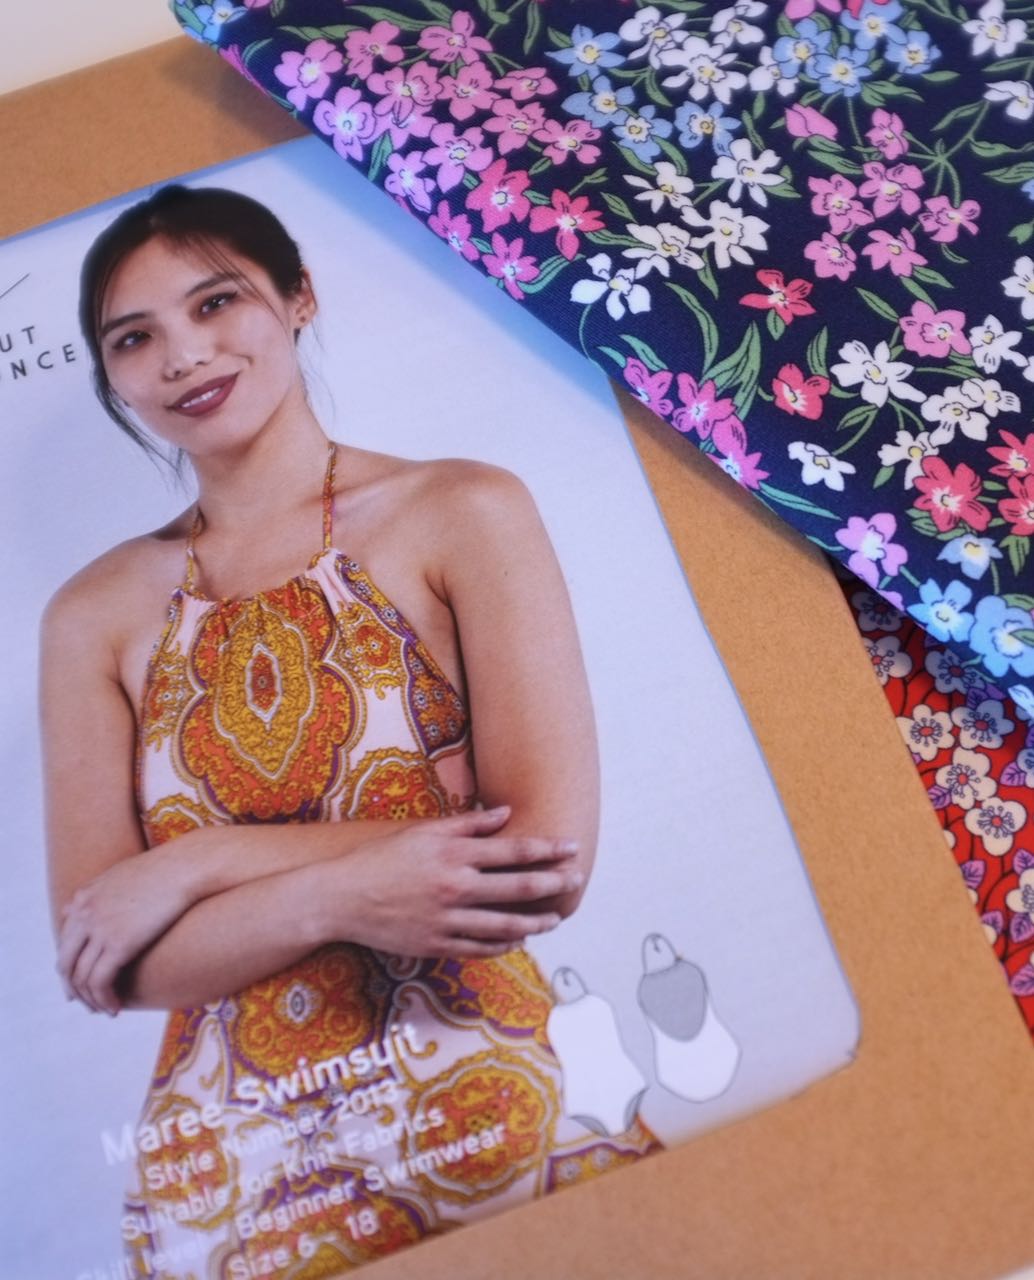
Posted on 2 Comments

Sewing Adventures: Emma Racer Back Slip in lemon and pink

A sweet Emma in lemon and pink! I actually had made this exact version before but lost the garment in the fire and when I discovered I still had some I knew I had to replicate it.

It’s a slinky jersey knit from Pitt Trading with pink lace trim and pink fold over elastic also from Pitt Trading. I love that their range of lace trims is so large you can always find a colour that is going to complement your fabric choices.

Much like my last Emma I’ve gone for a 12 top and graded out to a 14 bottom half. I’ve also been keeping them at the longest length. I’m just liking the silhouette of the longer line.

As you can see from my photos of all my Emma’s I have been trying hard to get better photos. It’s so much easier when you can shoot outside like I did for my Me Made May challenge. Hopefully with some more practice it will get slightly easier. Right now all I can see is the flaws in me and the photo.?

Pattern: The Emma Racer Back slip and bralet from Measure Twice Cut Once

Fabric and trims: slinky jersey, stretch lace and fold over elastic all from Pitt Trading

Alterations: This version made at the longest length on the pattern, see how it goes during sleep before deciding if I should keep it at that length or not?

Posted on 2 Comments

Sewing Adventures: Free Darcy Boxer Shorts Pattern

The Darcy Boxer shorts are one of my all time most downloaded patterns, am sure its 98% because it’s free and about 2% because it’s the pattern the person wanted? regardless it is a fabulous pattern that makes up in no time, takes a minimal amount of fabric and results in awesome shorts for yourself or to use as a gift.

These ones are intended for a gift. We are way behind on birthdays for the entire family this year so I’m trying to get ahead of the curve and get some Christmas sewing/whenever we see them next sewing in. When you don’t live near your family you sometimes find yourself giving and receiving presents at odd times of the year.

This is a lovely dense Japanese woven cotton I got at Pitt Trading. The tiny diamond pattern is perfect for an understated pair of boxers. I’ve gone with French seams throughout because a) I felt like being fancy and b) I currently only own white or black overlocking thread and well that’s not close enough for my colour matching loving heart. So French seams it was.

It’s been a little while since I made a pair with a fly so I had to go back and check my own notes. Apart from a slightly tricky fly/French seam junction point it was a straight forward sew.

For the elastic I jumped at the chance to delve into my Prym box of goodies and use this ultra plush yet firm elastic. It’s so lush and perfect for these boxers. Because I wanted to practice more with my coverstitch I used it to apply the elastic. It was a little finicky but now that I’ve done it once am sure I’ll be good for next time. Plus the stitching looks invisible!

All in all a pretty lovely make and a great example of “Everyone deserves pretty Lingerie”

Pattern: The Darcy Boxers Shorts by Measure Twice Cut Once

Fabric: made by Sevenberry sold at Pitt Trading waist elastic from Prym

Changes: French seams throughout, nice change but am unsure I would do that again?

Posted on 2 Comments

Sewing Adventures: Emma Racer Back Slip in a moody floral

My first make of the year that’s all for me! I’m very excited. It was such a wonderful feeling to pull on something I’d made after what feels like forever since I’d last done that.

Onto the make, it’s my newly released Emma Slip. I’ve been wearing these since I finished the pattern like 2 years ago. I kept putting off releasing the pattern thinking it wasn’t the right time or I need to have professional photos for it or a million and one other excuses. No more waiting for the perfect timing. If patterns are ready I’m going to let them loose into the world and not wait for that elusive perfect moment (that doesn’t exist anyway).

Size wise I went for a straight 14 as I’m still swollen post surgery and have an oddly lopsided torso. Ideally I think I should have gone 14 for the skirt section and cut a 12 for the bust as it’s a little big, not hugely so but just enough for me to notice it.

Apart from wanting to make that small size adjustment everything else is exactly as the pattern is. The dreamy moody floral knit fabric was a remnant at Pitt Trading and it’s lovely and soft. Perfect for a wriggly sleeper like me.

While I was making it I shared this quick tip on Instagram, when sewing to easily note the front and backs of a project I use one pin for the front and two for the back. You’d be surprised just how useful this turns out to be!

I like it so much I’ve already got more planned!

Pattern: The Emma Slip by Measure Twice Cut Once

Fabric: Floral remnant and lilac fold over elastic from Pitt Trading

Alterations or changes: Next time size the bust down

Posted on 3 Comments

Sewing Adventures: Peak To Do

I’ve reached peak “to do”. As a lover of lists and eternally trying to be organized, when I’m working on a project I pack up all the relevant details and pop them into a zip lock bag. Then they go into the “to do” box.

In theory this works fine. In a year of stress, lack of time and an apartment tiny in space it actually leads to not one, not two but three to do boxes.

This is quite a lot of projects that are partially started and never finished. Not only is this terribly wasteful it takes up way too much space.

So I’m declaring August as my personal project month. My aim is to get as many of my partially projects finished as I can. Just grab a zip lock bag of goodies and go!

Additionally I’m going to try and not start anything new. Hopefully by the end of the month I have lots of finished projects and my sewing area looks less like the aftermath of a horrendous wind storm than it currently does.