Posted on 14 Comments

Sydney Spoolettes go South

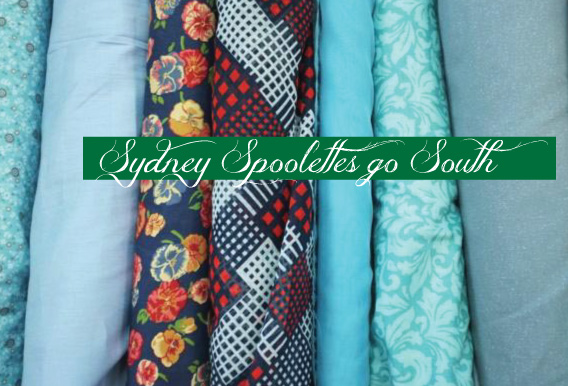
I missed putting this up last week in the excitement of Everyone Deserves Pretty Knickers week, but seeing as we all had such fun going south I thought I’d share with you the Sydney Spoolettes day out.

We met up at Ikea and perused their fabric section (and I didn’t even venture near the kitchen section which I’m normally such a sucker for).

From Ikea we went to Metro Fabrics which is directly across from Ikea. It reminds me of a big old style industry supply place as there are rows of bra trims, sliders, hooks and eyes. Other swim and lingerie trims and plenty of swim lycras, jerseys, sports specific knits and lingerie fabrics.

Metro 1

metro 2

Those of us who came by public transport grabbed lifts with those in cars down to Pitt Trading which is to the south of Ikea. It is a treasure trove! Filled with fabrics, trims, accessories and wonderful knick knacks like china cups and other goodies.

pitt 2

A not in focus @cherrypix in the appropriate black, white and red section.

pitt 3pitt 5

The lovely @kathborup showing off her gorgeous cotton pique dress with contrast collar.

pitt 7

pitt 4

Melanie of @MissPiggyEats having a look at the grey fabrics (that check she had her hand on was divine!)

It’s the kind of Aladdins cave you want to know about if you have to make a dress to wear to a wedding or looking for a special fabric.

pitt8

Everyone lining up to make their purchases. Thank you to the lovely ladies of Pitt Trading who rewarded us with a generous 20% discount on all purchases made on the day.

pitt 9

This watercolour floral was gorgeous, cotton stretch sateen. Just my kind of fabric, but in true stash busting mode I left it behind. If anyone does buy it can you send me photos of your make so I can live vicariously through you?

pitt 1Neon sequins! This one was killing me it was so awesome. It hurt to leave it behind but I don’t have a need for it at the moment and I can’t justify adding more “just because” fabric to the stash…but I’m certainly keeping it in mind and maybe later in the year might reward myself with some. Also note to self, when photographing the top shelf get a taller person to take the photo!

We rounded it out with a pub lunch at The Intersection hotel across the road where much laughter was had.

If you want to come hang out with the Sydney Spoolettes, come join the facebook page to know about the next outing. It’s so much fun and everyone is really really nice.

Posted on Leave a comment

Everyone Deserves Pretty Knickers – Design

What a week! Seriously thank you all so much, I hope you have had as much fun as I have.

We’ve had sewalongs, talked about inspiration, I’ve taught a knicker making class here in Sydney and now it’s time to wrap up the week.

While it’s sad to be wrapping up, this isn’t the end of the knicker making journey. I’m really hoping that this week has got you thinking about the smallest garments in your handmade wardrobe. While they may be small they need not be boring.

Every Measure Twice Cut Once pattern includes an extra we like to call The Designer Manual. This multipage manual gives you suggestions on how to take your standard pattern and push it further. How to add trims and extras to turn them into original creations.

So you can take a standard pair of knickers and add

The-Charlotte-Knicker-variations

The key is to make them suit your style, you can have them as lacy, sexy, cotton, practical or as frilly as you want. Now that the sewalongs have shown you how to construct the knickers themselves we will be showing you some more of these designer extras as tutorials in coming months. We also have plenty of other big things planned that we can’t wait to share. First thing we will be doing is creating a sewalong page on the site. This will make it an easy reference point for when you are next making knickers.

Become your own designer and have fun because Everyone Deserves Pretty Knickers.

Posted on 2 Comments

Everyone Deserves Pretty Knickers – The Jane Knickers Sewalong Part 2

Today in Sydney the weather is dark and dreary and it’s looking to be this way for the whole weekend. So load up on supplies and make yourself knickers all weekend. Much more fun than bothering about in this weather!

We are part way with The Jane Knickers, we left off just after overlocking the raw edge of the crotch seam.

10

On the lower front panels use the notches to indicate the gathered areas. I’ve shown them using pins to make it easy to see.

1 front panel notches

Between the notches run a gathering stitch. A gathering stitch is a straight stitch with a very long stitch length. Stitch a row and then stop, leave long thread tails and stitch another row. Again leaving the long tails. They should be a few mm apart. Repeat for the other front panel.

2 gathering stitches

Pulling the lower threads of your gathering stitch, gently pull them to create gathers.

3 gathers

Once you have created your gathers, pin the yoke to the lower front panels with right sides together.

4 pin yoke in place

Using a straight stitch (be sure to change it back to regular stitch length after gathering). Sew a 1cm seam allowance.

5 straight stitch yoke

Take out your gathering threads by gently pulling them through.

6 straight stitch yoke take out gathering threads

Finish the raw edge using an overlocker/serger or zig zagging.

7 overlock yoke

Press the seam allowance from the yoke seam up towards the waist and topstitch down. This is not 100% necessary but is a nice way to ensure a smoother finish to the inside of the knickers.

8 topstitch yoke

With right sides together, match side seams and pin together.

9 pin side seams

Using a straight stitch sew a 1cm seam. Repeat for other side.

10 straight stitch side seam

Finish the raw edge using an overlocker/serger or zig zagging.

11 overlocked side seam

Finish the raw edge of the hems by using an overlocker/serger or zig zagging. If you are using a very fine fabric you make like to think about doing a roll hem or a very fine double turn hem.

12 overlocked hems

Press hem up by 6mm to 1cm and iron into place. Straight stitch hem in place.

14 stitched down hems

Finish raw edge of waist by overlocking/serging or zig zag stitch.

15 overlocked waist

Turn finished edge of waist to the inside of the garment and press down by 1cm. The elastic is going to be topstitched in so you will be stretching the elastic as you are stitching it in place. I’m using a pretty purple lingerie elastic because that’s what I had in my stash and I like the way a contrast colour looks.

Measure the waist circumference, ideally your elastic length should be 2/3rds the full circumference. Before you cut, wrap the elastic around you and see if the 2/3rd measurement suits you. If you would like it roomier than go for a longer length of elastic. If you are unsure stick with the 2/3rds measurement.

Take your waist elastic, fold in half and half again. Put a pin at each of the quarters. Starting from the side seam pin the elastic on the inside of the waist at side seam, centre front, side seam, centre back and the last one will go to the side seam but we don’t want to pin that one just yet. It’s easier to attach it once you have already stitched the start point to the side seam.

16 elastic

Stitch and pull the elastic to one pin, once you reach the pin then move it, stretch the elastic to the next pin and stitch down. By going quarter by quarter it’s not only easier it means an even distribution of gathers too.Keep going until you reach the last pin, the end of the elastic should now be matched to the side seam you started at. Stretch the elastic for the final quarter and stitch in place.

Your waist should now have elastic attached all the way around.

And you are done!

17 finished

That’s it! With the sewalongs this week you can now construct The Charlotte Knickers a full bottom coverage style, The Georgiana Knickers a bikini brief style, The Lydia Knickers a cheeky G string style and The Jane Knickers a sweet style style. We have other DIY/Tutorial posts scheduled for the future where you can build on these skills. Till then have fun making knickers and remember to tag your makes #everyonedeservesprettyknickers

Tomorrow we have some more fun stuff planned for the wrap up of Knickers week so be sure to check back then.

Posted on Leave a comment

Everyone Deserves Pretty Knickers – The Jane Knickers Sewalong Part 1

What a week! Seriously it’s been a whirlwind of excitement. With seeing peoples makes and being featured designer on Kollabora. It’s all just been fantastic and one of those times where I’m supremely happy to have made the leap to share my love of sewing with everyone. Thank you to every single person who has supported Measure Twice Cut Once in any way, I truly appreciate it.

Today kicks off with The Jane Knicker sewalong. If you haven’t got your pattern yet, you can pick it up with a 20% discount until the 10th of June over on Kollabora.

Fabric choices are fairly varied for the knickers which is great as it means you can go as fancy as you want and it’s brilliant for stash busting too. Look for lightweight cottons like voile, cambric or lawn. Quilting cottons and dress cottons are very nice too. Lightweight silks and satins are also lovely and have the added slinky feel to them.

Avoid anything that doesn’t have a good bias stretch to it, is too bulky (like denim or canvas) and if in doubt make a test version before using up your best fabric.

As an indicator of fabric quantity I’m cutting out the size 18 pattern and this is 112cm wide fabric. For sizing, try going by your hip measurement not your waist measurement. The fabric I’m using is close in handling to a voile and has a printed floral on it. Again it’s a stashbusting piece but I know it came from Spotlight a few years back and I stole it from my sisters stash (um, Hi!).

As with all of our woven knicker patterns The Jane Knicker is cut on the bias. With right sides together fold your fabric in half and ensure that the grainline run parallel to the selvedge.

1

I then folded back just one layer until the selvedge is at 90 degrees to where it was to create a bias fold line. On this I placed the yoke and cut a single layer.

2

All pattern pieces are now cut.

3

Taking one lower front panel and one back panel. Match inside leg seam with right sides together and pin. Repeat for remaining leg panels.

4

4a

Using a straight stitch sew a 1cm seam along pinned edge. In a never before seen occurrence I am sewing with non matching thread to make it easier for you to see and apologies to Nan (my Grandmother) as I can hear you mentally tsk tsking me for non matching thread. It’s just for the photos I promise Nan!

5

Clean finish raw edge by overlocking/serging or zig zagging.

6

Repeat the last 2 steps for the other leg panels.

With right sides together match the joined panels. At the inside leg seam push the seam allowance to the back. Pin in place.

7

8

Using a straight stitch sew a 1cm seam allowance.

9

Finish raw edge by overlocking/serging or zig zagging.

10

Tune in tomorrow for the remaining steps and don’t forget to tag your in progress photos with #everyonedeservesprettyknickers


Posted on 2 Comments

Everyone Deserves Pretty Knickers – Sewalong Part 3

Ready to finish off your knickers? It’s so great that it is such a fast project and we can finish up so quickly.

By now you should have your knickers and your elastic.

1_knickers plus elastic

Take your waist elastic, fold in half and half again. Put a pin at each of the quarters.

2_elastic

Starting from the side seam pin the elastic on the inside of the waist at side seam, centre front, side seam, centre back and the last one will go to the side seam but we don’t want to pin that one just yet.

3_pinned elastic

Attach your elastic by overlocking/serging or zig zagging in place. You will need to stretch the elastic as you stitch it down. I’m going to use my overlocker because it’s all set up, but you don’t need to use one for this step. You’ll see my elastic is quite close to the edge but not right on the edge. When it is stretched it gets closer to the edge but a little buffer between edge and elastic also helps it glide through the overlocker a little easier.

4_attaching elastic

Stitch and pull the elastic to one pin, once you reach the pin then move it, stretch the elastic to the next pin and stitch down. By going quarter by quarter it’s not only easier it means an even distribution of gathers too.Keep going until you reach the last pin, the end of the elastic should now be matched to the side seam you started at. Stretch the elastic for the final quarter and stitch in place.

Your waist should now have elastic attached all the way around.

5_attached elastic

If you are using the 6mm elastic, follow the same technique for both leg openings.

To show how the lingerie elastic can be used I will be using it on the leg openings. You can use all 6mm or all lingerie elastic or a combination, it’s entirely up to you.

Overlock/serge or zig zag the raw edge of leg openings. Making sure you have caught in the edge of the gusset at you finish the edges.

6_gusset

Using an iron press 6mm – 1cm hem to the inside of the knickers (this photo makes them look the oddest shape! it’s just the photo though).

7_prseed hems

Taking your elastic, divide it into quarters as shown previously. Then divide the leg opening into quarters. Use a pin to mark each quarter.

8_

Starting from side seam pin elastic to inside of hem edge with scallop edge pointing out.

9_pinned

Using 3 step zig or any stitch which allows stretch eg twin needle or zig zag top stitch the elastic in place. You will need to pull the elastic to stretch it as it is going on. Using the pins and quarters of the garment it will help get the stretch even around the entire leg opening.

10_attached elastic

Repeat for other leg opening.

11_both legs

Fold over the elastic at waistband to the inside of the knickers. Topstitch it in place using 3 step zig zag, twin needle or zig zag.

12_done

and you are all done. You’ve made knickers! yay!

How exciting you can now make your own knickers! All of these photos show The Charlotte Knickers but the same techniques can cover The Georgiana Knickers and The Lydia Knickers.

Once you have the techniques of the gusset and elastic sorted out you can try different fabrics and a range of different trims and accessories. Later in the week we will be talking more about how to add your design flair to your knickers, so be sure to check back for that.

Tomorrow we will be kicking off our second sewalong and this one is for The Jane Knickers. If you don’t already have a pattern ready to go, Kollabora is having a sale on The Jane Knickers so pop across and pick one up and I’ll see you back here tomorrow for more sewing.

Don’t forget to tag all your Instagram and tweets with #everyonedeservesprettyknickers so I can see all your wonderful creations


Posted on 4 Comments

Kollabora – featured designer and a discount

Screen Shot 2014-06-04 at 9.43.28 amI’m pretty excited to be the featured designer on Kollabora this week. Pop on over to read what I would be if I wasn’t a designer and grab a sneak peek at my sewing and design area.

Also on Kollabora there is a discount being offered on The Jane Knickers pattern, the Sew along for these starts tomorrow!

Posted on Leave a comment

Everyone Deserves Pretty Knickers – Sewalong Part 2

I do hope everyone has been enjoying “Everyone Deserves Pretty Knickers” week. It’s so fun already and we have so much more to come. Don’t forget to tag your in progress work with #everyonedeservesprettyknickers if you are sharing on instagram or twitter so we can see your beautiful makes.

Yesterday we cut out our knickers and added the gusset. So now your knickers should look like this.

step-8

Now it’s time to sew the side seams. With right sides together match at the side seams and pin in place.

pins

Using a straight stitch sew a 1cm seam.

seam

Finish raw edge using overlocker/serger or zig zag stitch.

overlock

Your knickers should now look much more knicker shaped.

new shape

A few people have emailed saying “don’t go to elastic yet! I haven’t found what I need”. So here is a bit about types of elastic that is suitable.

elasticLeft to right

6mm regular elastic- super easy to find and possible the cheapest option.

10mm wide knicker elastic. It has a scallop edge and one side is lovely and soft for next to your skin.

Scallop edge elastic, bigger decorative edge and smaller amount of elastic to topstitch on. Some of the trims can look like this but lack any stretch so check the stretch before buying.

Measure the waist circumference, ideally your elastic length should be 2/3rds the  full circumference. Before you cut, wrap the elastic around you and see if the 2/3rd measurement suits you. If you would like it roomier than go for a longer length of elastic. If you are unsure stick with the 2/3rds measurement.

Measure the leg circumference, ideally your elastic length should be 2/3rds the  full circumference. Before you cut, wrap the elastic around you and see if the 2/3rd measurement suits you. If you would like it roomier than go for a longer length of elastic. If you are unsure stick with the 2/3rds measurement.

To allow those who haven’t yet found the right elastic one extra day we will leave it there, and tomorrow we will cover attaching the elastic and top stitching it down.

If you have any questions feel free to pop them in the comments so I can help you out.

Posted on Leave a comment

Everyone Deserves Pretty Knickers – Seawalong Part 1

charlotteThe start of the first sewalong will be for The Charlotte Knickers but the same construction method applies to The Georgiana Knickers and The Lydia Knickers so you can choose the style you like the most to follow along with.

Fabric choices are fairly varied for the knickers which is great as it means you can go as fancy as you want and it’s brilliant for stash busting too. Look for lightweight cottons like voile, cambric or lawn. Quilting cottons and dress cottons are very nice too. Lightweight silks and satins are also lovely and have the added slinky feel to them.

Avoid anything that doesn’t have a good bias stretch to it, is too bulky (like denim or canvas) and if in doubt make a test version before using up your best fabric.

First up cutting on the bias. Here you want to ensure your grainline is at 45 degrees to your selvedge. It gives the woven fabric a nice bit of stretch to it which I find makes for a much more comfy pair of knickers.

I’m very committed (ahem trying) to my stash busting this year so here is some leftovers that is going to be perfect for knickers.

part 1Iron your fabric and lay it out, if you have an inspector kitty get them to check your work before moving on to the next step (note: despite the pissed off look she is not unhappy with my work merely reminding me it is getting very close to food service time and that I’d better hurry up with these photos).

From the selvedge fold over your fabric ensuring your selvedge edge is now at a 90 degree angle to where it started. And arrange your patterns for cutting.

In this photo the top of the the front and back pattern pieces have been placed together. This is the most fabric efficient way to cut out your knickers and you can see the front pattern piece has been flipped over to ensure that both pattern pieces can fit in a small amount of fabric.

part 2For a directional print, arrange your patterns so the top of the front and the top of the back are in the same direction. We had to fold the fabric over more to use extra fabric to cut the patterns this way

part 3I hope that all makes sense for cutting on the bias? For an idea on how much fabric you need these pattern pieces are cut out to the size 18 and the fabric is 112cm wide

For the gusset you only need a small amount of cotton jersey. Try and use 100% cotton as it’s just a bit nicer to wear than any of the blends. If you are raiding the stash for your make and don’t have a knit, try cutting up an old t-shirt. They are great for recycling into gussets.

Now that you are done cutting we will move onto construction

Right side – the face, front or outside of the fabric

Wrong side – the interior, inside, back of the fabric

Step 1 – Front, back and gusset all right side up.

step-1

Step 2 – Gusset right side up.

step-2

Step 3 – Gusset right side up with front edge finished. I’ve overlocked it, you could overlock/serge, zig zag or turn under and straight stitch a hem.

step-3

Step 4 – Front panel, right side up.

step-4-a

Front panel with back panel placed on top. The right sides have been matched together so the photo shows the wrong side of the back panel facing up.

step-4-b

From the photo above, we have now added the gusset with the right side matched to the wrong side of the back panel. Photograph shows the wrong side facing up of the gusset.

step-4-c

Step 5 – pin at crotch seam. This seam is a bit tricky as the 2 woven fabrics have opposing curves. It won’t sit flat until it is stitched together. I pin at the centre and then one on either end. It will be bubbly looking but it’s meant to be so don’t worry.

step-5

Step 6 – 1cm seam allowance, straight stitch seam. Due to the bubbliness of the seam when you pinned it. As you feed it through the machine it can be helpful to put ever so slight an amount of tension onto the woven fabric by very gently pulling it as you feed it through the machine. This is ever so slight but it just allows you to feed the seam through and achieve a flat seam.

step-6

Step 7 – finish raw edge of seam, again I have overlocked but you could overlock/serge the edge or zig zag.

step-7

Step 8 – place seam flat and press. Photo now shows the wrong side of both front and back panels but the right side up of the gusset.

step-8That’s as far as we are going to go today, come back tomorrow to join in the next step of the sewalong. If you have any questions about what we have gone through so far just pop them into the comments so I can help you out.

Posted on 4 Comments

Everyone Deserves Pretty Knickers – knicker making class

sewmakecreate - knicker making class 1st June 2014 - 08

It’s been a few hours and multiple cups of tea and I’m finally recovering from the amazingness of teaching my first knicker class.

First up it was SO MUCH FUN and that was down to the lovely ladies in class of Mel, Stef, Carmen and Lyndall. They were all so enthusiastic and willing to give it a try that it made it a joy to teach them.

sewmakecreate - knicker making class 1st June 2014 - 06

The space at Sew Make Create was all set up with Janome machines and an overlocker for people to share and a beautiful big cutting table.

We went through how to find the right size, cutting on the bias, creating the gusset and then attaching the elastic. Along the way I was trying to make sure that everyone understood what I meant to not only do it in class with me there to help but more importantly to be able to do it once they got home.

sewmakecreate - knicker making class 1st June 2014 - 03

Overall we did really well, I wish we had another hour in class to help out as with many new techniques to learn I felt slightly cramped for time.

It was great and I so hope everyone keeps sewing knickers at home.

sewmakecreate - knicker making class 1st June 2014 - 10

If you’d like to come along to a class, there is a button on the sidebar that will take you over to what is on offer with dates and other information and more photos can be found on our flickr page.