Posted on Leave a comment

YouTube livestream Tonight 6th September at 8pm AEST

Today I’m trying something new and going with a YouTube livestream at 8pm tonight. I’ll be unboxing the August subscription sewing box from The Lingerie Society from Pitt Trading as well as answering questions about the box and sewing/lingerie sewing in general.

You can join in here

We have been in lockdown here in Sydney and I’ve been thinking of new ways to talk about sewing and teach without the benefit of inperson classes. I’ve also been really struggling to get eyes on any of my Instagram posts as I don’t do things such as Reels and IGTV. To me they feel transitory and content for contents sake but in no real benefit to either me or other sewers. It’s not like I can go “oh I saw this wonderful tutorial but I can’t remember who did it?” you can’t search it, it can’t be easily found and if it was in a story it disappears in 24 hours. It was making me feel all a bit useless.

So instead of learning silly dances (trust me no one needs to see that) or spend hours producing worthless transitory content I’ve decided to post tutorials and how to’s on YouTube so you have a visual, searchable, saveable way of learning and growing your sewing skills. I’m really hoping this works and it would be wonderful if it encourages more people to sew or even just regular sewers to sew more often.

Susan

Posted on Leave a comment

The Milicent Dress – Tie shoulder and ruffle hem version

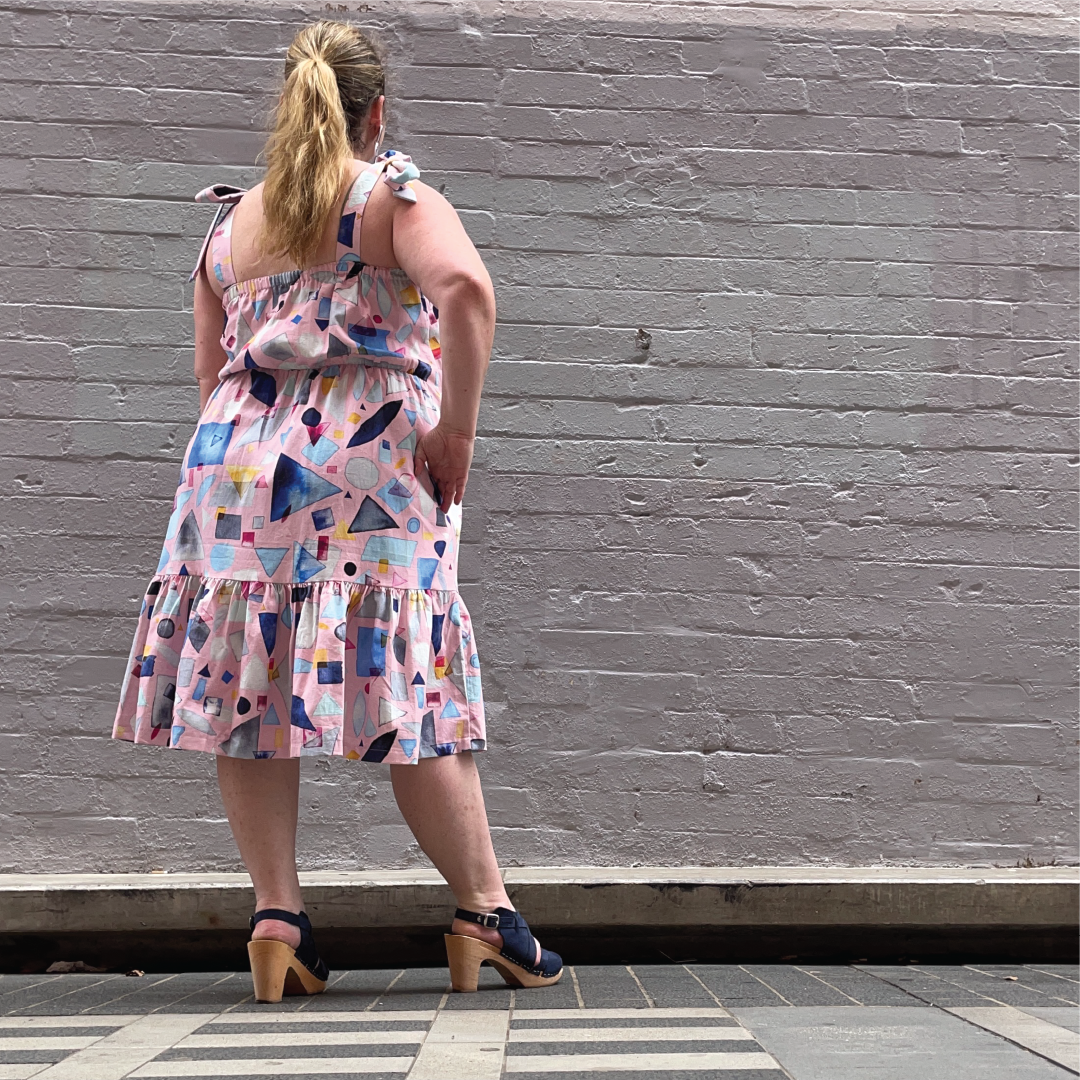
I’m breaking this down to be super simple changes you can make to the Milicent Dress to create tie shoulders and a ruffle hem. First up tie shoulders

Part 1.

  1. Don’t cut out the straps provided in the pattern we are going to create wider longer ones.
  2. on a piece of paper draw a rectangle 10cm wide x 70cm
  3. cut x 4 out of your main fabric
  4. cut x 4 out of iron in interfacing
  5. iron interfacing onto wrong side of fabric

Part 2.

  1. Fold in half lengthwise
  2. Press
  3. stitch around outside edge leaving one narrow edge open
  4. clip corners
  5. turn right side out

Insert straps into garment as per regular instructions.

For the Ruffle Skirt

Part 1.

  1. take you skirt pattern piece, draw a line on where you want to shorten it to. I’m only 5 foot tall so my skirt was reduced to 38cm including seam allowance.
  2. fold or cut your main pattern piece to that length
  3. decide on the height of your ruffle. Again I’m short but my ruffle is a finished height of 25cm. With seam allowance and hem it is 28cm high.
  4. Fold your fabric right sides together, place your skirt pattern pieces
  5. using chalk and a ruler mark in the ruffle height, go across the full width of your fabric for extra fullness

Part 2.

  1. Cut out your pieces
  2. Assemble the top portion of your skirt (including pockets) as per the instructions in your pattern.
  3. Run 2 lines of gathering stitch along the top edge of each ruffle
  4. pull stitches to create gathers until it is the same width as the lower edge of your upper skirt
  5. sew side seams of ruffles, finish edges

Part 3.

  1. right sides together pin and then stitch ruffle to upper skirt. Remove gathering stitches
  2. Hem lower ruffle then proceed with remainder of pattern instructions

Posted on Leave a comment

Sewing Adventures – Milicent Dress in Pink cotton linen

Am so happy at how you are all loving the newly released Milicent Dress!  Today I’m sharing a version of it I made for myself and  I’ll be back with all the info on how to hack the original pattern to this version.

All summer I kept seeing tie shoulder dresses with lower tier ruffles and thinking they looked so cute and perfect for the hot weather. Then one day it struck me that I could totally make the Milicent look like that. Here are a selection from Gorman and Obus that caught my eye.

I took my own copy, played around with the pattern a bit and hey presto cute summer dress version 2!

The fabric is a digital printed cotton linen from Nerida Hansen / Hansen Print Textiles. It’s been in the stash for about 18 months or more. Originally I was so excited as I loved the print but them when it arrived I was thoroughly underwhelmed with the print quality and how heavy and stiff the fabric felt. I honestly thought I was going to have to use it for endless amounts of bag making!

Washed it a few times, tried to make it feel softer it did by a very tiny amount. Disappointed I put it in the stash. I got it out when I was thinking of this variation and thought it’s going to hang stiffer and the ruffle is going to be way more noticeable making me look like a giant obnoxious cupcake but hey sometimes looking like an enormous cupcake is preferable to a fabric wallowing in the stash.

Sewing wise it sewed ok, quite stiff and stable but frayed unbelievably badly. I even overlocked some seams that were going to be enclosed by plackets it frayed so much and I was worried that with wear it would come apart.

Despite the less than stellar fabric I do really like how it has come together and I think I will get a lot of wear out of it. A friend suggested wearing it with a t-shirt under it for the winter and I think that could totally work.

Don’t forget to come back when I explain all the details on how to hack your pattern to make this version

Pattern: modified version of the Milicent dress by Measure Twice Cut Once

Fabric: Digital printed linen cotton by Hansen Print Textiles

Alterations: ruffles, tie shoulder straps

Posted on Leave a comment

Sewing Adventures – Boxy Dress

Summer in Sydney is getting hotter… or so it seemed? This summer is feeling cooler but this dress was planned before it turned cool and I was preparing for endless hot days.

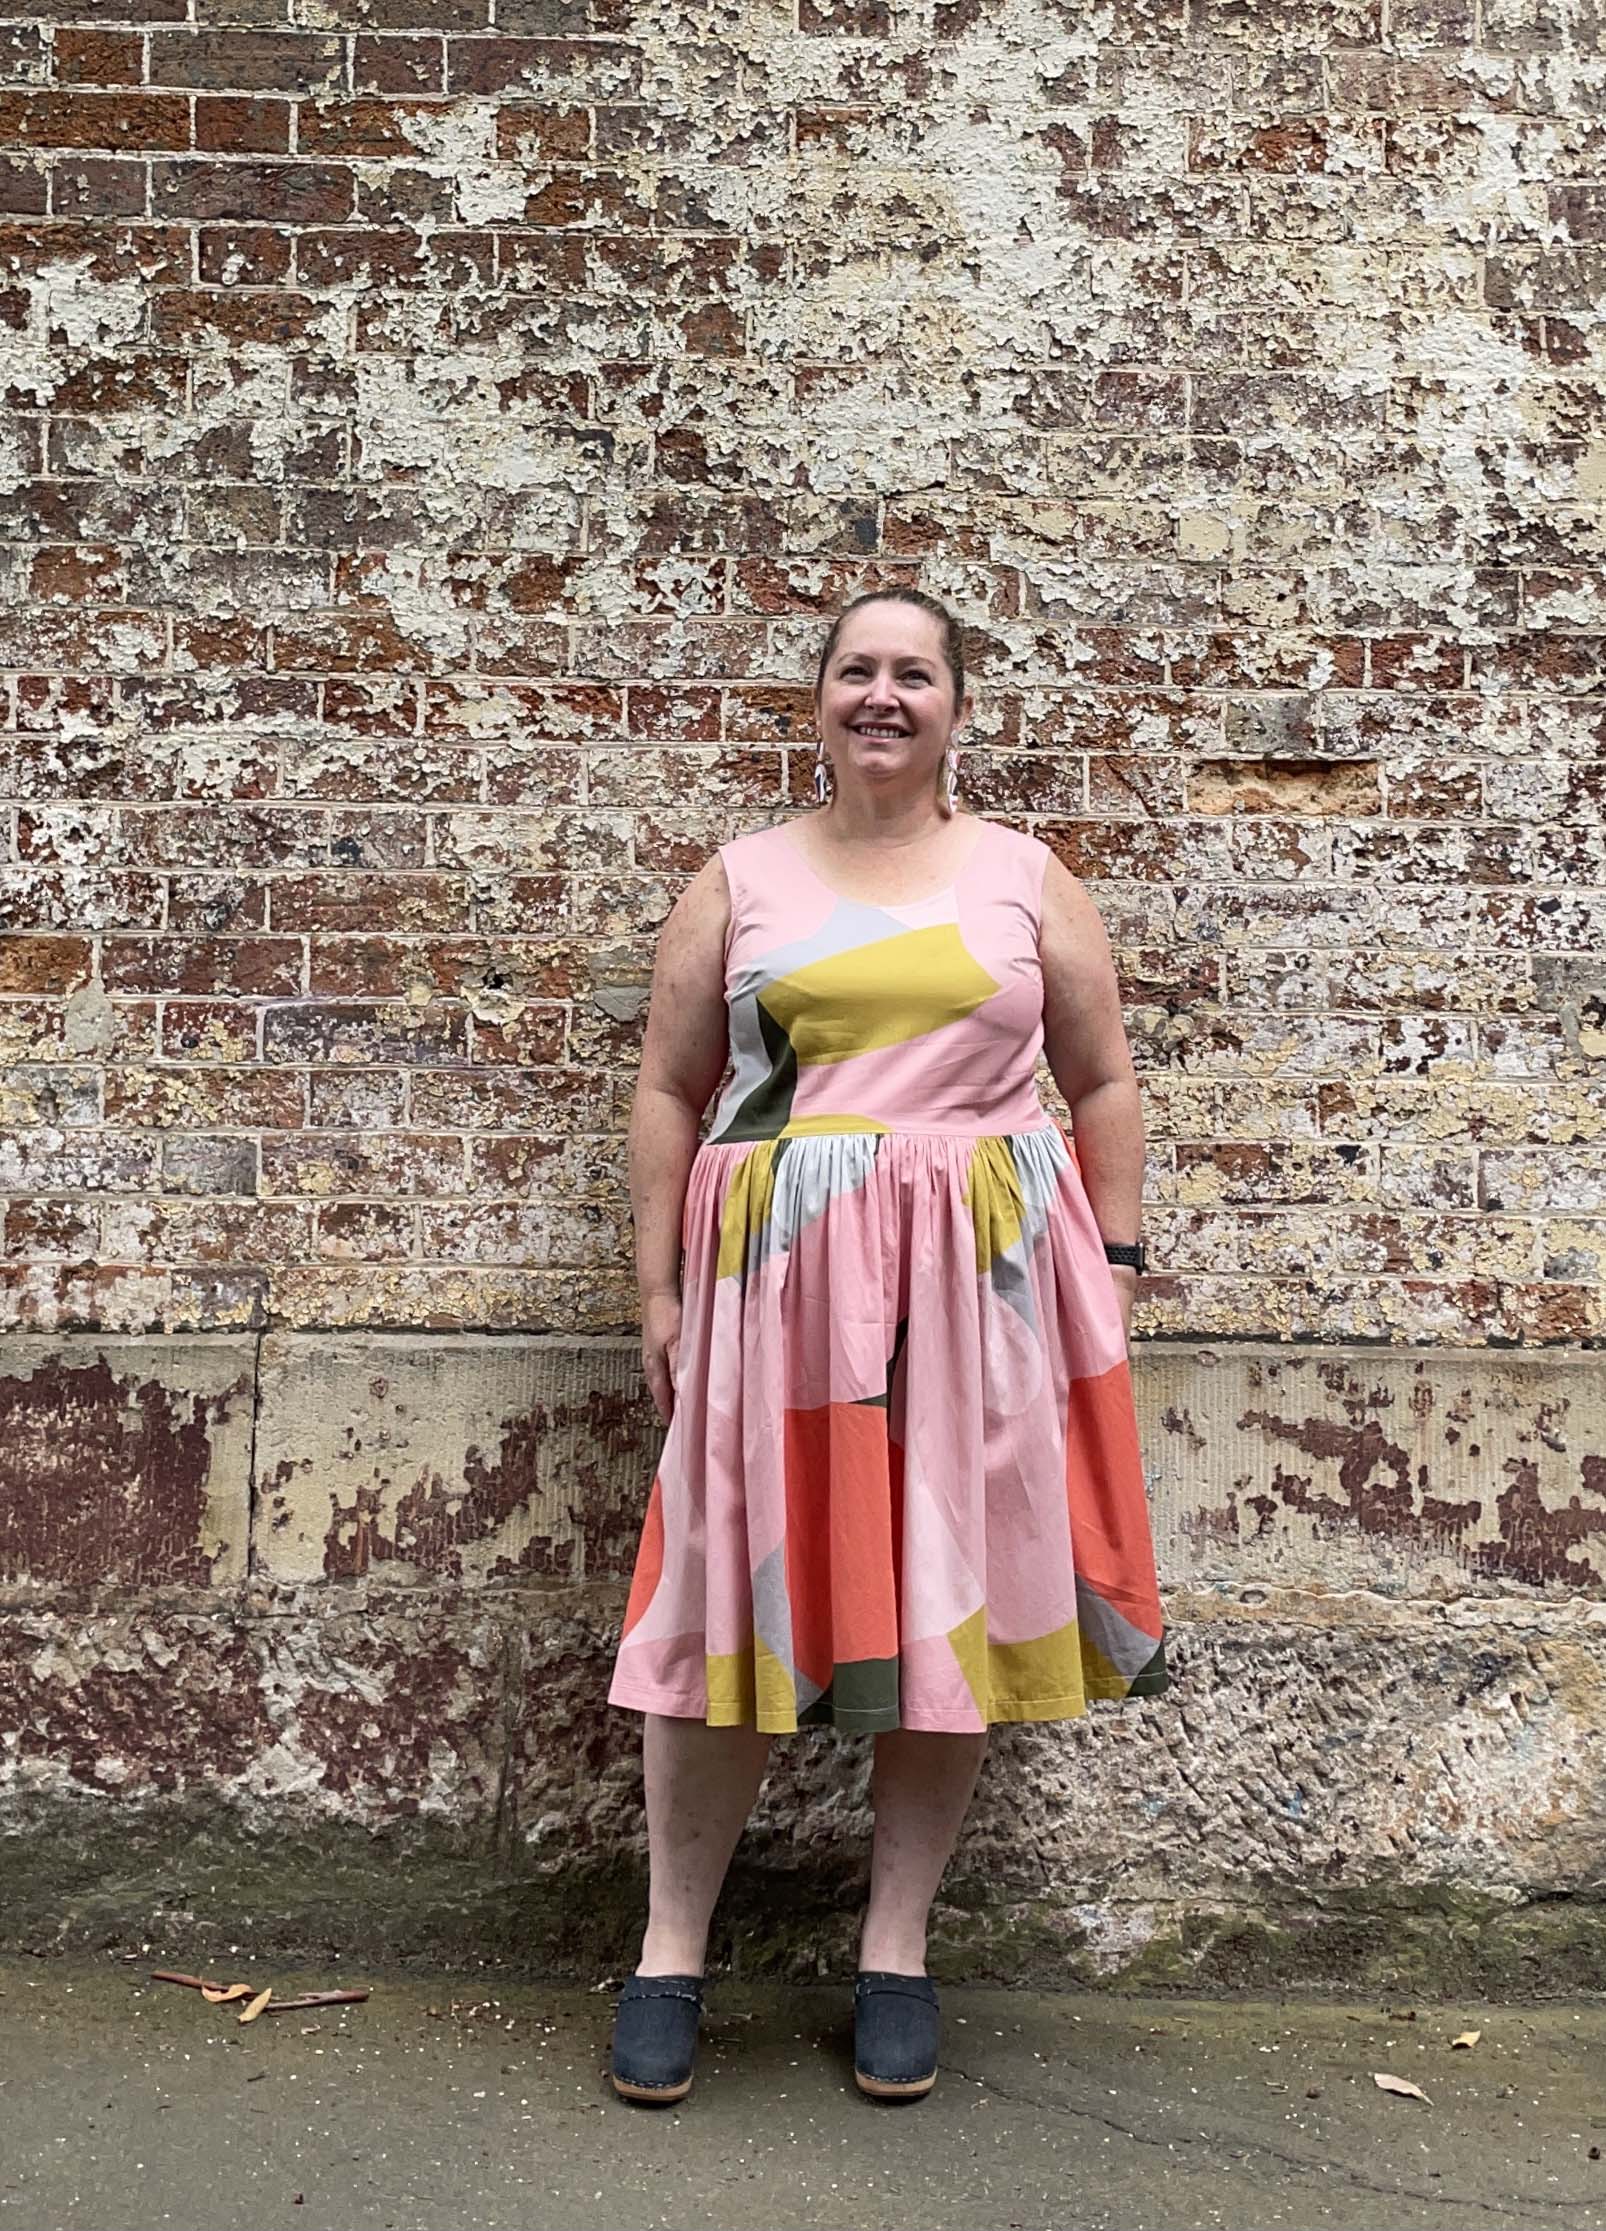
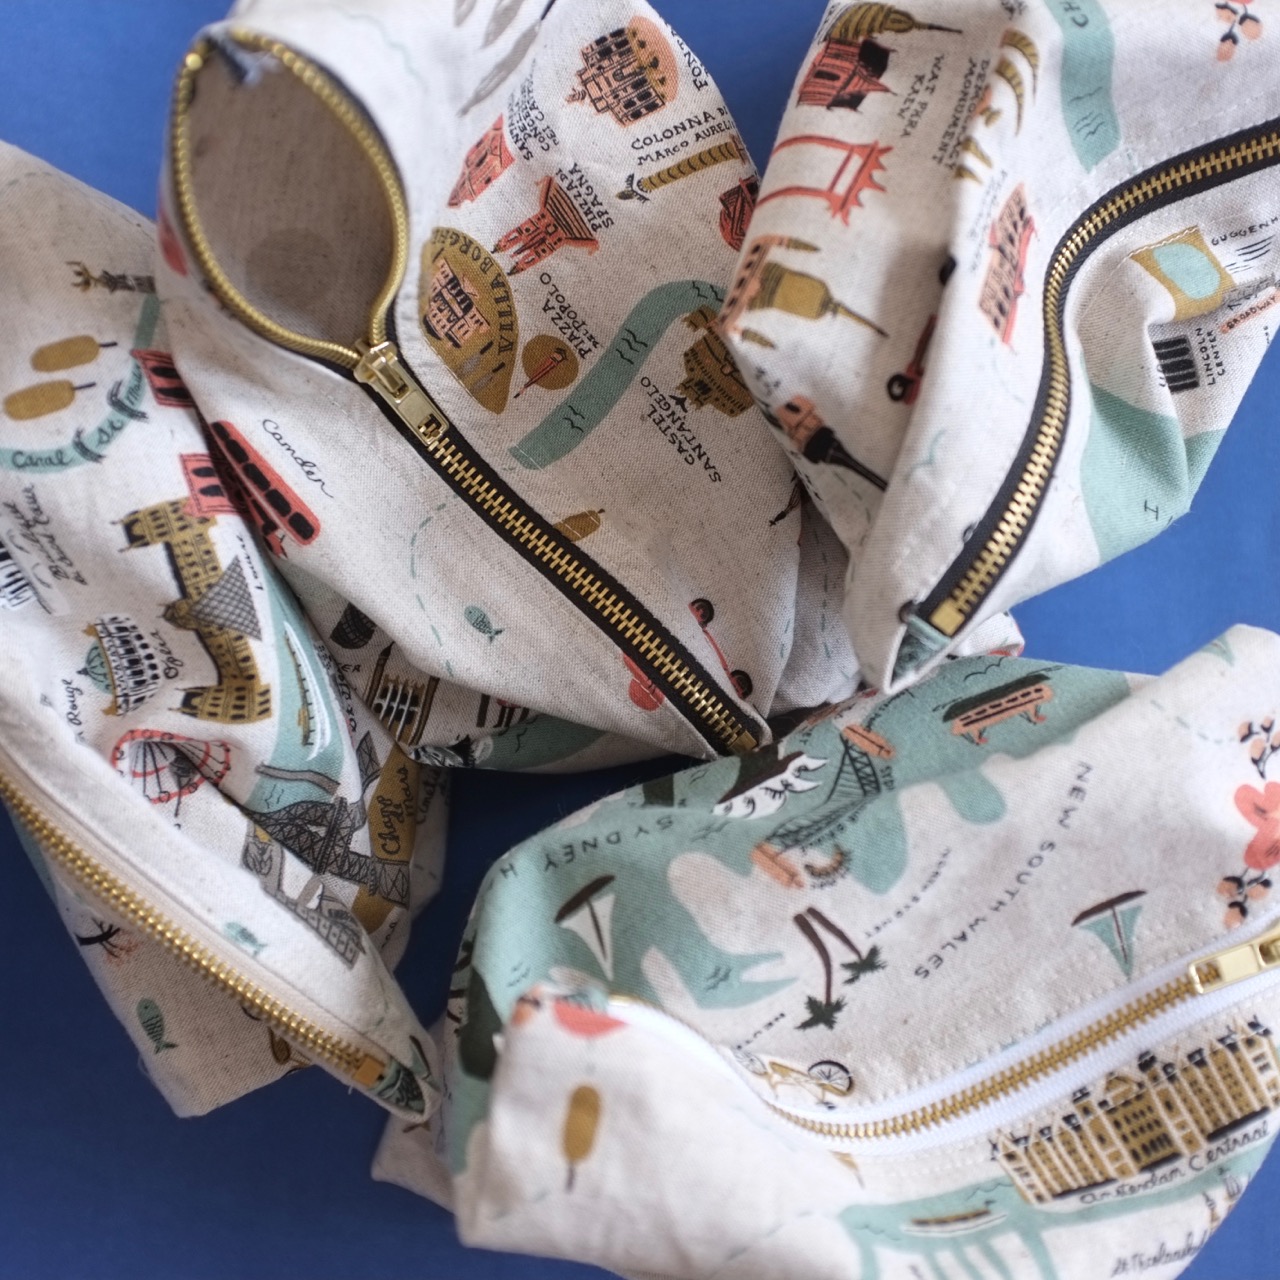
My goal was for a dress I could pull on over my head, was roomy enough to aid airflow but still looked decent in case I was leaving the house to go to the supermarket or post office. Hunting through my stash I found some Nerida Hansen remnants I had picked up at a Finders Keepers market back when we could meet in person. Each remnant was a slightly odd size so I had to plan out how I was going to cut it out to make it work. In the end I cut the top from one section and then used part of the rest of that panel and another panel to make the skirt. I didn’t even have enough fabric left to make pockets.

The pattern is my standard bodice block with a few changes

  • cut the armholes slightly lower
  • straightened off the side seams to create a more boxy look
  • increase side seams by 1cm to allow it easy to slip on over my head

So not huge changes but enough to make it slightly more casual.

The fabric itself is lovely to wear, nice and cool and relatively wrinkle free, sewing it was less fun. The print is a digital print so every needle and pin mark showed up. I sewed it using a Microtex needle and even at a 70 needle you had to be careful not to show up the needle marks. I used my overlocker to finish the seams and you can see the marks there. Which fine is ok for a remnant but very disappointing that the quality of the fabric is so fragile for what is essentially an every day fabric.

Despite the problems it is a nice dress to wear and has been fulfilling it’s mandate of boxy pull on dress ready for the hot weather.

Posted on Leave a comment

Sewing Adventures – a matching set

Much of the fabrics I use come from Pitt Trading, some of that’s because I used to work there and I stashed a fair bit of stuff and some of it is because they sell some of the most amazing fabrics and trims available. When they asked did I want to give one of their Crystal lycra kits a try I didn’t hesitate to say yes.

The kits are generous, you could easily make 3 to 4 pieces that co ordinate together. I decided to go all out and use as much as I could on an Emma bralet (pattern available via the shop) and matching it wth some Evie La Luvie Esme knickers.

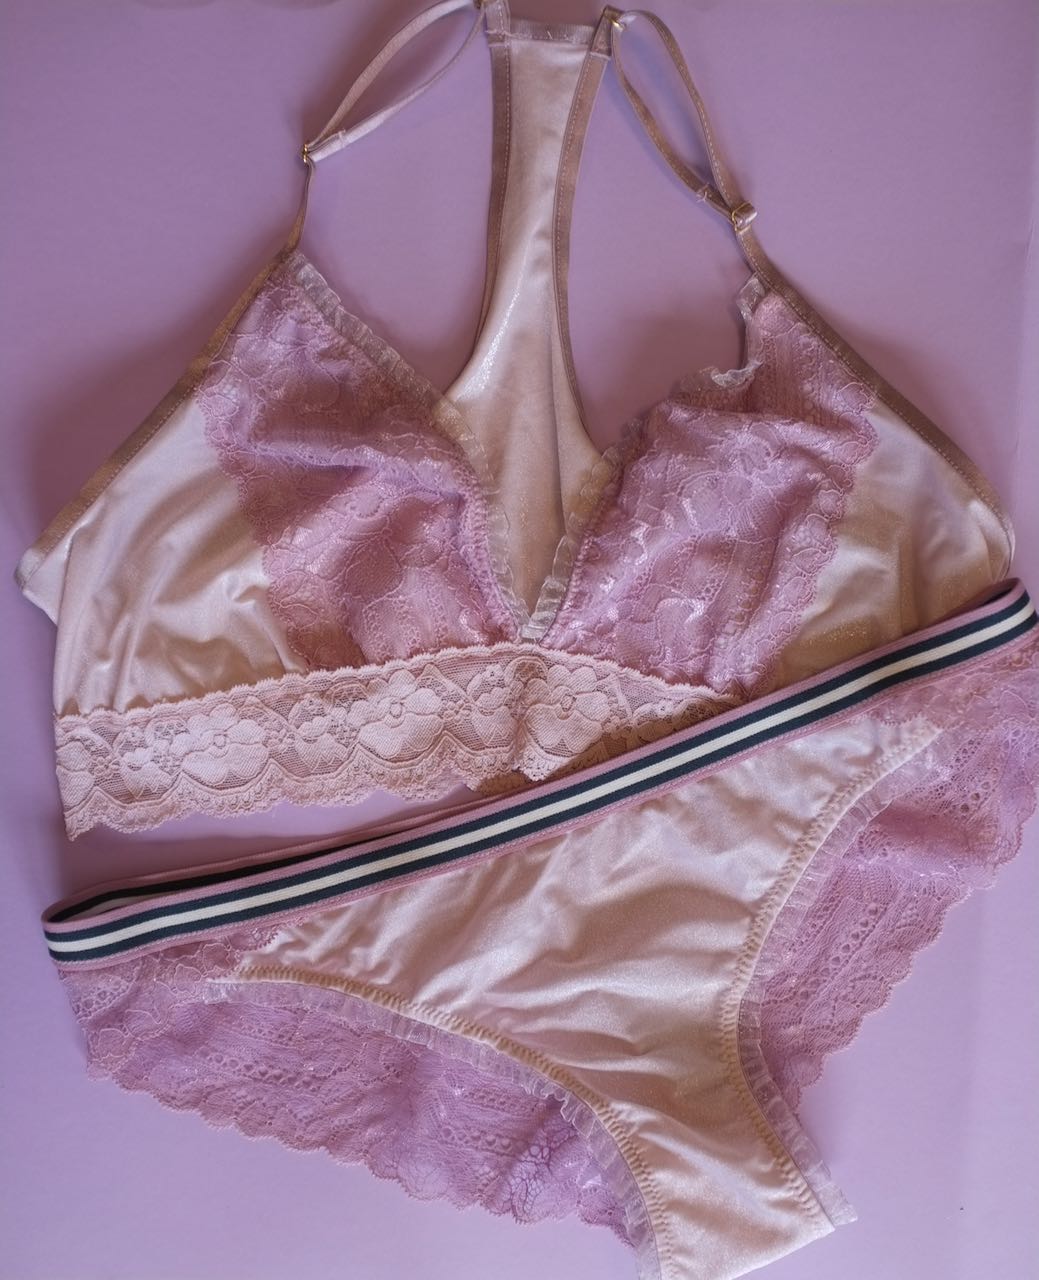
I love the knicker shape it’s super cute and a great use of lace. However I don’t love how the crotch gusset is smaller than the outer knicker panel along the sides. Unless your sewing is super precise it’s so easy to miss a bit when you are stitching it down. Honestly I’ll just be cutting it wider in the future to make the sewing more enjoyable and less fraught with worry that it won’t be caught in correctly.

I do however love the entirely lace back, it’s so pretty, particularly with the stripe elastic I do like a bit of sporty style mixed in unexpectedly.

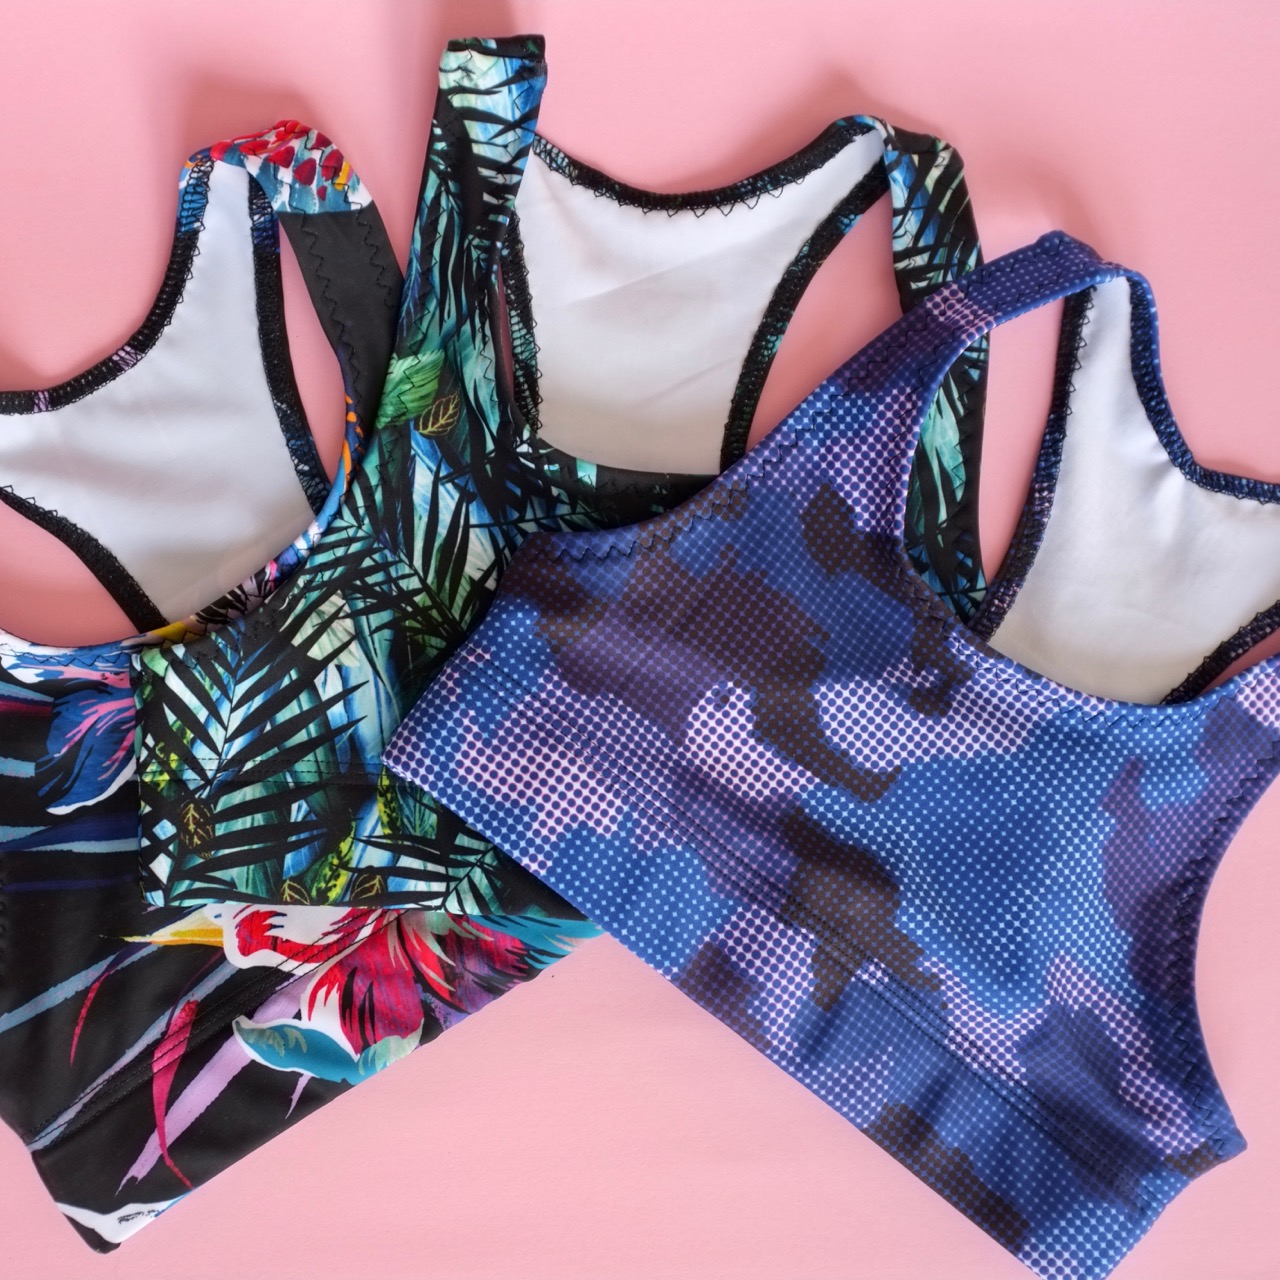
The Emma I have made multiple times before but this is the first time I’ve added the lace to the lower hem. For myself I don’t do it as I’m so short it just folds up but this one is for someone else and it looks so cute I think I want to try a narrower lace version for myself. Sewing on the FOE was a dream as this one is so lush and thick it’s like an elastic ribbon it’s so satiny. Absolutely gorgeous.

All in all it was a wonderful set to sew and I hope the person I made it for will love it too!

Patterns: Evie La Luvie Esme knickers, Emma bralet by Measure Twice Cut Once

Fabrics: Crystal lycra lingerie kit from Pitt Trading

Alterations: fix the width of the crotch gusset before I use the pattern again

Posted on 1 Comment

Sewing Adventures – more Mara Bralets

Any long term readers will know I’ve been on quite the bra sewing kick this year. Mostly because I needed new ones but also with lockdowns and COVID restrictions I just haven’t needed new dresses or other new clothes as much. I’ve been enjoying wearing what I have and filling the other holes in my wardrobe. However it has meant my blog and Instagram have been fairly Bra heavy on posts with lots of comments.

One person who sends me messages every time I post a new bra is my cousin Sarah who lives in Canberra. She keeps threatening to come steal my bras so I offered to make her some of her own. She sent me her measurements and I was shocked to find we were almost matching in our sizing. So I grabbed my patterns and got cutting.

I’ve started with the Mara bralet as it’s so comfortable and because I can’t get to Sarah to check the fit I thought it would be easier to start with a soft bra rather than dive into an underwire.

Rummaging through the stash I matched laces to printed meshes and came up with these combinations. Sarah said she didn’t mind if I stuck with my stash and made things in my non matching style.

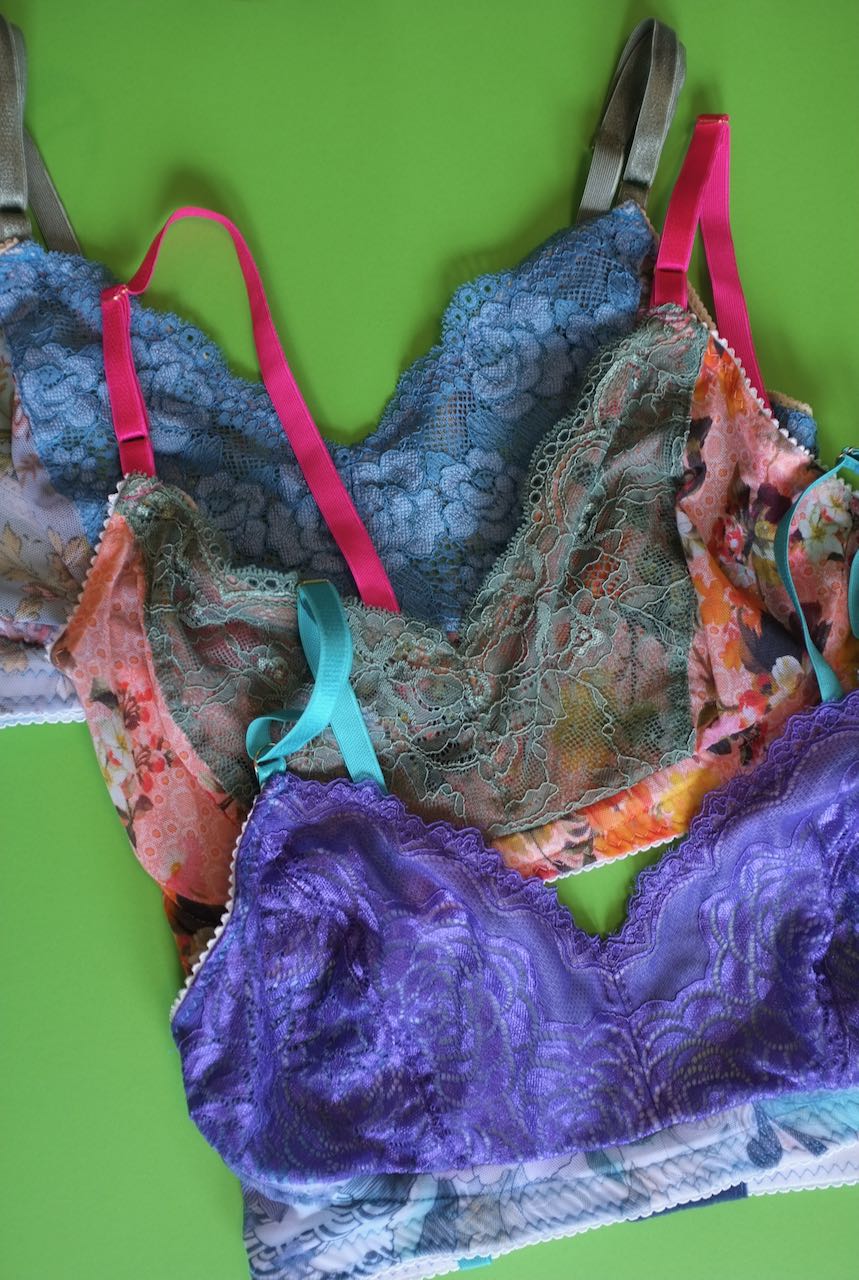
Now to send them off and fingers crossed they fit!

Pattern: Mara bralet from Studio Costura

Fabric: Meshes, laces, trims all from the stash but most likely originally from Pitt Trading. Back closures from stash or Booby Traps

Alterations: let’s see how they fit?

Posted on 2 Comments

Sewing Adventures – sports headbands

Depending on my hair length I need headbands to hold my hair back during workouts or it just bugs me, enter sports headbands. Moisture wicking strips of fabric that keep the hair and sweat out of my eyes. Necessary not sexy. You know what is sexy about them though?

  • they are super fast to make
  • normally they cost quite a lot to buy and yet you can make them out of your scraps
  • they make awesome presents
  • making your own means no more tension headaches because you can get your size perfect

They are sounding pretty good about now aren’t they? You could work out how to make them or you could save yourself a tonne of time and just buy Wendy Wards Rutland Collection PDF

It includes not only the instructions to make headbands but all manner of accessories that you can make from scraps and offcuts and all make wonderful gifts! Quick go get it now!

Pattern: from the Rutland Collection PDF

Fabric: athletic wear scraps from stash and other projects

Alterations: make more for presents because these are mine!

Posted on Leave a comment

Sewing Adventures – kids crop tops

When my niece sent me a message requesting some sports crop tops I immediately went to my Jalie patterns to find one. Not only would it be one of the few patterns I have with kids sizing, they also just work. No faffing about, no issues they just go together and fit really well.

Digging through my athletic fabrics I found some suitable small pieces and got to cutting. The fronts are all double lined with the same moisture wicking fabric. On many printed athletic fabrics there is a white panel along the side (normally where the fabric is wider than the sublimation machine) I use this section of lining to reduce waste.

Everything was overlocked together before encasing some wide elastic in the bottom which was finished with a triple needle coverstitch. I debated if I should add elastic to the neck and armholes, in the end I didn’t and I’m really hoping that decision doesn’t come back to bite me later on.

On the pattern I raised the seam allowance of the neckline and armholes to allow me to turn the fabric back and topstitch it down and an additional 1cm to lower hem to account for the wider elastic I had on hand.

Pattern: Jalie 3247 size 10

Fabric: Moisture wicking athletic spandex from Pitt Trading

Alterations: check and see how the wash and wear went and then decide if it didn’t need additional elastic or not

Posted on Leave a comment

Sewing Adventures – Rifle Paper Co, Travel Pouches

Planning for travel seems like a foolish notion right now but at the beginning of lock down I went through my stash and pulled out some fabrics that need to be sewn up. One of which was this gorgeous hand drawn map fabric from Rifle Paper Co.

I love a hand drawn map, whimsical with promises of exploring it’s right in the wheel house of things I enjoy. Add to that the fact The Englishman spends a great deal of his day looking at or drawing maps as part of his day job and well, a bit of map based fabric stood no chance around here.

Originally purchased from Miss Matatabi I’ve had it stashed away waiting to be something. As always I had elaborate plans and then decided that simple was best. Using a ruler and a rotary cutter I sliced it up so that I could fold each panel. add a zipper, sew along the bottom and the side and have a pouch.

Zips were from the stash hence why there are different colour zip tapes and I used some of the selvedge to neaten off the ends of some of the zippers to give a better finish to the top.

With travel off the cards for quite some time I’ll put these to use as project bags for my embroideries and dream about a time when we are free to explore once again.

Pattern: none just winged it

Fabric: printed panels by Rifle Paper Co originally from Miss Matatabi

Alterations: none

Posted on 2 Comments

My first paper pattern!

It’s a big day, today I release my first paper pattern! It’s been a long journey to get here and I’m very excited.


The pattern is the Maree swimsuit. A great beginner piece to get started on your way to sewing all the swimsuits. I released it some time ago as a digital copy and it’s been a firm favourite since then. It will always be available as a digital option so you can choose which you prefer.

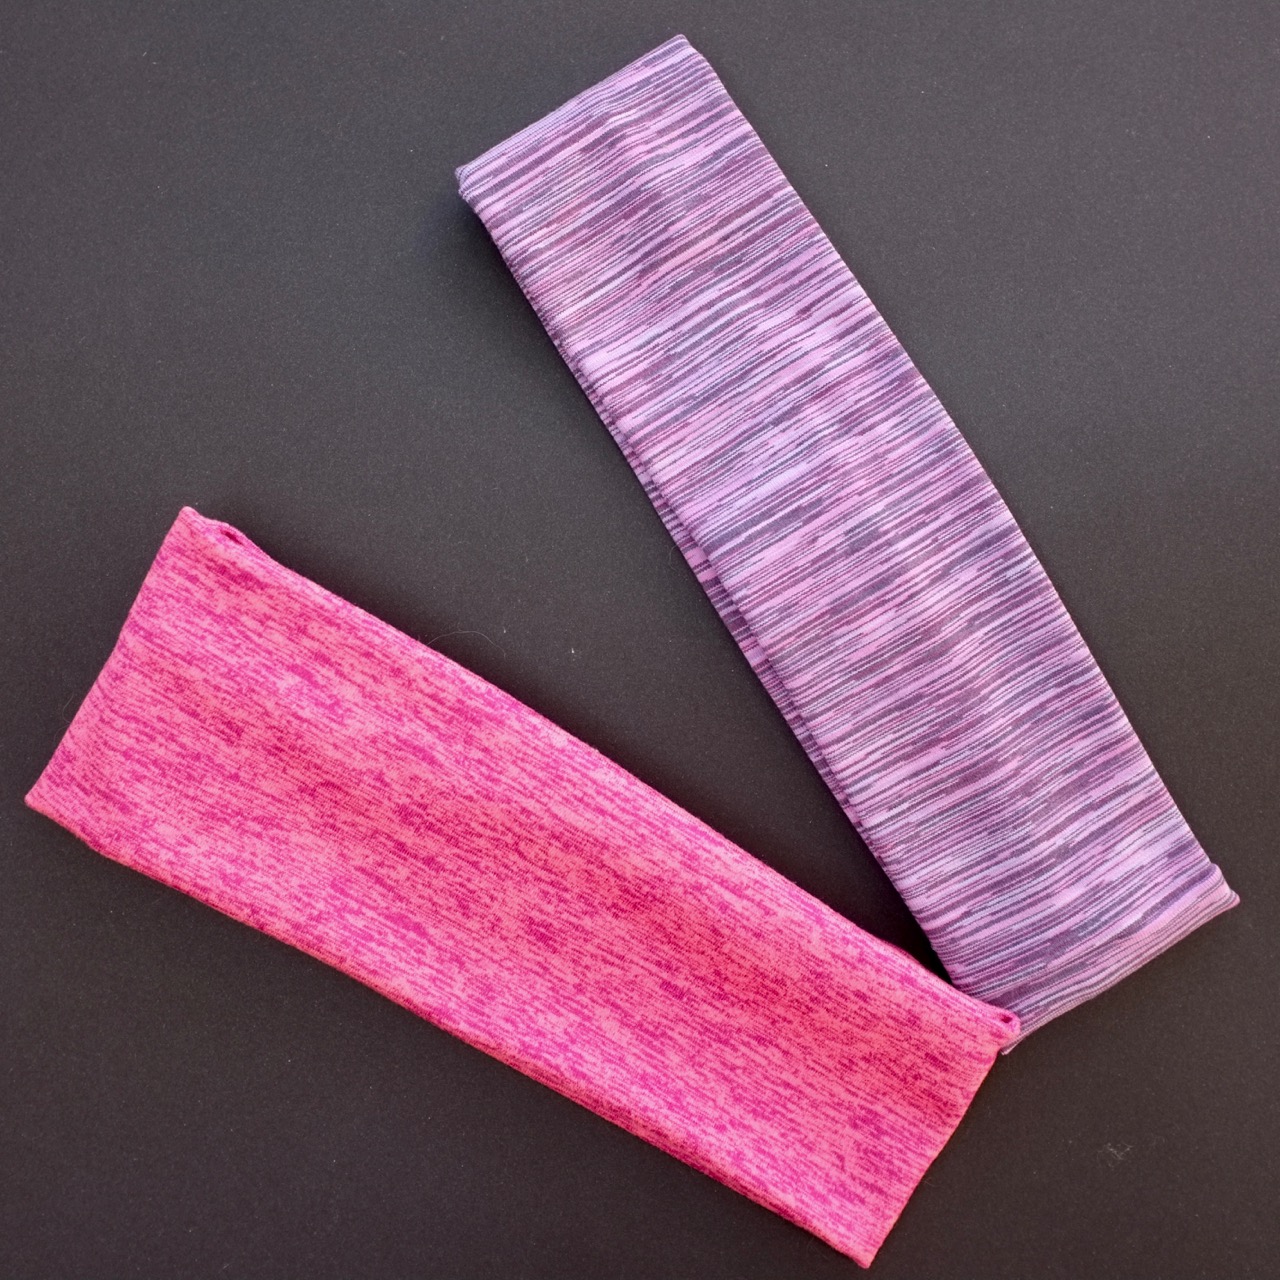
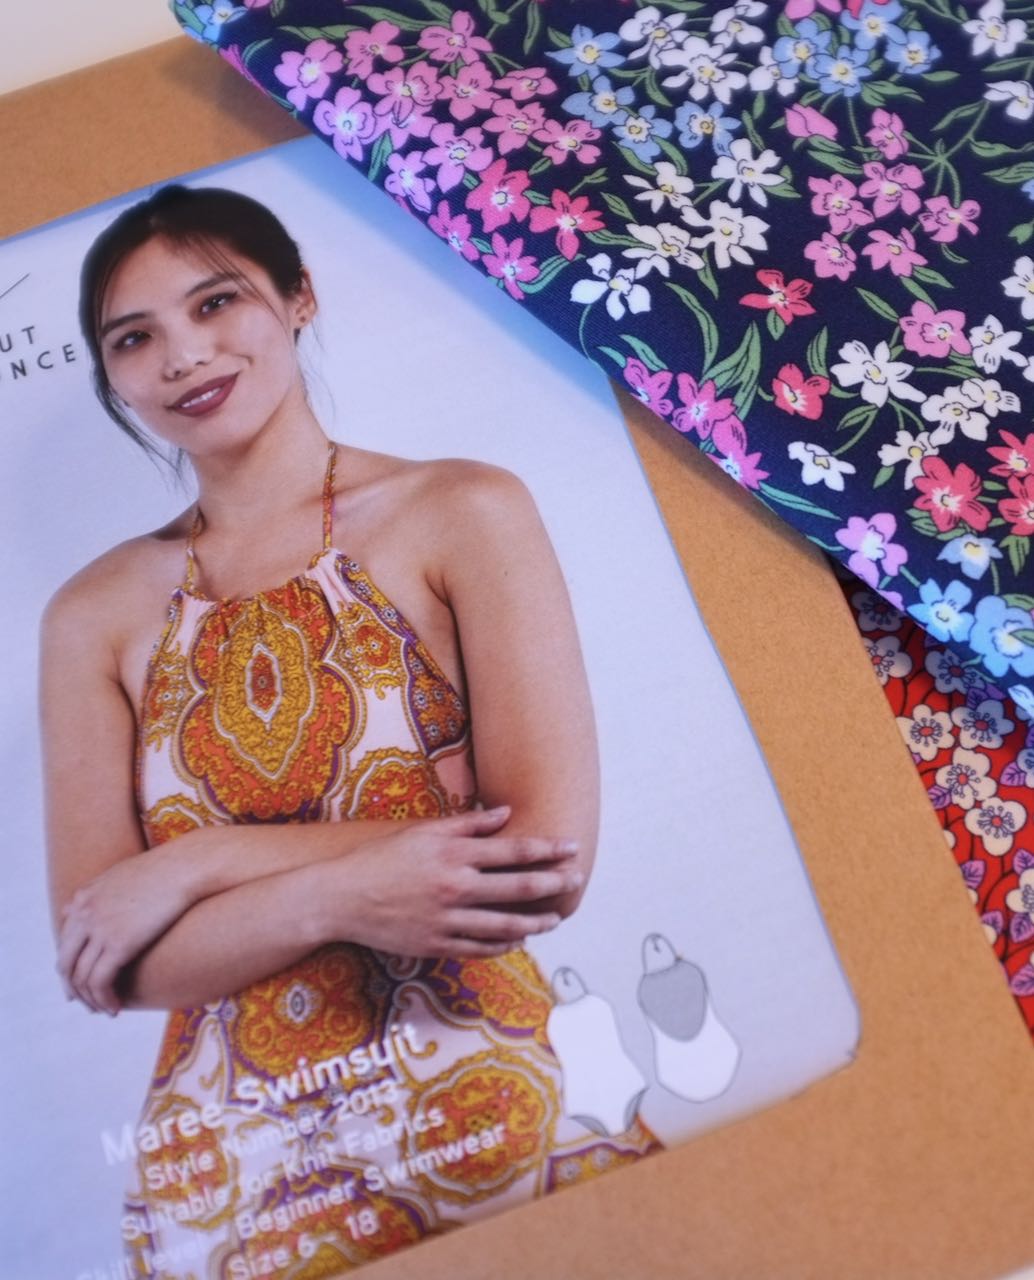
Sizing for this pattern is Australia size 6 to 18. It will not be released as a plus size. Sure I could grade it up and tell you it would work as a plus pattern but I know it won’t. It doesn’t have the necessary structure expected of a plus size swimsuit and trying to retro fit that in now would be disingenuous. I’m not going to give you an inferior plus pattern just by making something bigger, I’m continuing to work on my plus patterns and blocks and when they are ready they will be released digitally.

To start with paper patterns will be sent out each Wednesday, I’m getting them printed on demand here in Sydney. This means we don’t have to carry much stock and it helps give local people a job in a time when everyone needs as much help as they can get it. By shipping once a week it also helps me limit my times I need to leave the house, which I’m still keeping to a minimum despite the situation in Australia being better than it is in other places.

I can’t wait to hear what you all think, please don’t hesitate to drop me a message or leave a comment.

Susan