Posted on 4 Comments

Sewing Adventures: Simplicity 1873

1873_header

A few weeks ago I was doing some procrastisewing (you know, procrastinating by sewing). I’d decided it was suddenly vital to empty the work in progress box and get some of the half mades into something wearable or decide of they were just terrible and cut them into something else.

IMG_6288

This dress has been sitting there since this post where I detailed how I’d cut the sleeves upside down. Well it got put away in a huff and it’s been pulled out a few times but every time I tried it on I felt huge in it. A high neck and sleeves are not my thing. So I pulled out the sleeves, cut down the neck and tried it on again.

Front view

Good enough. I finished the edges with bias binding and popped an invisible zipper into the back. I’ve not sewn in an invisible in an age and was ever so pleased when it went straight in. I use my regular zip foot not one of the special invisible zip foots as I find them way too much drama. Regular zip foot, nice and slow is the way for me.

So I was all excited I had a pretty new dress to wear. I’ve worn it a few times since and until this morning had no idea that this happens at the back.

back view

What an ugly ugly wrinkle. We took these photos on the way out this morning and since coming back I’ve been trying to figure out how on earth I missed such an obvious and fixable wrinkle (back length needs shortening). Well it appears that when I try on my dresses and look at my back in the mirror I round my shoulders. By doing this I lengthen out the back panels and the wrinkle disappears! So lesson learnt, stand up straight and alter that back panel.

Fabric: Japanese Lawn from Spotlight

Dress Pattern: Cynthia Rowley by Simplicity 1873

Alterations: scooped out neck.

Alterations for next time: take length out of centre back panel, don’t take neck scoop quite so wide as some bra straps show at the current width.

Posted on 20 Comments

A day with Simplicty by Brother and Spotlight

simplicitybybrother_header

I’m endlessly fascinated with how stuff gets made, clothes, food, cars, electronics. Those educational type programs on factories are brilliant. I just like seeing the process of how things come into being. So a few weeks ago when I was asked to attend the launch of some new sewing machines I thought it would be a great insight into learning about how the machines came about.

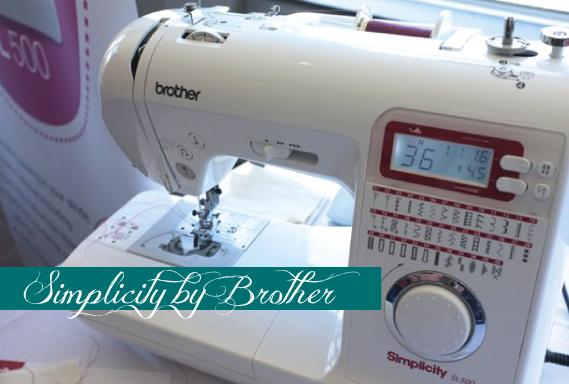
The event was to launch the new collaboration between Brother and Simplicity. Three new machines are going to be co branded and exclusive to Spotlight. Christy has done a fabulous wrap up of the actual machines at Little Betty Sews. They will be called Simplicity by Brother and each machine is aimed at beginner, intermediate or advanced sewers, come with a Simplicity pattern that matches the skill set of each machine.

simplicity by brother sl500

Essentially it’s a good, better, best type program which I’ve dealt with all the time in clothing. It’s all about hitting the correct price points and features to match the price points. Every retailer from supermarkets to hardware has a version of it. Homebrand, known brand, designer brand is what it equates to. In this case it means that the “good” machine is to entice newcomers to sewing. That can only be a good thing, I like that more and more people are learning to sew. What impressed me is that it wasn’t all about the beginner. They have thought about the natural progression of sewing and that there are more than just beginners out that. That showed some smarts as too often things only get aimed at beginners.

button hole demonstration

Overall the entire project has taken over 3 years to come to market. That seems like such a long time to be working on the one project! I was sitting in the audience mentally calculating how many ranges I would’ve designed or worked on during those 3 years. Even for companies where I only design 2 ranges a year that was still 6 seasons ago, that seems forever in my experience. It was insights like that which can make a launch day like this one so interesting. It’s all about learning new things.

launch team

The team from Spotlight were there and they were super knowledgeable not only about their products, but also about different bloggers and what plans they had for the stores. They certainly have some exciting fabrics on the way and I’m so glad. I grew up in a country town where for years Spotlight was the only fabric choice. Sometimes it felt limiting but with a bit of digging around you could turn up some gems.

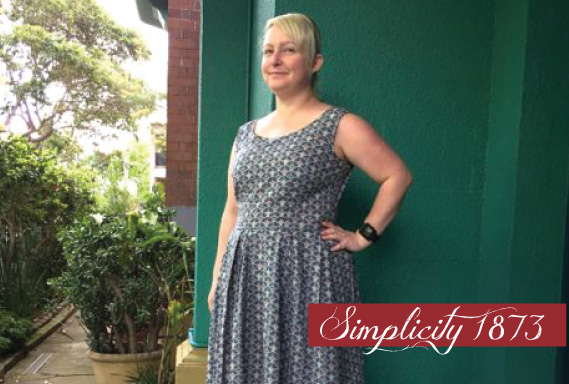
These days I like plenty of their lines, a notable highlight being the Japanese Lawn which I’ve used here, here, here, here, here, here and a bunch of not yet blogged makes. I genuinely like the fabric and find it a great wash and wear basic that suits my lifestyle. In fact I was wearing this dress on the day, it’s my current favourite dress for when I need to look semi dressed up but not too dressed up and for when I don’t want something that will distract me. It was a little weird to have people patting my fabric and talking about how well it sold and citing facts and figures on it. My dress also received one of the oddest compliments. I was told “but it looks as good as store bought and no one would know you made it”. Such a weird compliment to say at a launch of sewing machines? What exactly did they think a sewn dress would look like?

Simplicity by Brother me

If you took a selfie with a sewing machine you went into a competition to win one, this one has 5 kinds of buttonholes so I grabbed a photo on the off chance I may win.

I had a great time hanging out with Christy who was a bit nervous to begin with and was quite the celebrity as so many people recognised her from her excellent blog. The team from Spotlight are certainly reading blogs and seeing what people have to say about their stores/fabric lines and taking it on board. They rattled off a bunch of facts and figures around their customers and honestly I had no idea they were such a powerhouse. There wouldn’t be many bigger brands in retail in Australia that have a following that large.

Overall I found it a really interesting day. I hesitated to write this as a post because I didn’t want it to seem like an advertisement but I also wanted to offer insight into what is happening in the sewing industry and how that translates to my own experiences. It was an interesting day and I hope the whole promotion works to bring more people to the joy that is sewing.

Posted on 16 Comments

Sewing Adventures – Paris Malvarosa dress

parismalvarosa_header

I have dreamt about going to Paris for forever, like forever forever. In my mind I always had it worked out that I could be there in July when it would be summer, I could celebrate my birthday there with The Englishman, the couture shows are on and the Tour de France finishes in Paris. Add in some cheese, bread and pastries and we are pretty much getting close to all my favourite things in one place. So far that is yet to happen, but I have been living vicariously though the Instagram feeds of Roisin and Christine. Jealous much? um yeah, a whole lot of jealous.

So instead of being in Paris for my birthday I found myself in Bondi Junction Spotlight and saw some lovely Japanese Lawn (I adore this fabric so much). Not overly thinking it I saw it as a lovely geometric print…then I realised no, it was mini Eiffel towers with lasers shooting out of it! SOLD!

I needed something fun to make out of it and settled on the Pauline Alice Malvarosa dress as I love the ease of construction, no zips, no buttons! Plus it’s breezy style is perfect for this odd inbetween type weather we are in as I can match it with tights and a jacket and then as it warms up wear it on it’s own.

I finished it up last week and was wearing it to head to a meeting so grabbed 3 very quick photos before I headed out. Only 3 because I had a meeting and it was so windy this day that I couldn’t wait to put my jacket on.

Malvarosa dress 1

I’m standing weirdly and the wind has caught my skirt but I’m pretty happy with the dress. I find the lawn gets a better drape to it after it’s been washed which means the skirt looses some of it’s poufyness at the gathering which is good. The wrinkle above the bust is due to me being slouchy more than anything else.

I didn’t get a back shot but I get some slight pooling at the lower back, am unsure if it’s because the gathering skirt was sticking to my tights or if I could take it in a bit? I’m not bothered by it as I prefer a drop waisted dress to be loose and breezy but I’d like to see if I can fix it?

Much like my last Malvarosa I didn’t bother with the facings, just bagged the whole top out for a clean finish.

One last photo of me trying not to laugh and telling The Englishman to hurry up so I can put on my jacket. The complete derp face photo I’m saving for instagram as it’s just too “what the?” style face. So funny.

malvarosa dress 2


Posted on 22 Comments

Sewing Adventures – disaster time

You know how sometimes you should just go back to bed and pull the cover over your head and hide? Yeah? well that was my week.

I managed to ruin an entire pot of quinoa (yes it’s water and a grain and yes it was really ruined). This was on top of a few cooking disasters earlier in the week.

Then I was merrily finishing off a dress when I realised I had upside down sleeves

upside down sleeve

So I packed up my machine, had a nap and then a cup of tea to contemplate what had happened.

I purchased my normal amount of fabric for a dress. This is Japanese Lawn from Spotlight which I use a lot, so I know exactly how much I need. But I normally don’t have sleeves and this is a directional print. Am sure when I was cutting it out I only just had room for the sleeves and had assumed that I had cut them so they were the right way round. Clearly I hadn’t.

So I can either try and put the sleeves in back to front, they are shaped so this may lead to some fit issues? Or cut the armholes and neck to be the same as my current sleeveless versions of this pattern and not have the higher neck and sleeves.

Either way am not rushing into anything because I really don’t want this to be a disaster dress, it’s too pretty a fabric for that.

So tell me, did you have a disaster weekend too or was it just me?

Posted on 1 Comment

Sewing Adventures – The Jane Knickers

trioofTheJaneKnickers

I decided to add something a little cuter to my sleepwear so whipped up these three versions of The Jane Knickers.

TheJaneKinckers_greencheck

The green checked looked ok but was a little flat so I added a decorative topstitch to the yoke in a magenta thread to match the magenta lingerie elastic I was using for the waistband. You’ll see on all three versions I have created pleats in the front panels where it joins to the yoke. On the pattern it says to gather these pieces but I wanted to show that you can vary them up by pleating as well.

TheJaneKnickers_foldedElastic

The pale check is super sweet vintage fabric that I actually made a top in (that is waiting to be blogged). I used the remainder to cut out The Jane Knickers. I find it a little pale so I like to add a touch of colour on the waist elastic. This elastic is a folded elastic that has a decorative bobble edge. It’s one of those trims that I keep hanging on to and yet never get around to actually using. So I bit the bullet and used it here. The folded elastic works fine instead of the lingerie elastic. Just be careful to check the stretch. You’ll notice these ones look a little bigger than the others? they are the same size I just had to ensure not to stretch it too tight as I was topstitching it in as it doesn’t have the same stretch properties as the other elastic I was using.

TheJaneKnickers_JapaneseLawn

I dropped by Spotlight on the Easter long weekend with the idea of buying a zip, I came home without the zip (didn’t have the colour and size I needed) but with more fabric! This one is a Japanese Lawn which I adore and it was on special. They are so soft and yet not see through and make up beautifully. I cut a dress out of this fabric and then used up the leftovers for these knickers. On the front yoke I have added in a centre front seam and topstitched down the seam allowance. I couldn’t quite fit the yoke in the scraps so I managed to maneuver it in by adding a seam. Then added the bright green elastic because it is such a fun colour.

The mix and match of elastics helps tie the colours and fabrics together and you’d never know they were made out of leftovers!


Posted on Leave a comment

Sewing Adventures

Well it seems I have gone from no skirts to a little bit of a skirt obsession (can 2 be an obsession? or is it more of a set?) I’ve gone from no skirts to 2 skirts in under a fortnight!

pattern runway skirt

This latest creation is based on Pattern Runway free skirt pattern and made up in some voile from a recent Spotlight purchase. It seems to be a popular fabric with it popping up on Top Notch and Sew Brunswick and a number of sewers on Instagram and Twitter seem to have scooped some up too.

First up the pattern, I made a few small adjustments. I didn’t bother with the side seam pockets. The fabric is very lightweight and I was worried if I had pockets and put something in them and then was riding on my bike to do messages that the stuff would either fall or or potentially damage the lightweight fabric.
I shortened the length by about 20cm, and it is now just below knee length. No the pattern isn’t giant, I’m just really short.
I added about 5cm width to the centre front and centre back of the skirt but not the waistbands or the lining.The fabric is so lovely and lightweight and the pattern so pretty that I thought a few extra gathers won’t matter. Plus with the voile lining had the potential to make the skirt slightly less transparent. I used white voile for the lining and cut the waistband in the white, interfaced that and then placed the coloured voile on top. This way I got the strength I needed but I didn’t ruin the coloured fabric by being able to see the interfacing through the waistband.
Sewing it was very simple, in fact the hardest thing was locating a new extra fine needle to go into the machine to ensure a nice sharp stitch. The elasticated back makes it very comfortable and has the added bonus of not needing to put in zip or buttons! I did a smaller double turn hem as I thought it would work better in the fine fabric.

I really like it and am already planning to make another version. The pattern is fabulous and I cannot recommend it enough, not only is it a cinch to sew it’s free! So fab!

Hope you all had a productive weekend of sewing too?

Posted on 1 Comment

Sewing Adventures

I have been trying hard to not show any of of my handmade Christmas presents pre Christmas but this one is too cute not to share.

Figgy etherealLast week on Twitter I saw a link to the new release of Figgy’s Heavenly Collection. The Ethereal dress and blouse just stood out for me so I snapped it up and thought it would make a brilliant present for one of my nieces. Plus isn’t that red headed little model just the cutest?

Of course this meant finding the perfect piece of fabric. I couldn’t find anything in the stash that seemed right so I headed to Spotlight. I found a sweet stripe with little cherries all over it, a pretty floral, a stripe basically a whole bunch of stuff and none of it felt right, I even called my brother to see what he suggested (that’s a first right there). I had seen this pale lemon printed with large metallic yellow dots early during my search but it felt a bit stiff. However I just kept coming back to it, so I decided it was the one. The photos don’t really capture the metallicness of the dots but they have a real shimmer to them.

After some quick phonecalls to my mum and my brother to determine my nieces current size I assembled the pattern and went for it. The construction itself was quite straight forward but I made a number of changes to the Figgy’s construction method.

– added the gathers to the lower skirts and then attached them to their respective tops using french seams

– double turned the frill outer edge eliminating the overlocking/serging as I thought that the extra stitching would show through when pressed

– machine basted the frill onto the front neckline and armhole

– added the button loop using some patterned bias binding and bused the same bias to finish the back slit

– french seamed the shoulders

– bound the armholes using the patterned bias

– french seamed the side seams

– double turned the lower hem

– bound the neckline using the patterned bias

I did all the binding as the top is meant to be lined but this niece is in Queensland, and summer in Queensland is all high temperatures and humidity. The thought of extra layers was all just too much, so I just took them out. The added bonus of being able to use a patterned bias binding on the inside was also a factor as I totally love bias!

The french seams was mostly because I could but also because the printing is a little stiff. It will totally soften with a few washes but if I had just overlocked/serged the edges I was worried a small person might find them scratchy (and seriously who wants to be the person who gave the kid “that scratchy top”). Plus they look all pretty and professional.

french seam

Overall I am pretty happy with it and IĀ  hope my niece likes it too!

Posted on Leave a comment

Sewing adventures

I thought each Monday morning it would be nice to have a bit of a recap on my weekly weekend sewing adventures.

simplicity 2178 measuretwicecutonce

This weekend I finished a project that has been on the almost done pile for quite some time.

It is a mushroom,white and lilac Japanese print cotton I picked up at Spotlight about 2 years ago. It’s super cute as there are little tiny birds in the print. The dress was a breeze to put together and I love love that all the Cynthia Rowley patterns have pockets in the dresses. I’m guessing that the bow will become slightly annoying to keep tying it each time I wear the dress and am toying with the idea of getting it right once and then just hand stitching it in place?

Despite being a breeze to put together it wasn’t until I went to photograph this dress that I realised I had made a mistake. I’ve added the zip to the non bow side. Getting in and out of it is a 2 person job! So last night I unpicked the zipper and will be installing it on the correct side today, thank goodness for a long weekend so I can finally finish this dress.