Posted on 2 Comments

Named Clothing – Beverly Twisted Bikini Sewalong, adding elastic to the bottoms

NamedBeverlyBikiniSewalong_header

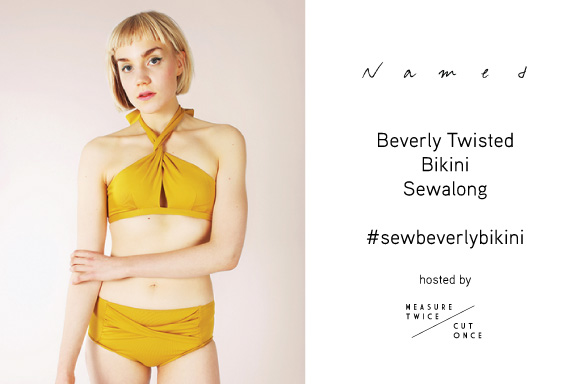
How’s everyone going so far with their bikini’s? Don’t forget to share all your progress on social media using the #sewbeverlybikini hashtag.

In this installment of the sewalong we are tackling the elastic on the bottoms. The most important thing to remember when using swimwear elastic is to not stretch it. It is to be put in under tension (by very gently pulling it) but not stretched. If you’ve pulled so hard that the width of the elastic has decreased then you’ve pulled too hard.

Start by pinning your lining in position. Here on the front you can see the lining is cut without the seam allowances. I’ve done the back differently so you can see 2 ways of attaching the lining/elastic.

pining the lining in place

I’m using my overlocker to attach the elastic. Line up your elastic underneath the foot but not right on the edge of the garment. It’s actually easier to cut off a slither of the fabric while attaching the elastic. If you line the elastic right to the edge it is way too easy to cut into the elastic and that way causes dramas.

lining up the elastic

I always attach my elastic in the flat and once I get back to the start point I just lap the elastic over and run the overlocker off the edge. It’s by far the easiest and flatest way to do it. Flat is good as elastic joins tend to poke in and get uncomfortable.

lapping over the elastic

The instructions had you cut your lining slightly smaller than the outer garment. This means the elastic sits only on the outer fabric and not on the lining.

with lining named way

elastic at front

Personally I find this method slightly more difficult as you have to make sure the lining tucks in when you do the topstitching.

An alternative is to cut the lining the same size as the outer fabric and catch it as you add the elastic in. I find this easier to sew and it stays in place no matter how active a swimmer you are as it’s anchored evenly across the entire pant. This is the back where the lining was cut the same size as the outer.

elastic with lining my way

elastic in legs and waist

Once you’ve attached your elastic it’s time to fold it down in preparation for topstitching. Lycra plus clear elastic often makes for it difficult to pin through. You could use quilting clips to hold it in place or even just clothesline pegs.

For topstitching you can use a twin needle, a zig zag or a 3 step zig zag. I’m going with my 3 step zig zag as I like the way it looks. When you are topstitching you don’t have to pull or stretch the fabric, you do have to ensure you keep a straight edge. Where the elastic is tucked under it tends to like to roll, if you let it you end up with a ropey looking edge and get puckers. Make that edge nice and smooth as you topstitch and it will look beautiful and professional.

topstitching

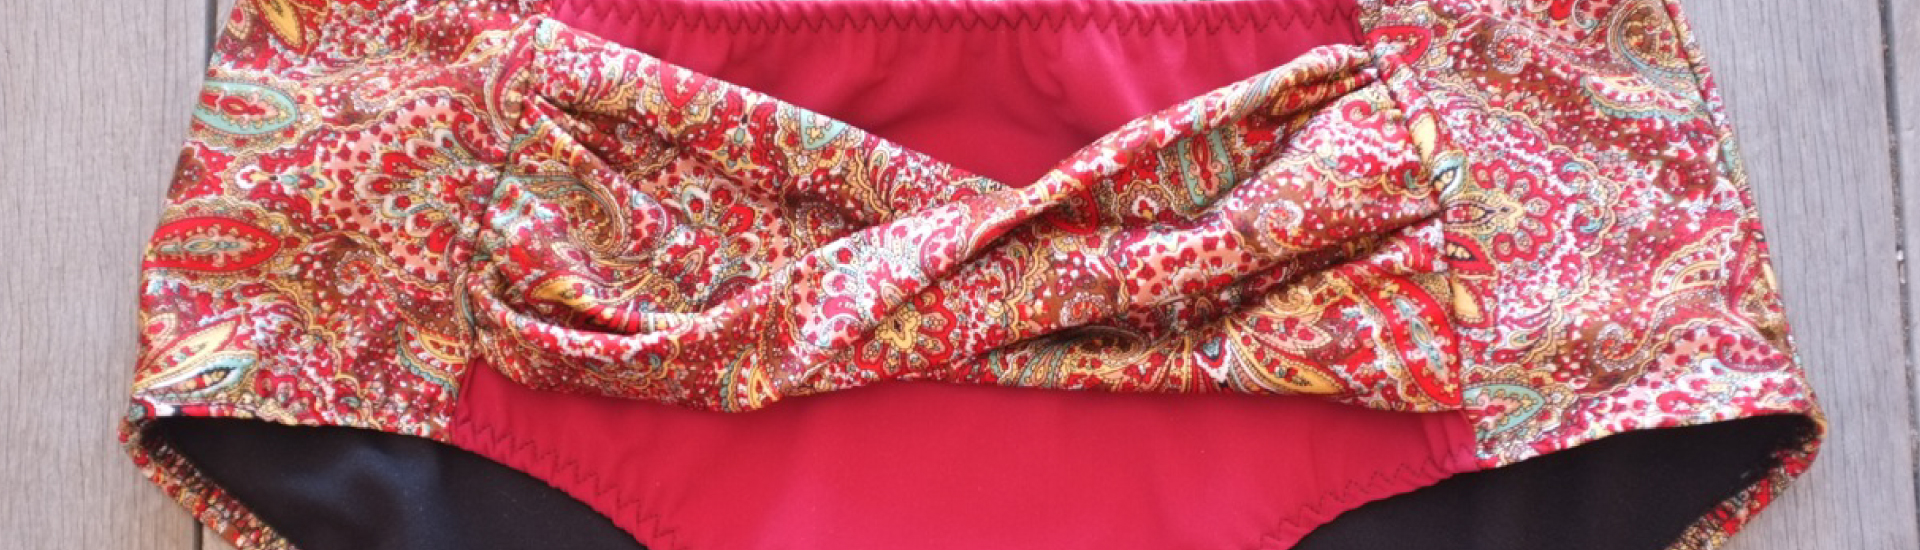
After topstitching I’ve gone back and checked my lining to ensure it is flat and even. On the back where the lining was cut the same size as the outer. It sits flat.

back lining

On the front where the lining was cut smaller it looks ok but there are a few places where the lining hasn’t been caught into the topstitching. You can see it on the left hand side of the crotch and the upper left hand side of the waist.

lining poking out

Here is the finished pant.

finished pant

If you have any questions about the elastic application just ask in the comments, next time we will be moving onto the top.

Still need your pattern? Named have set up a 20% discount code on PDF and printed patterns of the Beverly Twisted Bikini that can be redeemed until the 10th of February. Just use the code sewbeverlybikini at the checkout.

Stitch56 are also offering 20% off the paper pattern with the code BIKINI

Share your choices on social media using the hashtag #sewbeverlybikini so we can see what everyone is making.


Posted on Leave a comment

Named Clothing – Beverly Twisted Bikini Sewalong, making a higher rise pant

NamedBeverlyBikiniSewalong_header

Thank you for the great response to the sewalong, I hope you are enjoying it?

A few people have requested a more high rise style pant bottom for a bit more coverage. So here’s how to achieve a higher pant.

First trace out the size that you require according to the size chart included in the pattern. For the adjustment we need the front, side front and back to start with. Mark in 2 places where you are going to add the extra height.

Why 2 places? you want to keep the balance of the style intact and if you just put it all on the top it can result in a weird look or odd fit.

making-pants-high-rise

On your body measure from crotch to the desired height of your pant. Measure the current pattern pieces. If you need to add say 5cm in height then split that measurement between the 2 lines marked for adding the extra height.

Here the grey lines indicate where the extra height has been added, don’t worry about the side seam we are going to fix that in the next step.

making-pants-high-rise-1

Next we are going to reshape the side seam. You are aiming for a nice smooth line from hip to waist. Since the pant is now higher the waist will need to come in a bit to account for the tapering of your body towards the waist. If the difference between your hip to waist is large, measure your waist and taper in the seam according to your measurements.

The blue line is the smoothing of the side seam and the gradual taper for the waist. I’ve taped both the front and side front panel so that the front panel doesn’t get too wide in comparison to the side panel. It’s all about maintaining the balance of the design.

making-pants-high-rise-2

Double check all your adjusted seams to ensure that all match each other in length so your bikini will fit back together correctly. Re mark all pattern markings including the positioning of the front twisted panel.

making-pants-high-rise-3

Now you have a higher rise bikini pant! Once you’ve got the outer panels all sorted, follow the same principals to increase the height of your lining too.

If you’ve got any questions or need clarification on anything just ask and I can help you out.

Still need your pattern? Named have set up a 20% discount code on PDF and printed patterns of the Beverly Twisted Bikini that can be redeemed until the 10th of February. Just use the code sewbeverlybikini at the checkout.

Stitch56 are also offering 20% off the paper pattern with the code BIKINI

Share your choices on social media using the hashtag #sewbeverlybikini so we can see what everyone is making.


Posted on Leave a comment

Named Clothing – Beverly Twisted Bikini Sewalong – Part 1

NamedBeverlyBikiniSewalong_header

Welcome to the Beverly Twisted Bikini sew along! I do hope you are going to enjoy making your own bikini. Don’t forget if you want to join in, you can use the discount code sewbeverlybikini at the named clothing site to purchase the pattern.

Before we get to cutting out the fabric, check your sizing and assemble your pattern.
named Beverly bikini sewalong - 02

Some of you may find you will be a different size top to bottom, I’m cutting a 46 bottom* and a 44 top. Part way through the bottoms I’m going to try them on to see if I need to adjust the sizing as I like quite a firm fit on my bikini bottoms so I can swim with no worries. The seam allowance is included in the pattern (I’m using the PDF, if you are using the paper pattern please double check if seam allowance is included before cutting) so you can cut or trace without having to add the seams afterwards.

We are going to start with cutting out the bottoms including the lining. Before cutting your lining, read the post adding the elastic to the bottoms as there are 2 methods of lining used there and it makes a difference to your cutting. I’m using this stunning red paisley from Pitt Trading with a contrast centre front panel in a matte dark red also from Pitt Trading.

IMG_7726
Here are all my panels ready to go. When cutting be sure to cut with the greatest stretch going around the body. If you are dealing with a tricky print and want to avoid unfortunate print placements try cutting out your pattern piece in tracing paper. Cut it as a whole piece not place on fold and you will find you can see through the tracing paper to the print and avoid the poor print placement choices.

named Beverly bikini sewalong - 05
Starting with the Twist panel we are going to put ride sides together and sew along the top edge. I’m using my overlocker but you can use the stretch stitch on your regular machine if you would prefer.

DSCF8578
Turn the tube right side out and give it a press

named Beverly bikini sewalong - 07
Using a straight stitch add rows of gathering or basting stitches to either end. Pull the bobbin thread to create the gathers until you’ve gathered it in enough fit into the side of the centre front panel.

named Beverly bikini sewalong - 08
Twist the panel once and pin or baste it into place. Make sure you hide the seam of the band so it won’t be visible on your finished bottoms. Pinned in place you can see it buckles the front panel slightly. Once I put them on this buckling was not noticeable at all and the twist sat nice and flat to my body and didn’t sag forwards so don’t worry about the buckling.

named Beverly bikini sewalong - 09
Position side panels and sew in place.
named Beverly bikini sewalong - 11

named Beverly bikini sewalong - 12

Take front lining and crotch lining, sew seam.
named Beverly bikini sewalong - 14

Place front panel and back panel of main fabrics right sides together, matching at crotch. Take front and back lining fabrics, right sides together match at crotch and place them on top of the main panels.

named Beverly bikini sewalong - 15
Stitch through all layers.

When you open them up the seam you’ve just sewn should be tucked inside the lining so no exposed seams are on the inside of the swimmers.

*If you need to check your sizing, pin or baste your side seams and pop them on. You want them to feel firm but not tight. The stretch of your fabric must be used, if they feel loose when they get wet they may not stay in place. Mine could be a little firmer so I’m going to take an extra seam allowance from the side seams.

Using the same technique you’ve just used to sew the crotch, sew the side seams so all internal seams are encased inside the lining.
named Beverly bikini sewalong - 16
In the next installment we will be attaching the elastic and finishing up the bottoms before heading on to do the top. If you’ve got any questions or queries just ask in the comments.

Don’t forget to share your makes on social media using the hashtag #sewbeverlybikini


Posted on Leave a comment

Named Clothing Beverly Twisted Bikini Sewalong – discount codes

NamedBeverlyBikiniSewalong_header

Still need your pattern? Named have set up a 20% discount code on PDF and printed patterns of the Beverly Twisted Bikini that can be redeemed until the 10th of February. Just use the code sewbeverlybikini at the checkout.

Stitch56 are also offering 20% off the paper pattern with the code BIKINI

Share your choices on social media using the hashtag #sewbeverlybikini so we can see what everyone is making.

Posted on Leave a comment

Named Clothing Beverly Twisted Bikini Sewalong – getting started

NamedBeverlyBikiniSewalong_header

Super exciting that so many of you are going to take the plunge into making your own swimwear. You will not be disappointed.

Before we get to the sewing there is a few things we are going to need

First up the pattern. Named have set up a 20% discount code on PDF and printed patterns of the Beverly Twisted Bikini that can be redeemed until the 10th of February. Just use the code sewbeverlybikini at the checkout.

• Fabric: 95 – 120 cm / 1 – 1½ yd
• Lining: 35 – 40 cm / ½ yd
• Fusible knit interfacing: 10 cm / 4”
• 15 mm / ½” wide elastic band: Your chest measurement (measure under the bust)
• Clear elastic: approximately 300 – 350 cm / 120 – 130”
• 1,5 cm / ½” clip clasp
• 8 mm rigilene boning: 20 cm / 8”

We will be starting with making the bottoms so it gives you a bit of extra time to source some boning and bikini clasp as those are the pieces people have already asked questions on where to source them.

Not on the list but highly recommended is a knit fabric specific sewing machine needle. As many patterned swimwear fabrics are sublimation printed they have a coloured top and a white underneath. Using a new sharp fine needle means any needle penetration marks are small and lessons the chances of having any of that white peep through at the seams or hems.

Fabric choice makes a big difference with swimwear, you want to ensure that you get a quality 2 way stretch knit lycra/elastane/spandex with good recovery. Because the style includes twists choose a fabric that has a nice drape and isn’t too thick. Ideally you are looking for a fabric that is not see through, can be stretched a lot and still spring back into place.

Swimwear lining is soft almost crepe like in feel and often comes in black, white or cream. It’s great as it dries super fast and doesn’t add bulk. If you can’t source this try getting a very lightweight lycra jersey. I’ve used this before in swimsuits and it works quite well. Lastly if you are aiming for a super slick all white bikini consider double lining to add an extra level of opaqueness to your bikini.

The lovely ladies of Pitt Trading offered me my choice of fabrics for the sewalong, so hard to choose from all the beautiful prints they have instore. If you drop in or order on the online store (yes they post internationally) and need all the extras such as elastic, boning and other trims added to your order just let them know and they can arrange that. If you are instore a full list of all the components is behind the counter just in case you forget yours.

Some of the choices on offer

IMG_7726

IMG_7541

IMG_7447

Other places to source swimwear fabrics from include Spandex House (USA) or Funki Fabrics (UK). Check your local fabric store too.

I hope this helps everyone figure out what they need to join in the sewalong, any questions just let me know. Share your fabric choices on social media using the hashtag #sewbeverlybikini so we can see what everyone is making.

Tomorrow we get to sewing!

Posted on Leave a comment

Announcing the Named Clothing Beverly Twisted Bikini Sewalong!

NamedBeverlyBikiniSewalong_header

Here in Sydney the weather is warm and it’s bikini time! Spurred on by Jillian from Sew Unravelled and Kirsty from kbfield we approached the team at Named Clothing to have a sewalong of their Beverly Twisted Bikini.

Named have set up a 20% discount code on PDF and printed patterns of the Beverly Twisted Bikini that can be redeemed until the 10th of February. Just use the code sewbeverlybikini at the checkout.

I’ll be taking you step by step through the construction and will be on hand to answer any questions you may have. You can share your makes on social media using the hashtag #sewbeverlybikini so we can see all the gorgeous bikini’s being created.

Grab a button for your website and later today I’ll be back with some guides on choosing the best fabrics for your bikini and all the notions you will need.

<a href=”http://www.measuretwicecutonce.com.au/2016/02/announcing-the-named-clothing-beverly-twisted-bikini-sewalong/”><img src=”http://www.measuretwicecutonce.com.au/wp-content/uploads/2016/02/named-Beverly-website-button.jpg”/>

named-Beverly-website-button


Posted on 2 Comments

Sewing Adventures: Nookie bikini


nookie_bikini_header

When you wake up to a cold, grey and wet day with a to do list that is a mile long, well naturally you shove all that aside and make a swimsuit sample don’t you?

Nookie bikini - 09

Years ago one of the very first issues of Frankie magazine came with a free swimsuit pattern. This pattern has been languishing in my stash since then.

Nookie bikini - 01

The pattern was based on a bikini by Nookie an Australian based swimsuit brand. The construction is remarkably straight forward. Cut out matching panels, stretch stitch them together and turn them out to create a reversible bikini.

Nookie bikini - 07

Nookie bikini - 12Made with more of the lush lycra from Pitt Trading I opted for a pink bandana style print on one side and a tropical floral for the other side. I’d actually be super tempted to make either of these into a one piece as well because I like the prints so much.

The top worked really well and fits me fairly well (though I was way too cold to photograph myself in it. Later in the summer will be sure to get some poolside pics).

Nookie bikini - 10Nookie bikini - 02 The bow in the centre is slightly smaller on me and I didn’t gather the sides as much to give myself a bit more coverage. But it’s as good as any ready to wear bikini I already own.

The pants are ok. A little lower at the front than I would prefer.

Nookie bikini - 11Nookie bikini - 03Nookie bikini - 14Nookie bikini - 05

They are held up with the side bows as there is no elastic in the waist.

Nookie bikini - 04

This feels a little flimsy. Possibly ok if you were just dunking yourself under water and then sitting on the beach but if you actually wanted to swim or dive or move around then there could be some problems? I’m also not keen on the roll top look you get with reversible bottoms.

Nookie bikini - 06

It just seems really sloppy and like bad DIY. Certainly not a finish I would aspire to. I might see how unpicking the top and inserting some clear elastic into the seam goes?

Pattern: Nookie bikini free from Frankie magazine

Alterations: didn’t make self fabric straps but used a matte elastic instead.

Fabric: Printed polyester Lycra provided by Pitt Trading Thanks for letting me have some of your lovely fabric to play with. It’s so soft and lush feeling but goes through the machine like a super stable knit.

Am really enjoying making swimsuits, will have to find some more patterns to try out!


Posted on 3 Comments

Sewing Adventures – Alison Swimsuit

burdaswimmers_header

Wow just wow, I almost don’t have words for how bad the instructions and pattern for these BurdaStyle Alison swimmers are. I expect Burda instructions to be brief and I’m fine with that as I rarely read pattern instructions to begin with. But when the pattern pieces themselves are mislabeled, missing information, have spelling mistakes and in some cases have no label at all. Well I was skeptical.

That skepticism was warranted. So I threw out the instructions, labelled the pattern pieces correctly and got cutting. These swimmers are going to be an instore sample for Pitt Trading. I work there a few days a week and they just took delivery of the most amazing collection of designer lycra.

front view

This floral is beautiful, has a beautiful thick handfeel but with good drape and stretch. The print is on the oversize side so grab a little extra to ensure you can centre your print for maximum impact. I matched it with a contrast colour to emphasise the bust gathers and wide straps.

front gathers

My lovely model here is a few sizes smaller than what I made so she isn’t filling out the bust or bottom quite right. I’m not happy at all with the wide band at the lower back gaping. I think I perhaps I need to stretch it some more or possibly it flattens out on someone with more curves?

back view

back gape

The way I’ve added the band to the swimsuit and then up into the neck ties is not great. It looks clean but it just felt overly complex to sew. It’s one of the areas I’ll take a look at to improve construction of the next time.

side gathersI overlocked the leg opening with elastic then turned it under and added a 3 step zig zag topstitch. It was so neat and easy that I’m using it as my go to swimwear finish.

leg finishing

Despite the pattern dramas I think it’s a really cute swimsuit. I’m hoping I get some time to write down my method of assembly so I can remember what I did when I make another pair.