Posted on 5 Comments

Sewing Adventures – Soma Swimsuit and Bikini

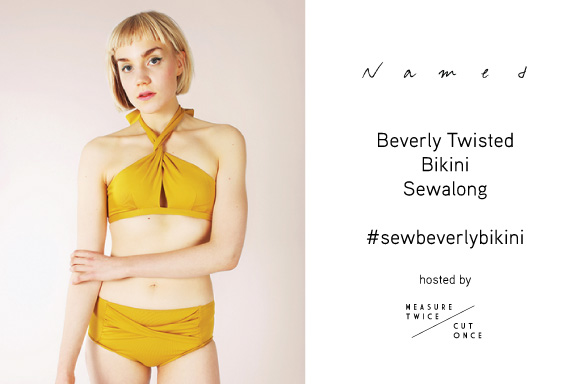
Over this summer I’ve been making plenty of swimsuits. I’ve taken up paddleboarding which I find it wonderfully relaxing and enjoyable. With views like this it would be hard not to. It also means new outfits were needed.

Sydney Harbour

I enjoy making swimmers and it’s so nice to use the gorgeous prints from Pitt Trading.

lycras from Pitt Trading
One of the styles I tried was the Soma pattern from Papercut patterns. I measured myself, I measured the patterns, I went by the guide and I cut myself the one piece.

papercut patterns Soma swimsuit
It’s huge. Like 2 or 3 sizes too big. It uses none of the lycras stretch at all. When I try it on it feels slack and if I added water it would most certainly fall down. The back gapes open as the cross over straps are not tight enough to sit flat. It’s clearly way too big.

IMG_6791

IMG_6792

soma back

Not too discouraged I cut out the bikini. I went down a few sizes and tried them on part way through the process and took them in some more. This worked much better, the stretch of the fabric was now being used and they sat firmly. I’d say I ended up cutting an XS which is a bit shocking as I’m not an extra small size.

soma bikiniThis photos is before I added the straps.

Now for the true test, in the water. The bottoms were quite good. I have a slight issue at the lower leg at the back, the elastic tends to fold back when I walk, swim or paddleboard. Not a huge problem but I like my swimmers to stay in place during activities. The bottoms come up nice and high and give good waist coverage.

DCIM119GOPRO
This is a GoPro photo from when I’m out paddleboarding. I like the fish eye effect but it makes for terrible selfies, hence the no photos of me in the bikini shots.

The top was ok, if I make it again I’d potentially do a Full Bust adjustment as I felt less than secure and covered while swimming and moving around. Not badly but just felt like I wanted to keep hiking the top up as I didn’t feel support/covered enough?
Overall the patterns went together well and the instructions were clear. However the sizing doesn’t seem to take into account the stretch of the fabric adequately? I’d certainly recommend trying on your swimwear mid way through your sewing process and adjust as necessary.

The fold over elastic for the one piece makes getting a neat edge super easy and is a great technique.

soma swimsuit foldover edge

Fabric: Lycra from Pitt Trading

Pattern: Papercut Patterns Soma swimsuit as one piece and bikini.

Alterations:  One Piece – size down a few sizes, fill in back panel and not have the thin cross over straps. More support there would be helpful in not having the swimsuit move around so much during activities.

Bikini – full bust adjustment on top and potentially add to the cups to give more of a full coverage? Reshape lower back leg so it doesn’t fold over.

Posted on Leave a comment

Named Clothing – Beverly Twisted Bikini Sewalong, making a higher rise pant

NamedBeverlyBikiniSewalong_header

Thank you for the great response to the sewalong, I hope you are enjoying it?

A few people have requested a more high rise style pant bottom for a bit more coverage. So here’s how to achieve a higher pant.

First trace out the size that you require according to the size chart included in the pattern. For the adjustment we need the front, side front and back to start with. Mark in 2 places where you are going to add the extra height.

Why 2 places? you want to keep the balance of the style intact and if you just put it all on the top it can result in a weird look or odd fit.

making-pants-high-rise

On your body measure from crotch to the desired height of your pant. Measure the current pattern pieces. If you need to add say 5cm in height then split that measurement between the 2 lines marked for adding the extra height.

Here the grey lines indicate where the extra height has been added, don’t worry about the side seam we are going to fix that in the next step.

making-pants-high-rise-1

Next we are going to reshape the side seam. You are aiming for a nice smooth line from hip to waist. Since the pant is now higher the waist will need to come in a bit to account for the tapering of your body towards the waist. If the difference between your hip to waist is large, measure your waist and taper in the seam according to your measurements.

The blue line is the smoothing of the side seam and the gradual taper for the waist. I’ve taped both the front and side front panel so that the front panel doesn’t get too wide in comparison to the side panel. It’s all about maintaining the balance of the design.

making-pants-high-rise-2

Double check all your adjusted seams to ensure that all match each other in length so your bikini will fit back together correctly. Re mark all pattern markings including the positioning of the front twisted panel.

making-pants-high-rise-3

Now you have a higher rise bikini pant! Once you’ve got the outer panels all sorted, follow the same principals to increase the height of your lining too.

If you’ve got any questions or need clarification on anything just ask and I can help you out.

Still need your pattern? Named have set up a 20% discount code on PDF and printed patterns of the Beverly Twisted Bikini that can be redeemed until the 10th of February. Just use the code sewbeverlybikini at the checkout.

Stitch56 are also offering 20% off the paper pattern with the code BIKINI

Share your choices on social media using the hashtag #sewbeverlybikini so we can see what everyone is making.


Posted on 2 Comments

Sewing Adventures: Nookie bikini


nookie_bikini_header

When you wake up to a cold, grey and wet day with a to do list that is a mile long, well naturally you shove all that aside and make a swimsuit sample don’t you?

Nookie bikini - 09

Years ago one of the very first issues of Frankie magazine came with a free swimsuit pattern. This pattern has been languishing in my stash since then.

Nookie bikini - 01

The pattern was based on a bikini by Nookie an Australian based swimsuit brand. The construction is remarkably straight forward. Cut out matching panels, stretch stitch them together and turn them out to create a reversible bikini.

Nookie bikini - 07

Nookie bikini - 12Made with more of the lush lycra from Pitt Trading I opted for a pink bandana style print on one side and a tropical floral for the other side. I’d actually be super tempted to make either of these into a one piece as well because I like the prints so much.

The top worked really well and fits me fairly well (though I was way too cold to photograph myself in it. Later in the summer will be sure to get some poolside pics).

Nookie bikini - 10Nookie bikini - 02 The bow in the centre is slightly smaller on me and I didn’t gather the sides as much to give myself a bit more coverage. But it’s as good as any ready to wear bikini I already own.

The pants are ok. A little lower at the front than I would prefer.

Nookie bikini - 11Nookie bikini - 03Nookie bikini - 14Nookie bikini - 05

They are held up with the side bows as there is no elastic in the waist.

Nookie bikini - 04

This feels a little flimsy. Possibly ok if you were just dunking yourself under water and then sitting on the beach but if you actually wanted to swim or dive or move around then there could be some problems? I’m also not keen on the roll top look you get with reversible bottoms.

Nookie bikini - 06

It just seems really sloppy and like bad DIY. Certainly not a finish I would aspire to. I might see how unpicking the top and inserting some clear elastic into the seam goes?

Pattern: Nookie bikini free from Frankie magazine

Alterations: didn’t make self fabric straps but used a matte elastic instead.

Fabric: Printed polyester Lycra provided by Pitt Trading Thanks for letting me have some of your lovely fabric to play with. It’s so soft and lush feeling but goes through the machine like a super stable knit.

Am really enjoying making swimsuits, will have to find some more patterns to try out!