
That’s right, we are taking this show on the road. April 27th and 28th in Canberra, 2 whole days of all things swimwear.
All the workshop details can be found here, places are strictly limited so get in quick!

That’s right, we are taking this show on the road. April 27th and 28th in Canberra, 2 whole days of all things swimwear.
All the workshop details can be found here, places are strictly limited so get in quick!
Today I’ve added another swim style to the ever increasing range of swimwear options available by Measure Twice Cut Once.
The new style is Agnes, she joins Henrietta and Anne. All available now in the swimwear section of the Pattern shop.


All patterns are available in sizes 6 to 18, come as downloadable PDF’s with instructions, A0 copy shop file, A4/Letter print at home file. Sewing swimwear is so much fun, with a few tricks and tips you will be making professional looking pieces in no time. Plus it’s fast so that’s a huge plus for time impatient sewers!
Grab a pattern and get sewing today you will not regret it.
Do you make gifts for the family? I try to make as many as I can and for Christmas 2016 there was a definite swimsuit theme happening. I’ve already shared the roarsome suit I made my niece and the cute rashie I made for my nephew.


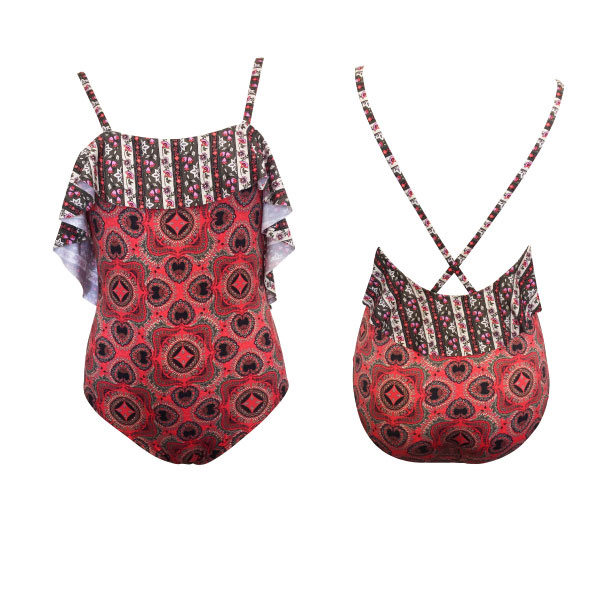
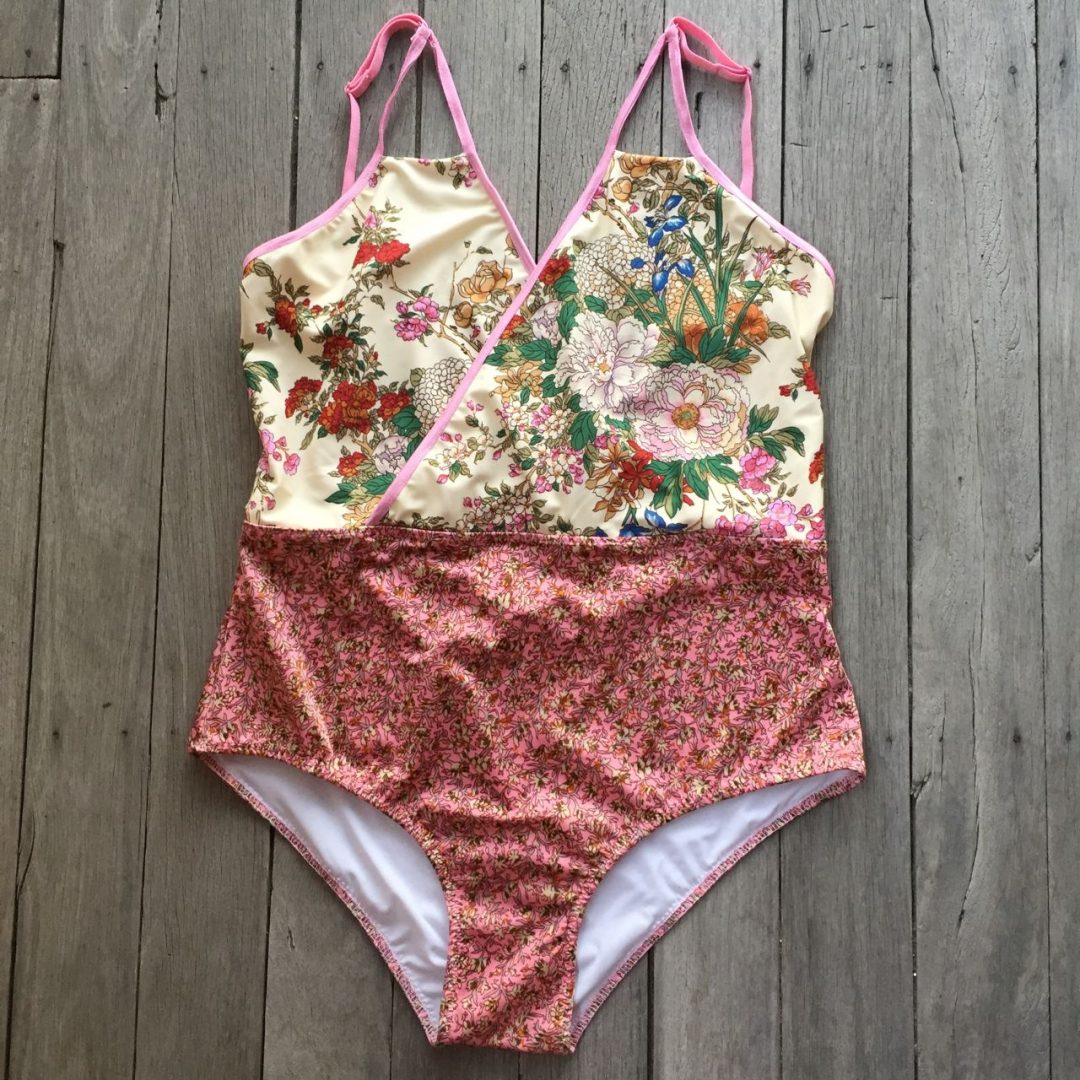
This swimsuit had slightly less success. It’s the Alison by Burdastyle which I’ve made before here. The pattern has plenty of issues but the style is cute so I thought I’d whip one up for The Englishman’s sister.

Fabric was the easy part using these great prints from Pitt Trading.

I already had H’s measurements so I cut her size in the width and went for the longest length as she is quite tall. Sadly it wasn’t quite enough length! They came up too short in the overall length, a clear case of me being short and forgetting just how tall she is. Rather than send them back I told her to find a shorter friend to give them to and I’ll make her a new pair.

I didn’t get a great pic before I sent the parcel off but I made a coverup to go with the swimsuit. I thought it would be handy getting to and from the beach or the pool?

This embroidered white cotton voile, another Pitt Trading fabric was perfect. It has this amazing border to it which kind of did all the work for the garment. I kept it simple and used the Named Asaka kimono pattern. The only change to the pattern was to cut the sleeves on the fold to take out the nice split sleeve that normally features in the garment. Seeing as how I wanted a sun protective garment I thought it best to cover up the slit. To help secure the cover up I added a decorative white and gold cord as waist tie.
Pattern: Burda Allison swimsuit, Named Asaka Kimono
Alterations: add length to the body of the swimsuit
Fabric: Fabric and trims for both from Pitt Trading
Sometimes accidents happen and this is one of those happy joyous accidents. Where I’ve made something I really love the fabric combinations.
Earlier this week I posted this image on Instagram.

I was intending to make my niece a rash vest to go with her roarsome swimsuit. Well I’m not sure if I’ve lost a sheet or am reading the pattern wrong but I cannot find the child’s pattern in this? I kept unfolding and rechecking and still nothing? Instead of getting stuck with searching for it it falling down a rabbit hole of internet research on it, I opened up my swimwear fabrics tub and started pulling out likely fabric combinations for myself.
This navy self spot was a The Fabric Store purchase from a few years back. It’s nice and thick but doesn’t have really great stretch as it’s a nylon knit with just a little spandex. It is however super cute.

The pattern fabric was something I spied on Instagram, had a meltdown about and was assisted by the amazing @_littleblackcloud in getting me some from Rathdowne fabrics. It’s super stretchy but quite lightweight.
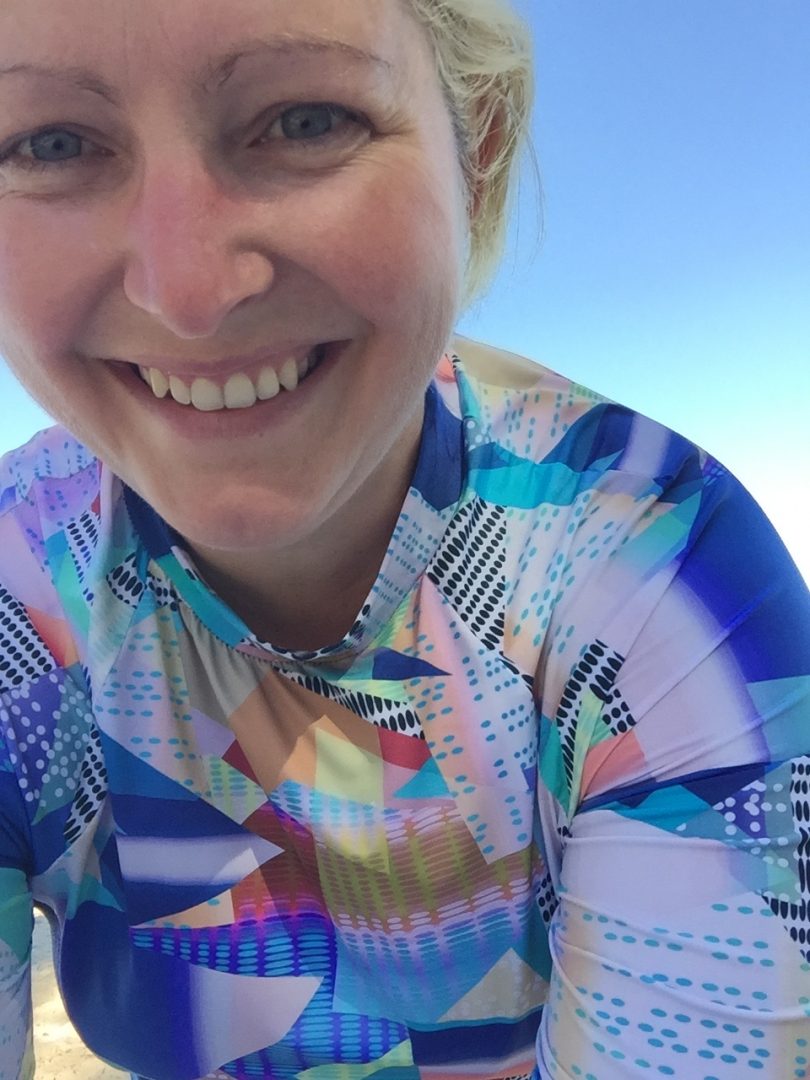
Much laughter occurred at the idea of a cropped rash vest on Instagram. I mean it’s not exactly practical is it? However if you are not blessed with height the cropped version is actually a decent length. I added 2cm to the hem length of the crop version to make this top (keep in mind I’m only just 5 foot tall so this mod won’t work for taller people). EDIT: I’ve just come back from paddling and I have to say the cropped version doesn’t work, it keeps moving around and exposing my stomach. Unless you are wearing it over a one piece do not cut the cropped version.

To keep the top as lightweight as possible I used the navy spot as the side panels and cut the rest in the pattern. Once it was together I tried it on and ended up slimming down the arms as they were too baggy. I deliberately didn’t make it skin tight as I want to use it for stand up paddling. I paddle for about an hour each time I’m out. For the final few minutes of each session I take off my rash vest and paddle in my bikini. This gives me a huge dose of vitamin D but also ensures my fair skin doesn’t burn. If it’s super tight it’s really hard to get off while standing on the board.

Sleeve hems were overlocked and turned up to be topstitched down. The garment hem I added some clear 6mm elastic into the hem to help keep it in place during the paddling motion.

Now for the bottoms. As mentioned previously the patterned fabric is lightweight so I reversed the top layout by cutting the center of the pants in the navy and the sides in the pattern. As I do with all swimwear, all major seams were sewn then I try it on and adjust the fit. I took evenly off each seam allowance until they reached the desired fit. I also added a full lining and applied the elastic as I usually do and didn’t bother with their instructions on it.
There are some serious issues I have with this pattern.
1.5cm Seam allowance on swimwear, utter craziness. The seams are way too bulky and it makes the crotch way too wide causing odd bunching.
The bottoms only come with a gusset lining. No and no. Once the panels were together and adjusted I laid them flat and used them as a template to create a full front and back lining. The gusset is also far too wide, I found it went across and then down my legs and kept folding back up. So I cut it narrower. Perhaps use an existing swimsuit or even bikini knickers to judge your correct width?

It indicates the patterns are to be cut on the cross grain. To me this suggest cutting on the bias. Why on earth would you cut swim fabric on the bias? It certainly doesn’t need to be. Surely the correct terminology would be tell you to cut with the greatest amount of stretch going around the body?
This combined with some odd styling notions makes me think it was designed by someone who saw a picture and went we need one of those but has no practical knowledge of how swimwear works?
Despite the crazy pattern I am very happy with the set, mostly due to the awesome fabrics. The fit is ok it could be improved but they are functional and that’s always a big plus when it comes to swimwear.

Pattern: McCalls 7417 size Large for top with extra 2cm added to the crop length and narrowed sleeves. Cut size large for the bottoms but probably adjusted down to an M but check stretch % on next fabric before cutting a straight M.
Fabric: navy self spot from The Fabric Store, print from Rathdowne Fabric, lining and elastic from Pitt Trading
Changes for next time: cut down seam allowance before making it up. Cut crotch narrower, make full lining for pants and narrow the arms more.
And now I need to go search for the children’s pattern hidden inside? or I might just head out for another swim

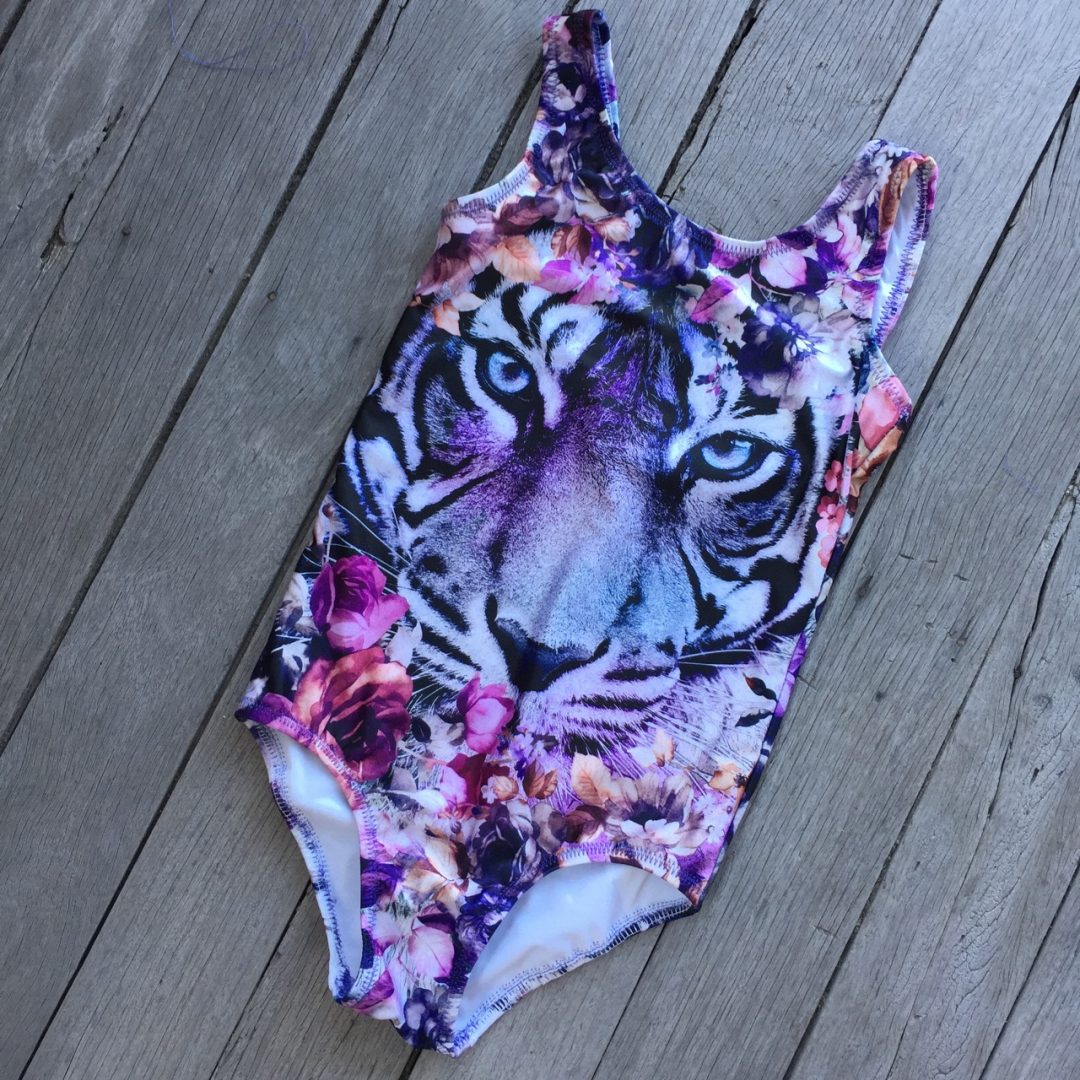
Sometimes a fabric is just so roarsome you have to have it.

When this panel came into Pitt Trading I knew it would make the perfect swimsuit (or should that be purrfect). I’m in the midst of my Christmas present list and knew one of my nieces would love this.
I made up a swimsuit block for her age and got to cutting. Using a lightweight interfacing I could see through it to place the face in the correct position.

For the back I added a centre back seam purely so I could cut the back out of the sides of the panel and use the remainder of the panel for another swimsuit.
To keep it smooth on the inside it is fully lined with all seams enclosed. Clear elastic was overlocked onto the legs, arms and neckline then turned under and topstitched with triple stitch zig zag. This was not so great, occasionally my machine would clog on the bobbin. This normally doesn’t happen at all so it was somewhat frustrating. It’s fine but not perfect and that’s somewhat annoying for me.
I only wish I could be there Christmas morning when she opens it up!
Fabric: Nylon Spandex panel and swimwear lining from Pitt Trading
Trims: clear elastic from the stash
Pattern: my own
Alterations for next time: fix the topstitching!
Summer is coming and I couldn’t be more excited. Long days of sunshine to be filled with food, friends, adventures and swimming. Sewing wise this means lots of swimsuits and now you have the chance to join me to make your own swimsuit.
I’ll be teaching a class at Bobbin and Ink. Spread over multiple Sundays you can bring along any pattern you wish and by the end of the class our aim is for you to leave with a finished swimsuit! Yay!
So here are just a few of the options you could come and make
Papercut Patterns Soma Swimsuit


Named Patterns Beverly Twisted Bikini

Closet case files Sophie Swimsuit


McCalls 7417 you can order all the following patterns direct through Bobbin and Ink


For each of your swimsuits be sure to read the exact requirements on your patterns but in general you are going to need
Fabric
Lining
Elastic suitable for swimwear
Thread
You’ll want a fabric that is suitable for swimwear so start searching out some stretch fabric. Pitt Trading has a fabulous selection of designer pieces.
I’d also suggest bringing along some tracing paper so we can do any alterations you need to your pattern without ruining your original pattern.
To book into your class head on over to Bobbin and Ink, see you there!
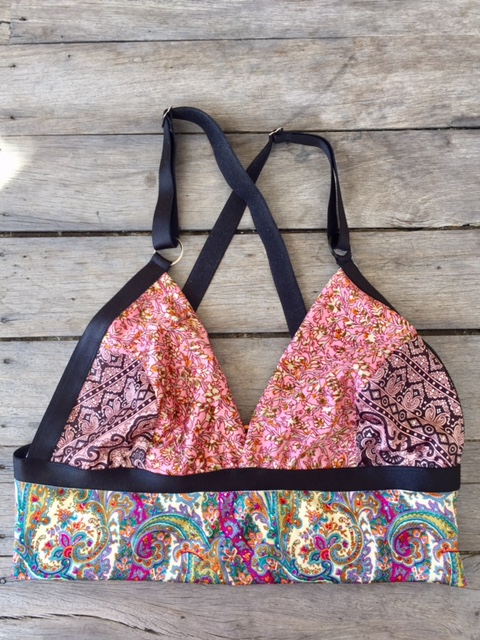

I saw this pattern on instagram last week and just had to have it. It’s the first pattern from designer Sophie Hines, while this is her first sewing pattern she has been making and selling lingerie for some time and has this laid back sporty luxe style that’s super sexy without the raunch factor. The colour aesthetic Sophie uses is super minimal and really beautiful in these muted type tones.

I wanted to whip up a quick wearable toile and so decided to make a swimsuit version using these lush lycras from Pitt Trading. So in keeping with my regular style why pick just one print when you can use ALL THE PRINTS.


The pattern offers 2 versions, a single hook/clasp back or a double hook/clasp back. I chose the double as I thought it would be cute?

After measuring myself and comparing it to the sizes I cut a size Large. Sizing is done as per garment sizing not cup sizing which I think is fine for soft cup bras.

Sewing was fairly straightforward. I used my overlocker for all seams and then straight stitched on the elastic. The instructions are written more than illustrated so have a read through before you get sewing and just refer back to the original garment photos and you will be fine.

I used what hardware I had on hand and took the opportunity to try some metal hardware and a plastic O ring too. I wanted to see how they will go in the water so snuck in a mismatched set so I can compare and contrast how they wear.
Everything went together easily and I like the fact it’s all lined as it makes it super smooth on the inside. I can see myself making more of these for sure. Am already thinking a soft bamboo jersey lined one would be great for summer.
Fabric: printed lycras from Pitt Trading, lightweight jersey lining from Pitt Trading
Trims: Elastic and hardware from the stash
Pattern: Sophie Hines Euler Bra
Alterations: none
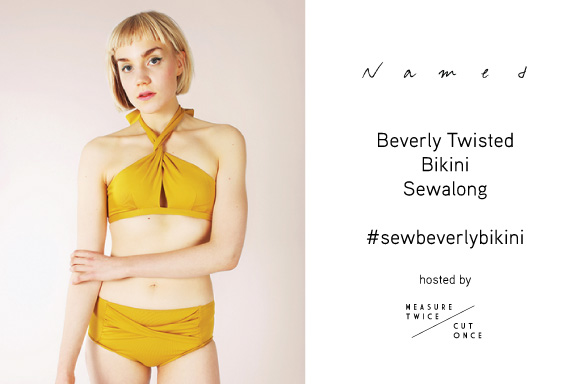

I hope everyone has been having fun with their swimwear sewing? This is the final installment in the sewalong and it’s been pushed back to today as I had so many requests for more time as people wanted to join in.
Don’t forget to share your makes using the hashtag #SewBeverlyBikini so we can see all your beautiful bikinis.
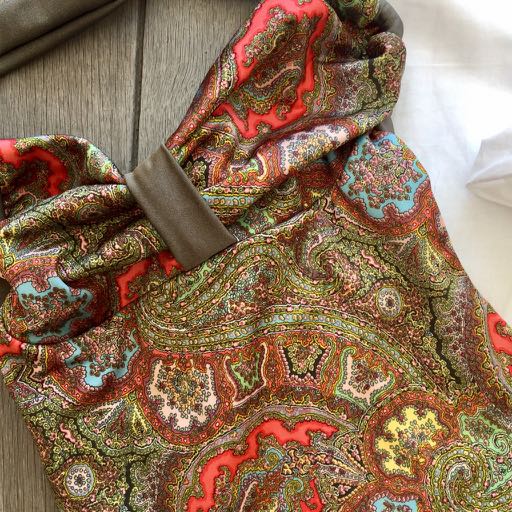
So let’s get started on the top. The outer of mine will be the same beautiful red paisley I’ve been using for the bottoms and the lining will be the solid darker red I used for the front contrast panel on the bottoms.
Stitch your darts into the outer and lining fabrics

Sew the side seam of the outer panels.

Iron interfacing into the seam allowance of the lining.

Sew the side seam of the lining. Note that the side seam is 2 different widths for the lining. The front panel has 2cm and the back panel has 1cm.

Press the seam towards the back, turn the extra seam allowance of the front panel under to create a little channel.

Stitch the channel down.

Placing the lining and the outer right sides together prepare to sew along the top edges of the panels. Go up one side, along the narrow top edge and down the other side.

As you sew the panels together you will also be attaching in the elastic. I’m using my overlocker and the same method I used for inserting the clear elastic into the pants.


Once you’ve done both sides, turn them right side out.
Take your boning and cut it to length, be sure to cut it shorter than the full length of the channel as there is a seam allowance at the bottom.

Before inserting your boning, quickly run it through a lit match so the flame seals the ends. Then insert it into the channel.

Lay the underbust band down, wrong side up. Matching the notches, line up the 2 front panels and pin into place. Once pinned this line is then stitched.


Fold underbust band in half, tuck under the seam allowance and pin into place.

Topstitch underbust band.

Using a safety pin thread your elastic through the underbust band. Make sure it stays flat and doesn’t twist. Once inserted stitch the elastic in place at either end.
Thread the ends of the underbust band (now with inserted elastic) and thread it through your bikini clasp. Pin in place and then securely stitch. My camera has made my clasp look pink! it’s actually not but just looks weird in photos for some reason?

Try your bikini on, check where the knot is. You may need to secure it with a few stitches. Experiment with different twists to see what suits you best.
and you are done!
This has been so much fun, I hope everyone has enjoyed themselves, learnt some new skills and ended up with beautiful bikinis!
As always if you have any questions just let me know and hopefully I’ll be back soon with a round up of all the fantastic swimwear we’ve created!
Huge thank you to Named Clothing for allowing me to do the sewalong and for providing me with the pattern, also to Pitt Trading for providing my amazing fabrics and trims. Finally thanks to Jillian and Kirsty for asking me to do the sewalong in the first place.
How’s everyone going so far with their bikini’s? Don’t forget to share all your progress on social media using the #sewbeverlybikini hashtag.
In this installment of the sewalong we are tackling the elastic on the bottoms. The most important thing to remember when using swimwear elastic is to not stretch it. It is to be put in under tension (by very gently pulling it) but not stretched. If you’ve pulled so hard that the width of the elastic has decreased then you’ve pulled too hard.
Start by pinning your lining in position. Here on the front you can see the lining is cut without the seam allowances. I’ve done the back differently so you can see 2 ways of attaching the lining/elastic.

I’m using my overlocker to attach the elastic. Line up your elastic underneath the foot but not right on the edge of the garment. It’s actually easier to cut off a slither of the fabric while attaching the elastic. If you line the elastic right to the edge it is way too easy to cut into the elastic and that way causes dramas.

I always attach my elastic in the flat and once I get back to the start point I just lap the elastic over and run the overlocker off the edge. It’s by far the easiest and flatest way to do it. Flat is good as elastic joins tend to poke in and get uncomfortable.

The instructions had you cut your lining slightly smaller than the outer garment. This means the elastic sits only on the outer fabric and not on the lining.


Personally I find this method slightly more difficult as you have to make sure the lining tucks in when you do the topstitching.
An alternative is to cut the lining the same size as the outer fabric and catch it as you add the elastic in. I find this easier to sew and it stays in place no matter how active a swimmer you are as it’s anchored evenly across the entire pant. This is the back where the lining was cut the same size as the outer.


Once you’ve attached your elastic it’s time to fold it down in preparation for topstitching. Lycra plus clear elastic often makes for it difficult to pin through. You could use quilting clips to hold it in place or even just clothesline pegs.
For topstitching you can use a twin needle, a zig zag or a 3 step zig zag. I’m going with my 3 step zig zag as I like the way it looks. When you are topstitching you don’t have to pull or stretch the fabric, you do have to ensure you keep a straight edge. Where the elastic is tucked under it tends to like to roll, if you let it you end up with a ropey looking edge and get puckers. Make that edge nice and smooth as you topstitch and it will look beautiful and professional.

After topstitching I’ve gone back and checked my lining to ensure it is flat and even. On the back where the lining was cut the same size as the outer. It sits flat.

On the front where the lining was cut smaller it looks ok but there are a few places where the lining hasn’t been caught into the topstitching. You can see it on the left hand side of the crotch and the upper left hand side of the waist.

Here is the finished pant.

If you have any questions about the elastic application just ask in the comments, next time we will be moving onto the top.
Still need your pattern? Named have set up a 20% discount code on PDF and printed patterns of the Beverly Twisted Bikini that can be redeemed until the 10th of February. Just use the code sewbeverlybikini at the checkout.
Stitch56 are also offering 20% off the paper pattern with the code BIKINI
Share your choices on social media using the hashtag #sewbeverlybikini so we can see what everyone is making.
Thank you for the great response to the sewalong, I hope you are enjoying it?
A few people have requested a more high rise style pant bottom for a bit more coverage. So here’s how to achieve a higher pant.
First trace out the size that you require according to the size chart included in the pattern. For the adjustment we need the front, side front and back to start with. Mark in 2 places where you are going to add the extra height.
Why 2 places? you want to keep the balance of the style intact and if you just put it all on the top it can result in a weird look or odd fit.

On your body measure from crotch to the desired height of your pant. Measure the current pattern pieces. If you need to add say 5cm in height then split that measurement between the 2 lines marked for adding the extra height.
Here the grey lines indicate where the extra height has been added, don’t worry about the side seam we are going to fix that in the next step.

Next we are going to reshape the side seam. You are aiming for a nice smooth line from hip to waist. Since the pant is now higher the waist will need to come in a bit to account for the tapering of your body towards the waist. If the difference between your hip to waist is large, measure your waist and taper in the seam according to your measurements.
The blue line is the smoothing of the side seam and the gradual taper for the waist. I’ve taped both the front and side front panel so that the front panel doesn’t get too wide in comparison to the side panel. It’s all about maintaining the balance of the design.

Double check all your adjusted seams to ensure that all match each other in length so your bikini will fit back together correctly. Re mark all pattern markings including the positioning of the front twisted panel.

Now you have a higher rise bikini pant! Once you’ve got the outer panels all sorted, follow the same principals to increase the height of your lining too.
If you’ve got any questions or need clarification on anything just ask and I can help you out.
Still need your pattern? Named have set up a 20% discount code on PDF and printed patterns of the Beverly Twisted Bikini that can be redeemed until the 10th of February. Just use the code sewbeverlybikini at the checkout.
Stitch56 are also offering 20% off the paper pattern with the code BIKINI
Share your choices on social media using the hashtag #sewbeverlybikini so we can see what everyone is making.


