
I love Lingerie, from a simple cotton set to silk and intricate lace I love it all. So naturally once I conquered making my own knickers I wasn’t going to sit around with a drawer full of non matching sets (the horror! ha ha).
For a few months I’ve been gathering supplies. Foam for the cups, elastics, channeling for underwires and other bits and pieces. They’ve been sitting in a tub mocking me. Why mocking? because I kept putting it off. Too often we read/hear/get told that sewing is hard and certain things like lingerie are held up with this mystique of being difficult. For some silly reason I got spooked and didn’t want to start. Obviously I got over that and just got on with it.
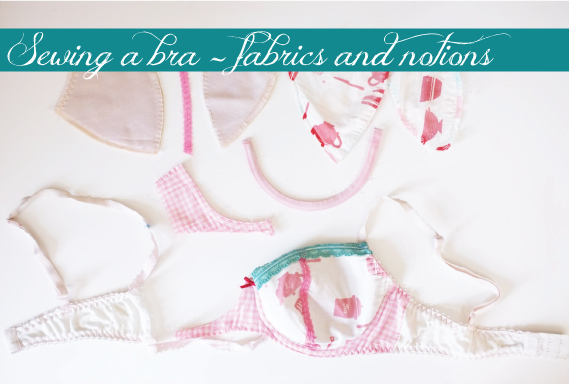
The actual sewing of a bra is not that hard or difficult. If you can use a zig zag and a straight stitch you can do it. What is hard is getting the fit right. Due to my love of lingerie I own um…quite a lot of it. So I’ve been putting aside the ones that are starting to show signs of wear but haven’t completely disintegrated yet. These not quite dead bras (zombie bra’s if you will) have been photographed and then unpicked.
By photographing them I know what they are meant to look like when I reassemble but it also gives me a stitch template to follow. When to use straight stitch, when to use a zig zag. This is super helpful as you end up with lots of very small pieces and putting them together is a bit like a jigsaw so a visual guide is a saving grace.
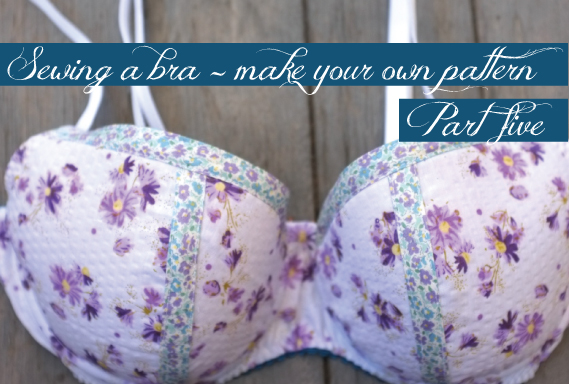
Once unpicked I’ve been creating a pattern from them and this bra is the first toile I’ve made up from one of my zombie bras. I managed to re use the underwires, the hook and eyes and the straps from the original as well. That was a nice added bonus after all the unpicking.

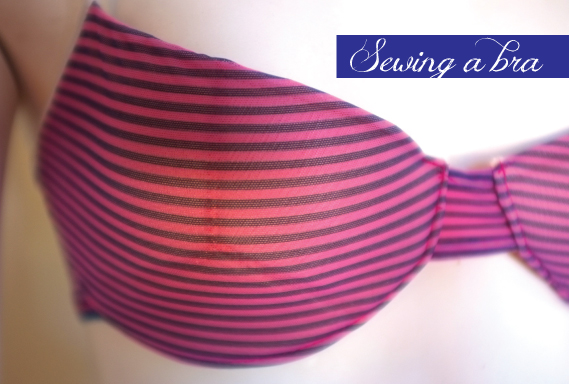
My lovely model as you can see, doesn’t quite fill out the cups. I do and the fit isn’t too bad for this style of rather simple bra. With only a few very minor tweaks it will be identical in fit to the original purchased bra before it started to wear.
The back needs a bit of an adjustment as it’s come out quite rounded from the strap placement down to the hook and eye. It’s not bad or wrong so much as it can be improved and so it will be.


Where the front cup meets the strap it could do with a bar tack for extra strength.

The original bra had molded cups, these aren’t always available and I can find the shape a little bit bullet bra for my liking. So I’ve purchased bra foam. It comes by the metre and is far far cheaper than buying individual molded cups. To take this into account I cut the original molded cup into 3 pieces, cut them flat from the foam and then zig zag seam them back together again. You can faintly see it through the mesh here. It worked really well sewing wise and I can’t wait to see how it wears as I feel like it could be a really good solution for when you can’t get cups or don’t like the shape they create.

If you are looking to make your own underwire bras this is a great way to start for a few reasons
– you know the original bra fits. I should mention if you are going to unpick one try not to do it to one that is totally wrecked. It’s very hard to take a pattern off pieces that have stretched and warped. To the point where a wrecked bra would actually make it more difficult. While a new bra is a bit expensive to rip apart it is a good start point, or do what I do and go for one that is gently worn and be sure to allow for this when making your template pattern from it.
– the unpicking process gives you the reverse order of assembly so take notes and photographs to help with the sewing steps
– you can salvage hardware
– it’s a cheap way to see if you like making bras