Posted on Leave a comment

Self Striping Socks!

Encouraged by my successful socks using the fade yarn from Bendigo Woollen Mills I dove right pack in and cast on another pair!

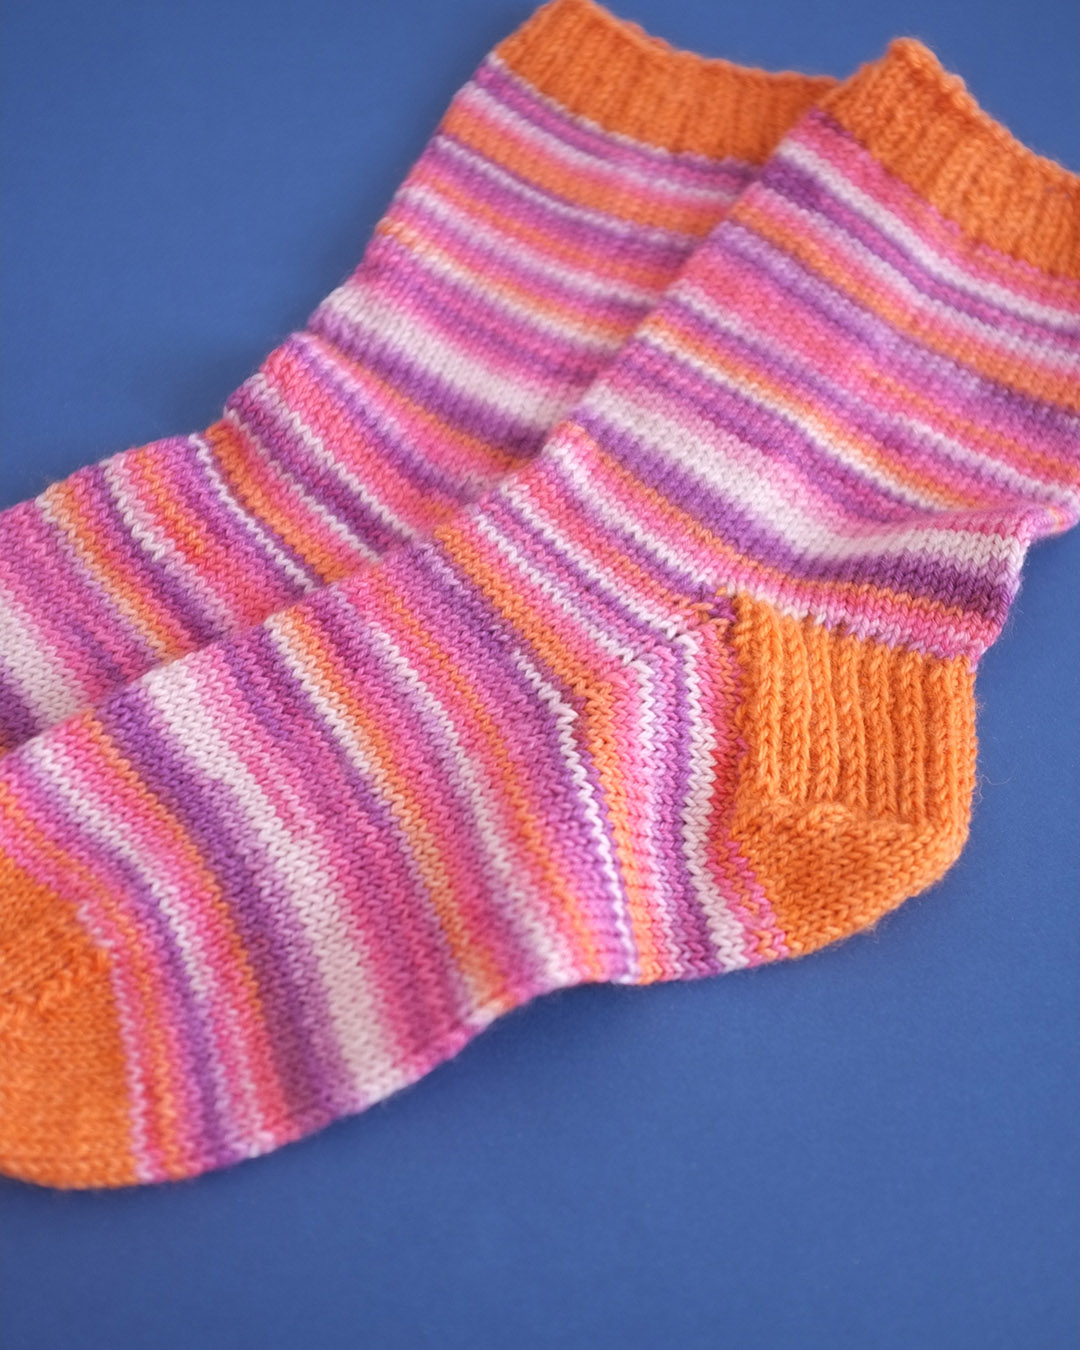
I’m using the same basic sock pattern so I can get more practice using the magic loop method. I’m also struggling with joining in the round at the moment so it’s taking a few goes to get it right.

The orange yarn feels slightly thinner than the self striping yarn. Both are merino blends but 2 different brands and I think I got them from Maker Maker Store in Melbourne via an online order? I found the details and added them down below

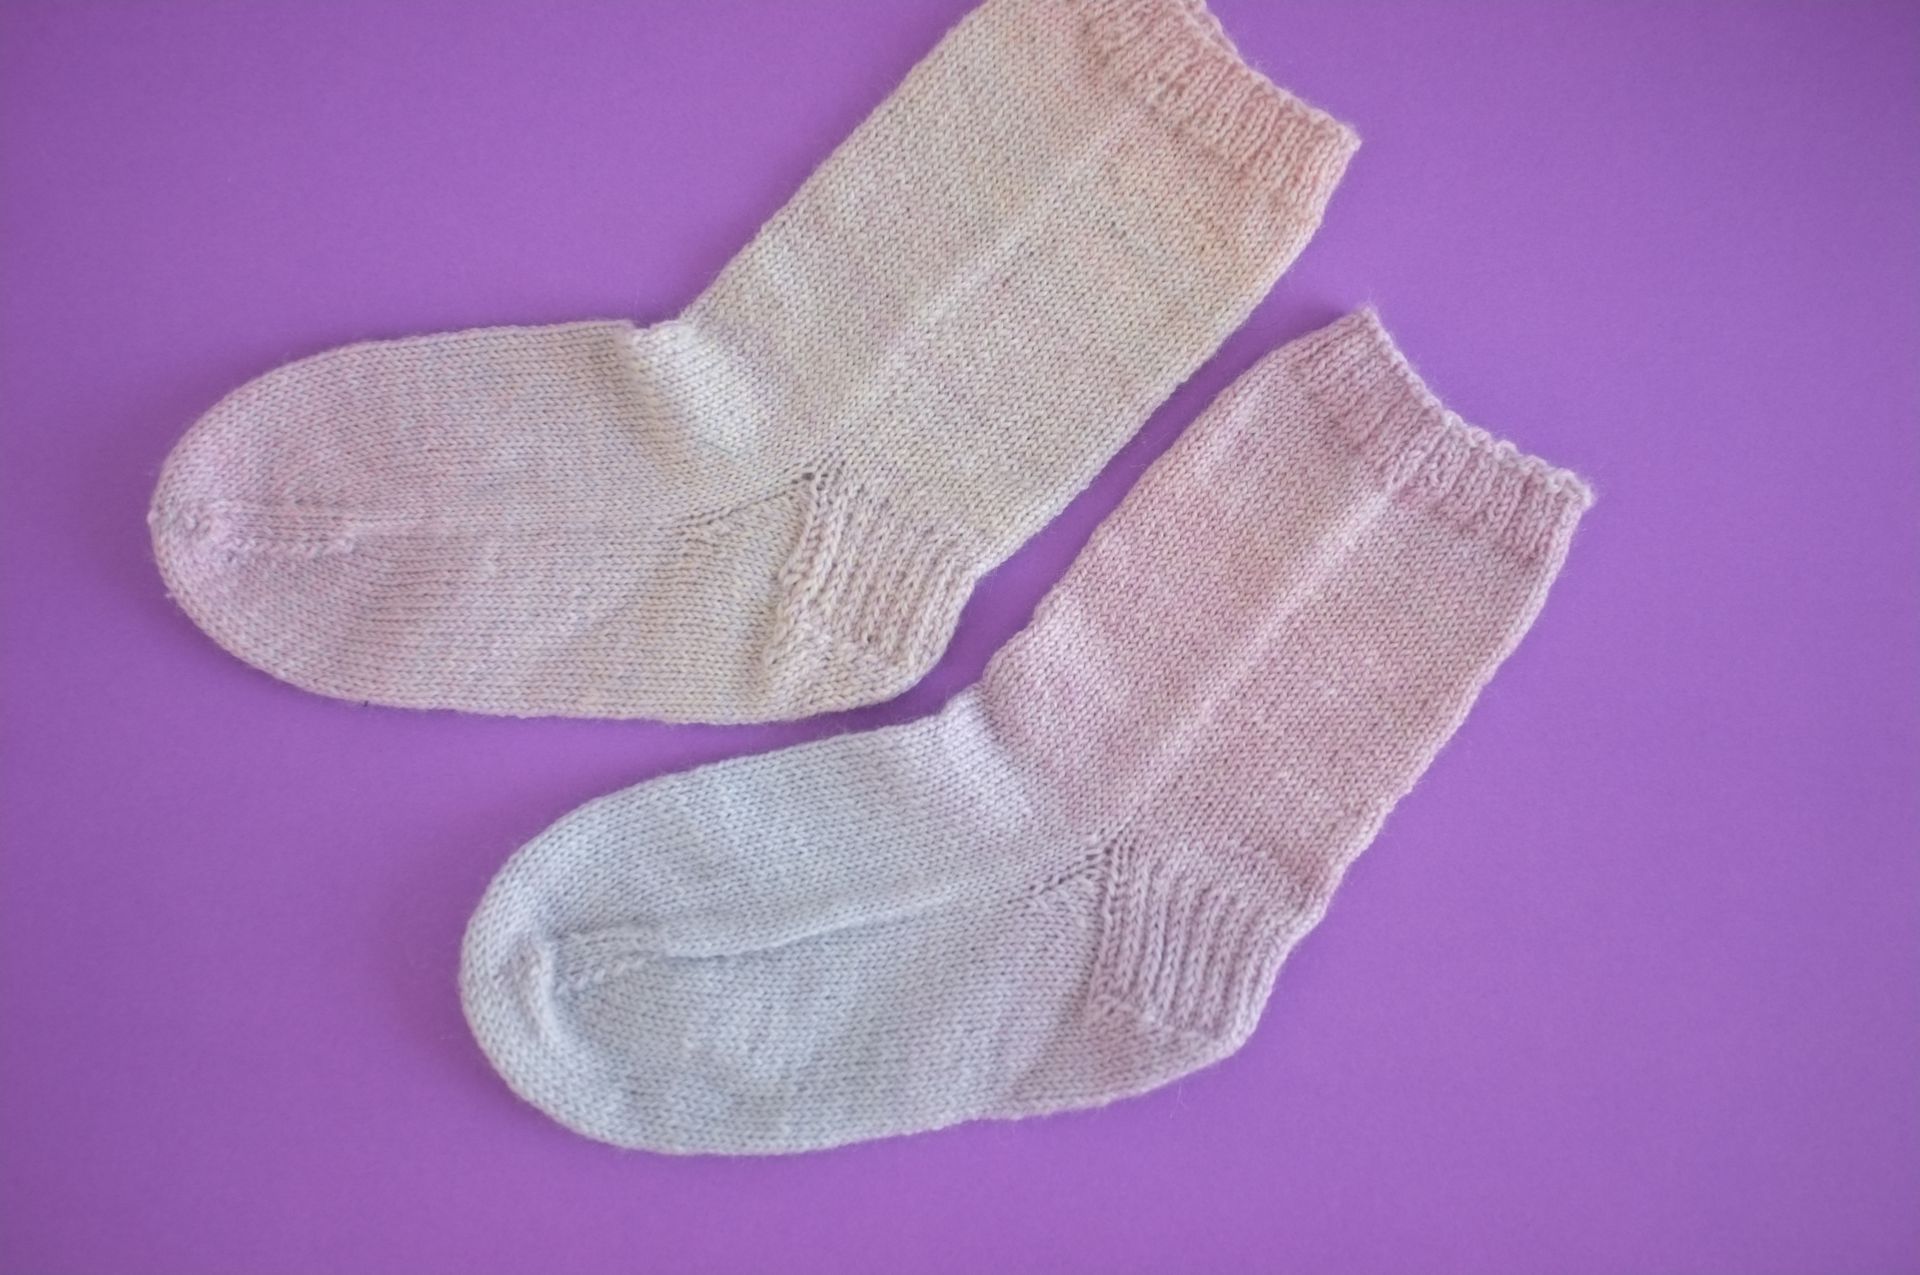
After the last fade sock where the heel was the same yarn the whole way though, I found having a contrast yarn so much easier to see and deal with! Will be remembering that for future pairs.

I liked the contrast heel so much I did the same for the toe, I’m still struggling with the grafting stitch so the toes aren’t as smooth as I would like but they are better than the last ones so I think at this stage continuous improvement is a good sign.

So far I’ve been following the pattern and just using a ruler to measure when it says “make rib to 3cm” it works mostly but having to keep trying on the sock for my foot length which is slightly annoying for some reason?

At one point I was trying on one of each sock to see how my tension and fit was between 2 different yarns.

I also adore the self striping yarn! It makes me look so much fancier than I actually am in my sock knitting journey!

Pattern: The I’m so basic sock with video tutorial from Summer Lee

Yarn: Both from Maker Maker in Melbourne – Self striping yarn Chaska Sky Collection × 1
F995 Pink Sunset and Solid Orange Yarn Edelweiss Classic × 1
408 Warm Orange

Changes: made the foot shorter as per my last pair

Posted on Leave a comment

Knitting – my first real socks!

Technically these are my second pair of socks but they are my first pair with real sock yarn so I’m counting them as my first real pair!

When I cast these on it had been about a year and a few days since I had first learnt to knit. That year was lots and lots and lots of practice, I was still struggling with casting on so these are a little wobbly around the top of the first one but still pretty good for my first go.

Now because I’d been struggling with the cast on I stopped using my fancy yarn The Englishman had got for me for my birthday and I purchased a cheaper same weight yarn from Bendigo Wool Mills. It’s super lovely to handle and similar in feel to some of the other yarn I had but because it wasn’t a special gift I feel ok with the fact that it took me so long to do a cast on that I was happy with that I shredded the first half a metre or more of yarn.

The knitting series by Summer Lee that takes you through each step of the pattern was an absolute miracle and I’m not sure I would’ve got this far without it, so thank you Summer! Link is down below for anyone who hasn’t seen it.

It knitted up well and I was super happy except for one thing, it kind of looks like dirty washing up water on the second sock. I think because I have small feet the “fade” didn’t show up as well and instead of getting the pretty pastel colours I’m mostly getting the blend in-between which looks kind of dirty?

Apart from not being very happy with the colour I was happy with how they finished up and very excited to have finally achieved an actual real pair of socks.

Pattern: The I’m so basic sock with video tutorial from Summer Lee

Yarn: Multicoloured 4 ply yarn from Bendigo Wool mills in French Macron

Changes: made the foot shorter to accommodate my very small feet

Posted on Leave a comment

Sewing Adventures – Matching Rash vests

Due to an enormous backlog of finished projects to share, I’ve decided to dive right in and not adhere to strict chronological order. Mostly because if I don’t start now I never will and also because it doesn’t matter when they were made only that they were made! So let’s get to it!

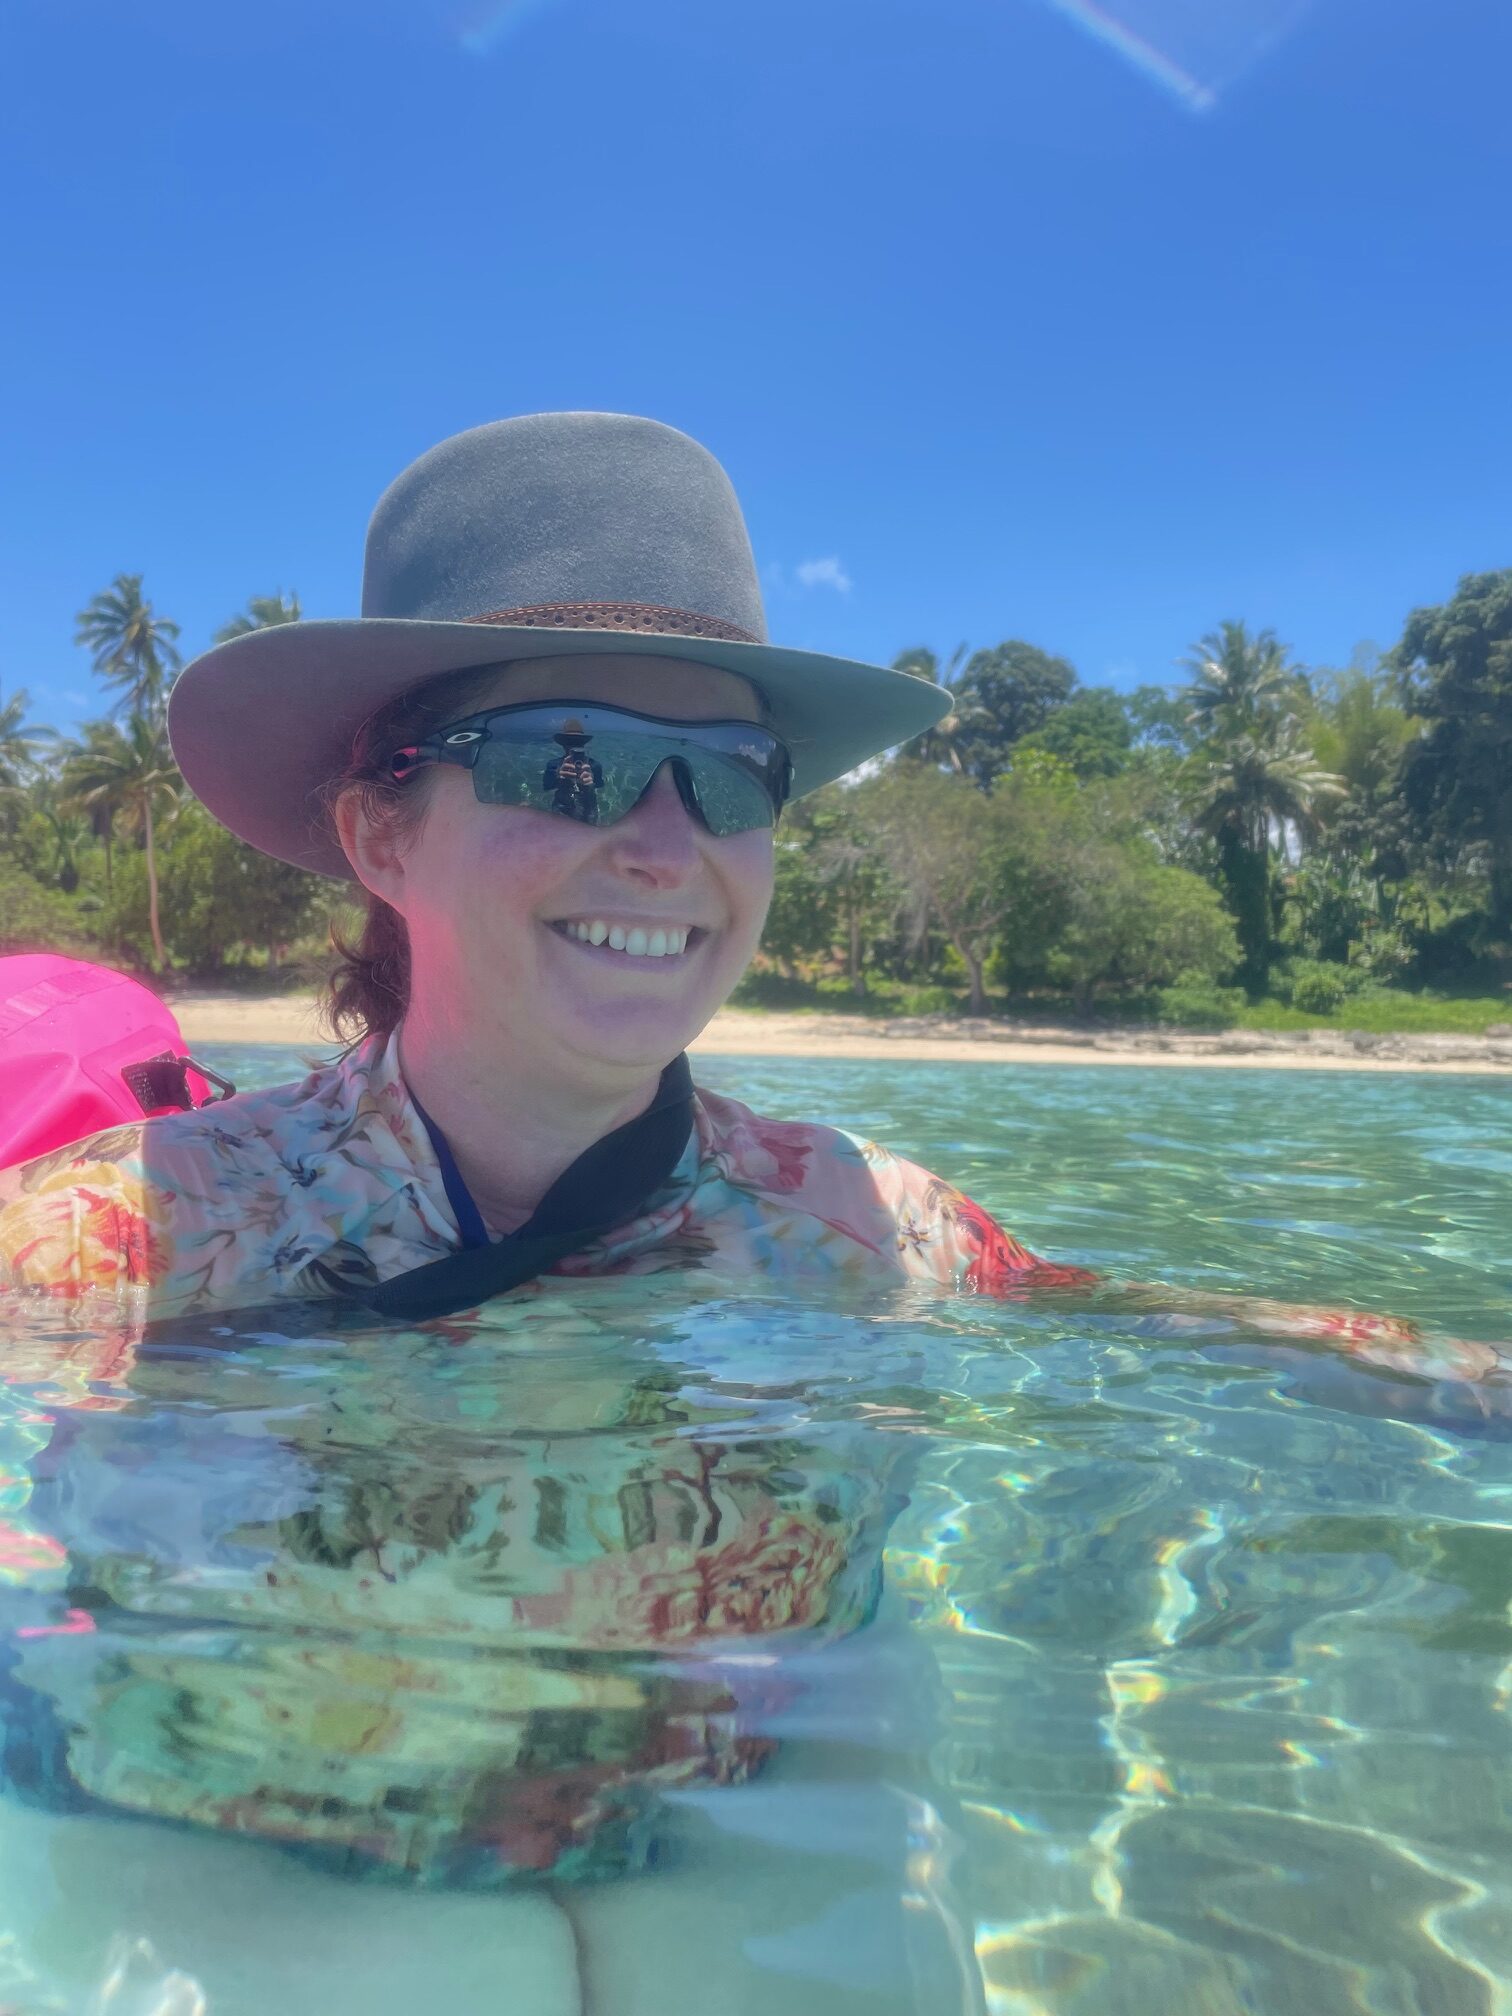
A trip to Fiji (2023) is a pretty mind blowing thing to prepare for, not only is it not the normal type of holiday for us to go on it was also preceded with a super busy time period. Having now been on the holiday it was amazing, we loved it and would do again!


Being the water lover that I am I knew I’d be in as much as I could and thought a second long sleeve rash vest would help protect me from the sun. Using Jalie Valerie I quickly whipped one up from this gorgeous pink swim lycra from the stash (originally from Pitt Trading now The Makers Society) my only changes were to make the arms longer than I normally do and make the neck band slightly wider.

and yes hats and sunglasses in the water were very necessary for anyone wanting to avoid some sun. The water is very calm so it’s not like you are going to lose everything when a wave hits you or anything like that.

Sewing wise I did the entire of the seams using my overlocker and then hemmed the sleeves and body using my coverstitch machine, super speedy nice and secure.

In some of these photos I’m wearing my previously made Jalie Valerie in a white and blue floral lycra also from The Makers Society.


At the last minute the day before we flew I decided to make one for The Englishman in whatever I had on hand which was some navy swim lycra and some athletic lycra in a sharkskin type print for the side panels.


Am so glad I did because we practically lived in these things as we explored the waters around the resort. we had an absolutely wonderful time and we didn’t get sunburnt so winning all around.

Can also highly recommend reef shoes, these are a neoprene upper with a rubber base and it made climbing through rock pools or traversing sand littered with coral a breeze. A must for anyone who wants to explore and swim.

Pattern: Valerie from Jalie – made my sleeves longer and wider neck band for me (in a previous version I have blended the sizing from my bust size out to my waist and hip. I found doing this stops it from riding up while paddleboarding, this is now my base pattern I use), no changes for The Englishman

Fabric: embroidered cotton lawn and plain cotton lawn both from the stash originally from Pitt Trading

Changes: pattern changes as noted above

Posted on Leave a comment

Patterns no longer FREE

Hi Everyone,

After repeated calls for people to STOP abusing me in the small amount of information required in order for them to get the FREE Patterns today I hit my limit and the patterns will now be paid for.

Only the PICC line pattern will remain FREE everything else is now a paid pattern.

I have kept prices low but hopefully this means the abuse stops or is at least lowered. Know that if you have given a fake name like Mickey Mouse, sworn at, abused, left rude comments etc in the information you’ve given in to get your download I will not provide ANY support to you in either downloading your pattern or how to sew it up. You showed zero respect you deserve zero help.

Regards,

Susan

Measure Twice Cut Once

Posted on 2 Comments

Sewing Adventures – Australian Flower Quilt

I’m not a quilter, I’m most definitely a garment sewer and the few quilts I’ve made have been out of leftover scraps from my garment projects. Then one day I was mindlessly scrolling through instagram and I spot a quilt pattern for a gum blossom. It was stunning and on impulse I bought the pattern and kit for the project.

It sat for awhile till I had some time and I thought I’d better start as I wanted to give it as a gift for Christmas. The pattern was actually a hand drawn to scale drawing of the final piece and the instructions told you to trace out each individual piece and then add seam allowance around each one. You then referred to another chart to figure out what colour each piece would be. Another list would then tell you what colour code then corresponded to the fabrics included in the kit. I found this frustrating as it all could’ve been laid out in a much clearer way that reduced the amount of back and forth for the sewer and given this was not a cheap pattern or kit the lack of attention to detail was doubly frustrating.

Oh and the most frustrating drive me bonkers almost give up the entire thing was that the the images didn’t match the same orientation as the pattern. Some are mirror images, some are not. Zero consistency. So frustrating.

Eventually I got all the pieces cut out and started to assemble. At first I followed the instructions which were adamant that you were not to press any of the seams and that some panels were to be joined to the halfway mark and then left. It was looking and feeling like a big hot mess. I ditched the instructions, laid out all the pieces in formation on my desk and then picked the up one by one, attached and pressed them and suddenly it all came together much faster than trying to follow the instructions.

Once I had the one panel done it as fine but it was too big for a cushion, too small for a blanket. Other patterns were included in the booklet so I drew a square the same size as the first panel, hand drew out the designs, cut it up and added seam allowance then cut out the fabrics and sewed it all together.

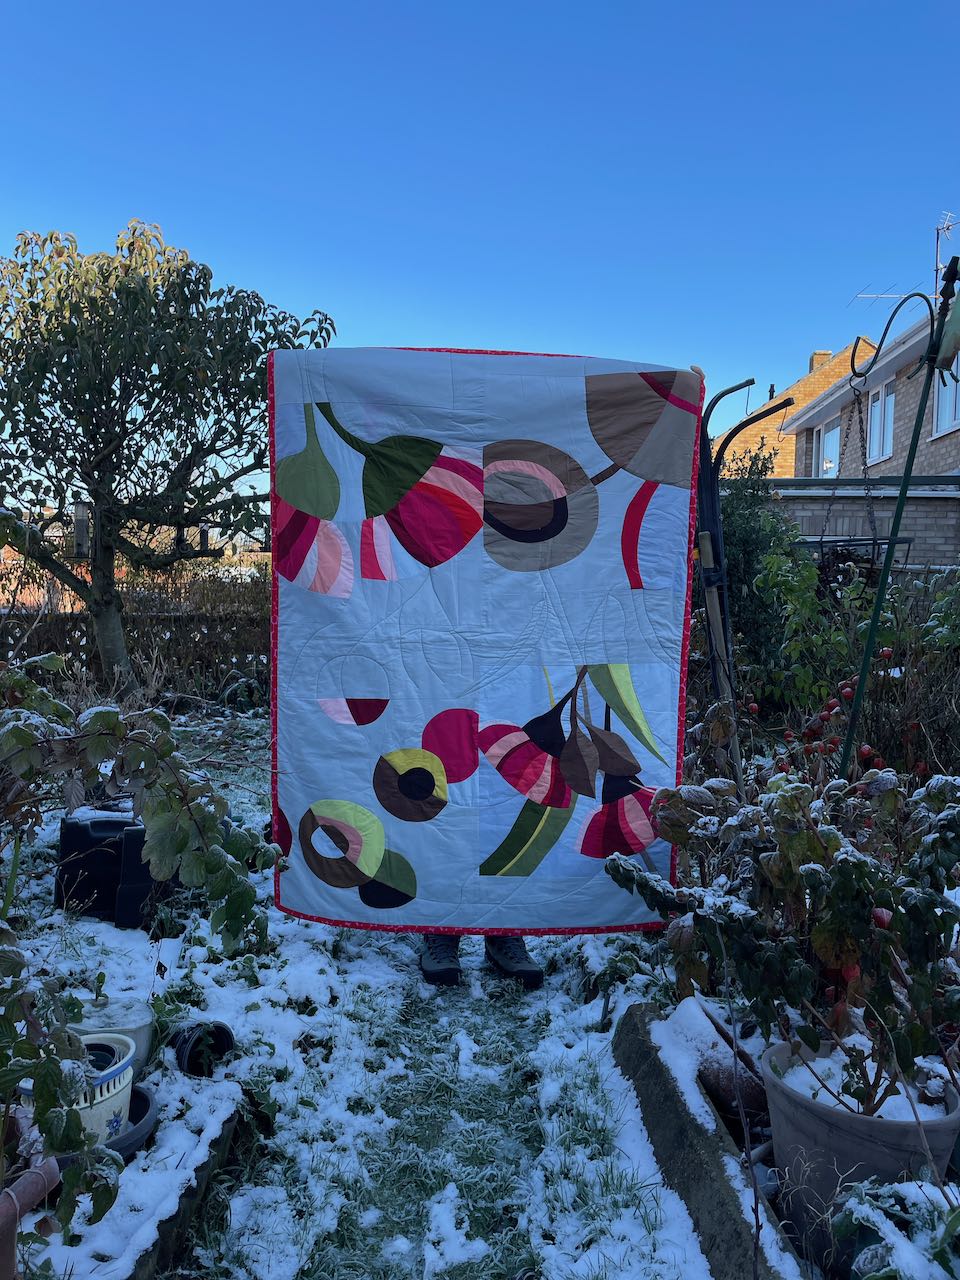
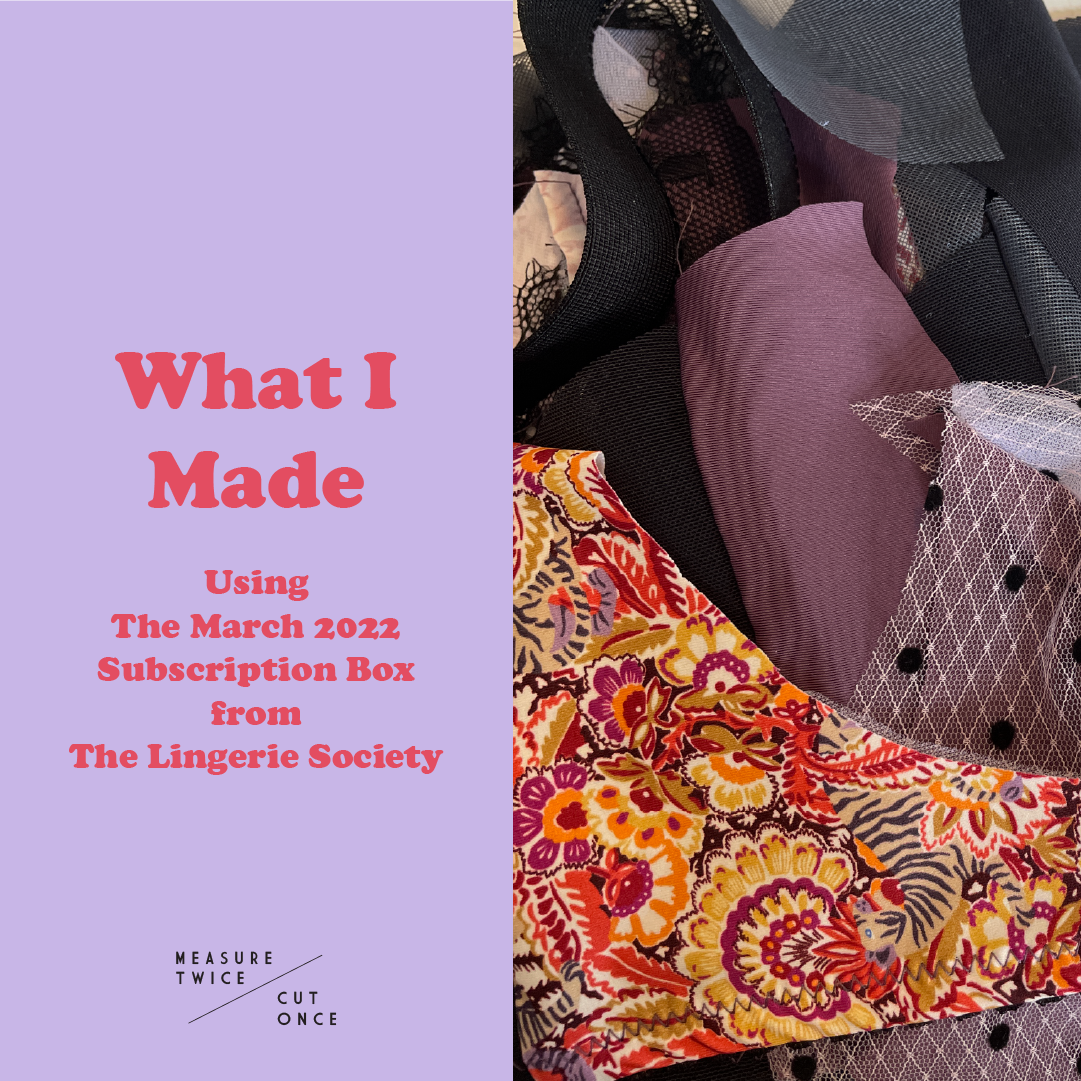
I needed some extra fabric so I popped over to The Selvedge Society who were supremely helpful in matching colours, choosing a Liberty cotton backing and suggesting the most amazing spot to use for the binding. After such an enormous struggle of frustration to get some straight forward good advice was just so wonderful.

While the pattern and instructions were lesson in frustration the final quilt looks good. I need to do better with my binding corners  and when I washed it one of the original fabrics from the kit bled onto the pale blue resulting in some very panicked colour removing.

Will I quilt again yes, will I use this pattern again a solid no.

Photos taken while on holidays in England in a frosty and cold -7 degrees

Posted on Leave a comment

Sewing Adventures – Gardening Tool Wrap

For Christmas 2021 The Englishman received a beautiful set of handmade gardening tools from his parents. To keep them safe he asked me to make a tool bag or tool roll for him. I made it very early in 2022 and then never got round to taking the photos to post up this blog of it all. So finally I’ve taken photos and I’m sharing it!

We decided a roll would be best as it would keep them separated from each other and protect them more.

I measured the height of the tools and decided to add a bit of a mat to them so he could kneel or just rest things on it as he works on his plants.

With that as a vague plan I basically winged it. Decided on a base size, quilted some bamboo batting to one side, made a pocket and stitched it on the other side. I really just made it entirely up as I went.

To tidy the edges of the pocket I decided to use some cotton tape and then thought I’d make loops at the top in the idea that if we ever had the space he’d be able to hang it up for easy access. I used the same tape to create the closure to the roll.

As a surprising bonus is if you fold the base behind the pocket you can use the closure tape to go through the loops and wear it like an apron. An entirely unexpected but very lucky result.

I have no idea how long this took as I did it over a day while doing other things at the same time but I’m so pleased with how functional it worked out.

Fabric: cotton duck from Spotlight purchased Dec 2021 and intended for something else but got used for this

Pattern: made it up as I went

Alterations: none so far


Posted on Leave a comment

What I made, sew Japanese in January

First up apologies for the sound, seems like a jet lagged me was a bit lax with actually connecting the microphone to the recording device so I’m sorry for that. Also sorry for my ugly feet (why are feet so ugly? Like why???) so just ignore them and focus on the pretty bath mat.

Right with that out of the way, this is Sew Japanese in January a fun challenge set out by @ bloglessanna on Instagram to encourage people to use their beautiful Japanese sewing books.

The book I’m using translates as “Goods made with simple fabrics – bags and miscellaneous” ISBN978-4-594-06361-0 I got it on my last trip to Japan so it’s many years old now but I love the simple and practical ideas.

Everything was sewn on my Brother NV180D

My nail polish is from Hanami “Tides” not an add just a huge fan.

As always thanks for watching if you have questions please leave a comment and please subscribe it’s a really easy way to help support the work I do.

Lastly thanks to Anna of @ bloglessanna for running such a fun challenge each January and July!

Posted on Leave a comment

What I Made, March 2022 Lingerie Society subscription box

Hi Everyone, normally you see me doing the unboxing of The Lingerie Society subscription boxes, this time I’m sharing what I made from the March 2022 box.

You can see the earlier cutting out and planning portion in another video. You can watch that one here https://youtu.be/VpdtvkTnzB8

Patterns used Maya Bralet by Studio Costura https://www.studiocostura.com/patrones

Box from The Lingerie Society by Pitt Trading https://www.pitttrading.com.au/the-li…

See more of my sewing and shop patterns at https://www.measuretwicecutonce.com.au

Follow me on Instagram https://www.instagram.com/_measuretwi...

Follow me on Twitter https://twitter.com/_MeasureTwice​

What I’m wearing Dress Pattern: Myosotis from Deer and Doe in Liberty of London Tana Lawn

Earrings: Harry and Herne

Posted on Leave a comment

What I Made, The 5 bra Experiment!

Today we are doing science! sewing science.

I’ve made 5 different bras from 5 different patterns and I’ll be showing their shapes and how they differ. Come join in the fun

Patterns used Chelsea Bra by Contour Atelier https://www.contouratelier.com/shop/p…

See more of my sewing and shop patterns at https://www.measuretwicecutonce.com.au

Follow me on Instagram https://www.instagram.com/_measuretwi...

Follow me on Twitter https://twitter.com/_MeasureTwice​

What I’m wearing Dress Pattern: Self drafted dress in fabric from my stash was originally from The Fabric Store

Earrings: Harry and Herne https://www.harryandherne.com/

Posted on Leave a comment

See My Brother NV180D sewing machine in Embroidery Machine Mode!

Today I’m showing my machine in its embroidery set up, you normally see it in regular sewing mode.it’s sure easy to swap between the 2 and i love having the fun experimental option of some embroidery. If you’ve got any questions, add them down below and don’t forget to subscribe!

My machine is a Brother NV180D available at Bobbin and Ink https://www.bobbinandink.com/products…

The pattern is available from Urban Threads https://www.urbanthreads.com/products…

Embroidery Thread is from Brother, available at Bobbin and Inkhttps://www.bobbinandink.com/products…

Wool Felt from My Felt Lady https://myfeltlady.com/

2022 is my year of taking the Scary out of Sewing! I want as many people as possible to take up sewing so they can create, make, mend and more. To help take away the scary, every Friday there is going to be a new video with accompanying pattern for a project entirely aimed at beginners. Each week there will be different techniques to learn or go over and it’s going to be a super fun way to grow your sewing skills.

See more of my sewing and shop patterns at https://www.measuretwicecutonce.com.au

Follow me on Instagram https://www.instagram.com/_measuretwi...

Follow me on Twitter https://twitter.com/_MeasureTwice​

Support me on Patreon https://www.patreon.com/MeasureTwiceC...