Posted on Leave a comment

Sewing Adventures – Cycling Kit bags

Cycling is a serious business around here. I don’t get out near as much as I used to nor indeed want to but The Englishman is out as often as he can.

On weekends they meet early so it’s often a pre dawn wake up call. The night before the bikes are prepped and all the kit is set out. All of which is awesome except for one little or should I say big and fuzzy member of the family.

IMG_7467

If she decides to be a brat there is always the worry that she will claw the kit or even worse be sick on it (hey, she’s furry she gets hairballs). For his birthday last year I got The Englishman a particularly gorgeous set of kit by chpt3 it came individually packaged in linen bags. Such beautiful presentation and perfect solution for a situation like ours. Fast forward a year and I’ve finally got round to making more cloth bags to house more kit. In contrast to the lovely understated chpt3 ones I went with Day of the Dead inspired cats and dogs.


day of the dead cycling bags - 1

day of the dead cycling bags - 5

IMG_0477

It’s a simple fold over construction and I added a bit of elastic in order to keep the lid closed. I made a pattern out of some A4 paper sheets, cut out the fabric and overlocked it all together then turned under and topstitched around the front flap. Super simple, super speedy.

day of the dead cycling bags - 3

day of the dead cycling bags - 4

Cue one very happy cyclist and one cat plotting revenge.

Fabric: Quilting cotton from Spotlight from the Calavera range (not sure if that is available in other countries or not?).

Trims: narrow black elastic from stash

Pattern: made my own

Alterations for next time: black ones are a little on the snug side, white ones a better size. Make a bigger version for winter kit.

Posted on 11 Comments

Sewing Adventures – African Wax Print and Simplicity 8048

IMG_9569

African wax print is not a common sight in Australia. Occasionally you may see someone wearing it but I’d never seen it for sale anywhere. That is until I missed the train at Cabramatta and had 15 minutes to use up before the next train. Rather than wait in the rain, I dashed up the street to the closest fabric stores for a quick look.

IMG_9427

They had some nice pieces but this one caught my eye. I asked the price and was sure she said $14, I was about to say no when I asked again and she said $4. 2.5m later I was running back to the train.
It’s a lightweight cotton lawn so a dense weave but very light. So I don’t think it’s real wax print as my impression is that is a much denser slightly heavier fabric?

The print repeat is huge so I wanted a style that didn’t cut into it too much. Simplicity 8048 was a contender as I really liked the dipped angle of the front skirt.

Screen Shot 2016-08-11 at 2.57.27 pm

The angle is a separate piece that is inserted into a circle skirt. Pinning the panel straight onto the skirt pattern I eliminated the seams and made it one continuous pattern piece across the front.

Once again I used my own bodice block. I raised the neckline slightly to help balance out the oversize print but made no other alterations to the basic bodice. It’s not fitting perfect right now but I think a bit of winter pudginess has crept on and I’m hoping once that drops the fit will be ideal again.

IMG_9487
Once the pattern matching was done (seriously that was the hardest part of the entire make). It went together in no time. Neck and armholes are finished with bias binding.

DSCF8741

DSCF8744
Because I cut the front skirt as one panel the side seam had some crazy grain line action happening. To help compensate for this I let it drop for a few days before hemming. It didn’t move at all which was very encouraging. I had planned to shorted the entire skirt length after letting it drop but I ended up liking the longer length so I kept it. The invisible zip went in with ease once gain.

IMG_9508

I love this dress, the longer length feels swishy and the big bold print is so striking and fun.

Fabric: cotton lawn from Cabramatta. It comes in a cream/blue and khaki/pink combination also in case anyone else likes the print.

Dress Pattern: My own bodice block and skirt from Simplicity 8048

Alterations for next time: look at increasing the sway back adjustment on the block, and take 1cm wedge out of each side of CB neckline where zip is inserted.

Special thanks to my fellow Sydney Spoolettes for helping with the photos. We met up in Hyde Park and helped each other take blog photos.

Posted on 3 Comments

The Jacket project with Brother ScanNCut

Sometimes you see a garment that stops you in your tracks. Just stopped, your breath quickens and it lights a fire of ideas and imagination within you. This photo of a Valentino Pre Fall Jacket did that to me a few months back.

Valentino Pre Fall

I couldn’t stop thinking about it. From the delicate dip dye ombre effect to the embroidered pieces it just made me want to create. I wanted texture and colour. Embellishments and dyeing. In short I wanted it all. I collected ideas and images. I made Pinterest folders and mood boards.

moodboard

I consulted a hand embroidery expert for her ideas on how to best to tackle some of the work and got some great information about thread types and some leads on some gorgeous hand dyed silk threads. Then came the idea of how was I going to cut all the pieces to make the flowers and textures that I wanted? I could do it all by hand but that was time prohibitive.

So while all these ideas and plans were swirling about in my head I was contacted by Brother to see if I’d like to test one of their ScanNCut machines. I’d never heard of them, they have been primarily focused at papercrafts and quilting but once I saw what they could do the possibilities came alive. Here was a machine that could cut precise delicate shapes in minutes and then replicate that over and over. I said yes and they sent a ScanNCut machine over.

Sadly things got incredibly busy and I just didn’t get a chance to get to it as quickly as I wanted. I kept sending the team messages saying every time I gave it a try it was brilliant and it was nothing more than my time pressures which prevented me from singing it’s praises all over town.

So here is how it works. You choose an image from it’s pre stored library or create one of your own.

IMG_9692

You set size and placement.

IMG_9694

IMG_9695

Then push go and it cuts away.

IMG_9697

It is truly magical.

I’ve been busy using the machine to create the exact textures I lusted after that can normally only be created by a Couture house. I seriously cannot explain how fun it is and how many design possibilities it opens up. I’ll be back soon with more details on how I’ve used the Brother ScanNCut to create the outfit of my dreams.

Brother sent me the ScanNCut free of charge to try out, all words and opinions are my own.


Posted on 5 Comments

Sydney Fabric Destash – wrap up

Yesterday was such a fun day! The Sydney Spoolettes got together for a fabric destash.

IMG_0432

The concept was super simple, bring pieces you no longer want and swap them for something you do like and all the leftovers go to charity.

IMG_8299

IMG_8300

IMG_8306

IMG_0433

Add in a wonderful array of delicious food everyone brought with them and it was a great way to pass a morning. Talking fabrics, patterns, sewing plans and identifying mystery fabrics.

IMG_8290

IMG_8294

Huge amounts of thanks go to Martine and Pat from Home Industry for hosting us and Melanie for organising. Also a heartfelt thank you to the amazing generosity and kindness of all the Sydney Spoolettes for bringing such an array of fabrics and baked goods.

Cannot wait till the next one as this one was so much fun! If you are in Sydney or the surrounds and would like to join a fun laid back sewing crowd, come and join the Spoolettes.

Posted on 4 Comments

Stylish Remakes – Japanese Sewing book giveaway

Some time ago I was given a copy of Stylish Remakes to review, when I was asked to do it I said sure, I’m not normally an up cycling type of sewer but am always interested to have a look at something.

DSCF8710

When the book arrived I was intrigued. It has some really great ideas to take pre existing garments and give them some cool and sometimes quirky twists to create a new garment.

DSCF8712

DSCF8715

I was all inspired and yet the book has been sitting there and I haven’t created any projects. I sat down the other week to choose a project and then it dawned on me, I’m trying to decrease my stash and I rarely if ever buy any clothes (even 2nd hand clothes).

This is a book that is to be utilised and treasured by upcyclers who love to rummage at a charity shop. Who chop and recreate and do all manner of wondrous things with an existing start point…and I’m not one of those people. I struggle to find anything at charity shops, am hopeless at doing alterations because to me it’s faster and easier to just grab fabric from the stash and create from the very beginning.

DSCF8711

Despite all this the book really sparks my imagination, one of the pieces I really like is taking a bunch of bandannas and making outfits from sewing them together. Such a cool idea to use scarves or bandannas or even fat quarters. Now I don’t have any of those things but I do have a collection of lovely swatches from when we did our Shibori workshop.

DSCF8707

I started sewing them together using french seams in the fine fabric. it was this very fineness that made me reconsider the dress as the fabric was virtually sheer and a dress made from it would be unwearable. Creating something only for the photos goes against all the good that upcycling promotes so I needed another way of using the sewn together squares.

During all this sewing and thinking it’s been really hot, when I’m working at home I keep the front door open to promote a cross breeze. This is good except for the flaw that everyone who walks past has a look in, it seems like half the apartments in my building are now some kind of AirBnB and the foot traffic / looking in was getting a little ridiculous for my tastes.

Taking my sewn together squares and inspiration from Japanese doorways which often have fabric coverings called Noren, I created one of my own.

DSCF8705

As you can see it keeps the airflow going but discourages peeping eyes, added benefit of looking really beautiful.

So while it’s not a project from the book it is a project inspired by the book which has certainly made me look more seriously at upcycling and how I can use what is around me to create new things.

The publishers have generously given me a book to giveaway to any Australian upcyclers (sorry overseas readers maybe next time), so if you genuinely think you want to give upcycling a go or are a current upcycling fan then please leave a comment below telling me why you should get the book or linking to one of your own upcycling projects. I’ll choose a winner within a week and post it out.

Posted on 6 Comments

Sewing Adventures – Simplicity 1873 insertion trim edition

Sydney has been hot, like hot hot and it’s unrelenting so even overnight it doesn’t cool down very much so it’s been an endless amount of feeling too warm. Which is kind of nice because yay summer and also kind of over it, would like to not constantly feel hot and sticky.

It was on one of these hot days that I was working at Pitt Trading and by the end of the day I declared it was far too hot to be wearing a skirt and a top. I purchased one of my favourite new fabrics that has only just arrived instore along with some insertion trim with the plan of making a dress. If you want the same fabric you can get it here or come instore.

IMG_7903

Pressed for time and wanting a sure fire sewing win I went with Simplicity 1873 which I have made before with much success. Construction wise it was very much like what I’ve done before. Slight sway back adjustment, invisible zip at centre back, no linings or facings I’ve just used bias binding around the neck and armholes. I was pretty happy with my invisible zip.

IMG_7862

The only big departure from previous editions was the addition of the insertion trim. I cut the skirt panels 5cm longer than I normally do, constructed the entire dress and then proceeded to measure 10cm up from the raw edge of the skirt. I cut along this line and overlocked the new hem of the skirt.

insertion 1

To place the insertion trim in, I stitched the edge of the trim just above the finished line of overlocking, turned it under and topstitched it down. Then taking the 10 cm circle I cut off, pressed it half with the iron reducing the height to 5cm, overlocked the top edge and pinned it to the lower edge of the trim.

insertion 2

Some slight fiddling with the seams helped it line up correctly as it was slightly larger in circumference than the insertion trim due to the nature of the flared panels of the skirt. Repeated the stitching, then topstitching and hey presto insertion trim and pretty hem.

IMG_7905

I’m so happy with it as the insertion trim really lifts it out of the homemade arena and into a more fashion item. It’s certainly the type of garment that I’m aiming towards with my makes this year, more fashion less plain sewing.

Fabric: Polished cotton from Pitt Trading, insertion trim also from Pitt Trading who have one if not the biggest number of trims instore anywhere in Australia.

Dress Pattern: Cynthia Rowley by Simplicity 1873

Alterations:  Added the insertion trim as explained, other alterations as per previous editions of this pattern, I cut the skirt width as per the pattern this time and didn’t add extra volume.

Posted on Leave a comment

Named Clothing – Beverly Twisted Bikini Sewalong – Part 1

NamedBeverlyBikiniSewalong_header

Welcome to the Beverly Twisted Bikini sew along! I do hope you are going to enjoy making your own bikini. Don’t forget if you want to join in, you can use the discount code sewbeverlybikini at the named clothing site to purchase the pattern.

Before we get to cutting out the fabric, check your sizing and assemble your pattern.
named Beverly bikini sewalong - 02

Some of you may find you will be a different size top to bottom, I’m cutting a 46 bottom* and a 44 top. Part way through the bottoms I’m going to try them on to see if I need to adjust the sizing as I like quite a firm fit on my bikini bottoms so I can swim with no worries. The seam allowance is included in the pattern (I’m using the PDF, if you are using the paper pattern please double check if seam allowance is included before cutting) so you can cut or trace without having to add the seams afterwards.

We are going to start with cutting out the bottoms including the lining. Before cutting your lining, read the post adding the elastic to the bottoms as there are 2 methods of lining used there and it makes a difference to your cutting. I’m using this stunning red paisley from Pitt Trading with a contrast centre front panel in a matte dark red also from Pitt Trading.

IMG_7726
Here are all my panels ready to go. When cutting be sure to cut with the greatest stretch going around the body. If you are dealing with a tricky print and want to avoid unfortunate print placements try cutting out your pattern piece in tracing paper. Cut it as a whole piece not place on fold and you will find you can see through the tracing paper to the print and avoid the poor print placement choices.

named Beverly bikini sewalong - 05
Starting with the Twist panel we are going to put ride sides together and sew along the top edge. I’m using my overlocker but you can use the stretch stitch on your regular machine if you would prefer.

DSCF8578
Turn the tube right side out and give it a press

named Beverly bikini sewalong - 07
Using a straight stitch add rows of gathering or basting stitches to either end. Pull the bobbin thread to create the gathers until you’ve gathered it in enough fit into the side of the centre front panel.

named Beverly bikini sewalong - 08
Twist the panel once and pin or baste it into place. Make sure you hide the seam of the band so it won’t be visible on your finished bottoms. Pinned in place you can see it buckles the front panel slightly. Once I put them on this buckling was not noticeable at all and the twist sat nice and flat to my body and didn’t sag forwards so don’t worry about the buckling.

named Beverly bikini sewalong - 09
Position side panels and sew in place.
named Beverly bikini sewalong - 11

named Beverly bikini sewalong - 12

Take front lining and crotch lining, sew seam.
named Beverly bikini sewalong - 14

Place front panel and back panel of main fabrics right sides together, matching at crotch. Take front and back lining fabrics, right sides together match at crotch and place them on top of the main panels.

named Beverly bikini sewalong - 15
Stitch through all layers.

When you open them up the seam you’ve just sewn should be tucked inside the lining so no exposed seams are on the inside of the swimmers.

*If you need to check your sizing, pin or baste your side seams and pop them on. You want them to feel firm but not tight. The stretch of your fabric must be used, if they feel loose when they get wet they may not stay in place. Mine could be a little firmer so I’m going to take an extra seam allowance from the side seams.

Using the same technique you’ve just used to sew the crotch, sew the side seams so all internal seams are encased inside the lining.
named Beverly bikini sewalong - 16
In the next installment we will be attaching the elastic and finishing up the bottoms before heading on to do the top. If you’ve got any questions or queries just ask in the comments.

Don’t forget to share your makes on social media using the hashtag #sewbeverlybikini


Posted on 1 Comment

Sewing Adventures: Tsurah Designs Straight Skirt Sparkly edition

Silver-Skirt_header

In my head I refer to this skirt as “The Lizzy Made me do it skirt”. After Lizzy had been down for the Shibori Workshop last year (actually the year before last as I’m more than slightly behind in blogging all my makes) we had talked about shapes, proportions and trying new things just to see where they go. On Pinterest I had admired images of sequin skirts worn casually and I always wanted to give it a go.

Spurred on by Lizzy I grabbed some sequins and got to making. I’ve made the Tsurah Designs straight skirt before here and here. So I knew it would be fast to make and I could alter it to fit in the sequins.

The sequin has slightly less stretch than the Ponti and isn’t quite as strong so I wanted the back of the skirt to hold more of the weight of the garment. So I cut it fractionally bigger from hem all the way to just above the hip but kept the waist the same width. Then cut the sequin panel the same.

silver skirt front

This gives it more room which is nice and it doesn’t pull the sequins at the front. I kept the wide waistband as I thought it could add to the look by being worn up for a very long silhouette or folded down which is lovely and comfortable. The hem is twin needled but apart from that the rest was entirely sewn on the overlocker. I did wear my clear lens running glasses while sewing to prevent flying sequins into eyes but honestly it sewed like a dream with no problems at all.

silver skirt back

I find it a surprisingly comfortable piece. I have to be slightly careful as the sequins do like to snag themselves on things and it gets handwashed too. Apart from that it’s very easy wear and always gets compliments! I’ve been wearing this to work for over a year and it’s still going strong, made for a whim it’s certainly become a mainstay of my wardrobe.

silver skirt side

Thanks Lizzy for spurring me on to try something I thought was out of my comfort zone and yet became one of my most worn items!

Oh and I look slightly pinker than usual it’s because I’m sunburnt, I got roasted on Australia day despite wearing a hat, keeping to the shade and  doing all the usual things to avoid the sun. It was a beautiful day out, despite the resulting burn. Here’s the Russian Roulette’s as they came across the Bridge.

Russian Roulettes in Sydney


Pattern: Tsurah Designs straight skirt made many times before.

Alterations: Shortened skirt, added width over hips and down side seams to allow for sequins.

Fabric: Stretch Silver purchased at Pitt Trading, Grey Marle Ponti purchased at Cabramatta.

Posted on 6 Comments

Sewing Adventures: Vogue 8766 – The Bridesmaid Dress

When I design ranges for big companies part of the job is presenting the range at an initial ideas stage. You come in with a bunch of drawings and fabric swatches and proceed to be grilled about every decision. Every idea needs to be backed up with why it should be done, how much money it’s projected to make and why time and money should be invested into making that particular idea come to fruition. Depending on the size of the range you need to be prepared to do that for over 100 pieces. It’s utterly nervewracking and stressful but it’s also a necessary part of the job. It’s one of the ways you weed out the good from the bad, learn to take on others perspectives and realise that not everything you design is going to be amazing or the correct fit for the time and place.

I find this somewhat clinical approach is super helpful to my sewing as I enjoy the process so much more than focusing on the end result.

Recently I had great fun in pushing myself recently to make a bridesmaid dress for a friends wedding. When I got a late night text the day before the wedding from the beautiful bride explaining that they decided to change the bridesmaid dresses and weren’t going to use the one I made I said to her, as long as you are happy that’s all that matters.

When I saw the Bridesmaids the next day at the ceremony it was 100% the right decision to change the dresses. With a natural linen back drop, wild roses and Australian natives in pale creams and pinks the bridesmaids looked picture perfect in their blush coloured dresses. Totally the right choice for the occasion. Sadly I don’t have any photos as it was an “unplugged” wedding with no phones or cameras and everyone told to just enjoy and have a great time. It was utterly fabulous night filled with friends, fun and laughter even if we don’t have the pics to prove it.

The original bridesmaid dress was a deep wine coloured French lace over silk. The lace was from Studio Fabrics who have a store in the city and another at Cabramatta, highly recommended for gorgeous lace, silks and lovely staff. The silk was from Pitt Trading and had the softest handfeel to it.

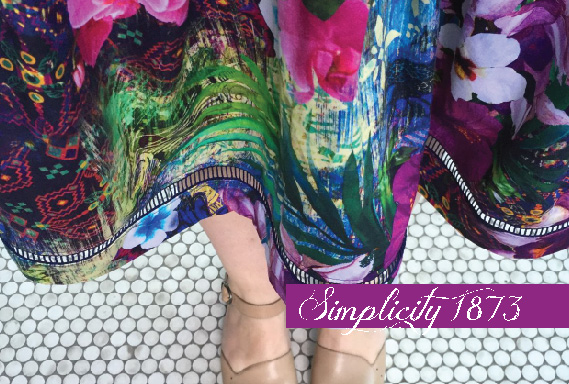
The lace was 170cm wide with a double scallop edge so it was quite economical to cut the dress from as you could utilise so much of the scallop. The style was a boat neck fitted dress with a knee length skirt and tiny cap sleeves. I used Vogue 8766 as my base block.

V8766

I really wanted to achieve a skirt hem with no seams, the lace had a little scallop, big scallop design to it, adding seams would interrupt the flow of the design.

hem

So I eliminated the side seams of the pattern. I placed the front and back patterns together, overlapped at the side seams where the seam allowance would normally be and traced off one continuous pattern from that. The top of the side seam was turned into a long curving dart so you still got the hip shaping despite the lack of side seam.

I made a toile from calico and used that to do the fitting. I transferred all the fitting marks to the calico and then cut a new calico version which I then used as the final pattern.

At the centre back I joined the hem by overlapping the lace and using a small zig zag all the way up to the base of the invisible zip. Creating an amlost invisible centre back seam.

centre back seam

The silk underneath was fully bagged out with a matching silk lining which joined at certain points to ensure it would sit flat and not cause any movement while being worn.

The sleeves were small with just an inverted pleat at the top of the sleeve head to allow for movement.

sleeve

Now there is no denying I was super stressed making this dress, I felt the need to make it perfect and be so beautiful for my friends, but the fact that it wasn’t worn doesn’t even worry me. I got to use some techniques I don’t use in my regular sewing, had fun working with utterly divine French Lace, conquered my fear of lace overlay plus silk plus invisible zip (which honestly I have been avoiding for like forever in case I made a mistake). It was good to push myself and I’m glad they found the perfect dresses at the last moment.

Fabric: French Lace from Studio Fabrics, Silk from Pitt Trading

Dress Pattern: Vogue 8766

Alterations: eliminated side seams of skirt, cropped sleeve length, fitted to a size 10, 5 foot 11 bridesmaid


Posted on 4 Comments

Sewing Adventures: Simplicity 1873

1873_header

A few weeks ago I was doing some procrastisewing (you know, procrastinating by sewing). I’d decided it was suddenly vital to empty the work in progress box and get some of the half mades into something wearable or decide of they were just terrible and cut them into something else.

IMG_6288

This dress has been sitting there since this post where I detailed how I’d cut the sleeves upside down. Well it got put away in a huff and it’s been pulled out a few times but every time I tried it on I felt huge in it. A high neck and sleeves are not my thing. So I pulled out the sleeves, cut down the neck and tried it on again.

Front view

Good enough. I finished the edges with bias binding and popped an invisible zipper into the back. I’ve not sewn in an invisible in an age and was ever so pleased when it went straight in. I use my regular zip foot not one of the special invisible zip foots as I find them way too much drama. Regular zip foot, nice and slow is the way for me.

So I was all excited I had a pretty new dress to wear. I’ve worn it a few times since and until this morning had no idea that this happens at the back.

back view

What an ugly ugly wrinkle. We took these photos on the way out this morning and since coming back I’ve been trying to figure out how on earth I missed such an obvious and fixable wrinkle (back length needs shortening). Well it appears that when I try on my dresses and look at my back in the mirror I round my shoulders. By doing this I lengthen out the back panels and the wrinkle disappears! So lesson learnt, stand up straight and alter that back panel.

Fabric: Japanese Lawn from Spotlight

Dress Pattern: Cynthia Rowley by Simplicity 1873

Alterations: scooped out neck.

Alterations for next time: take length out of centre back panel, don’t take neck scoop quite so wide as some bra straps show at the current width.