Posted on 2 Comments

Sewing Adventures: The Betty Blouse

In my head the outfit was to be a simple pair of elastic waist pants and a boxy top. The fate of the pants you know about in the Simplicity pants of mehness, the boxy top is an entirely other story and a much nicer one at that.


I wanted a simple boxy top and immediately thought one of my Japanese pattern books would have just the thing. In taking them off the shelf I came across The Betty Blouse. A free pattern with Simply Sewing magazine and it was just what I needed. Loose, extended sleeve and just the sweetest detail of front pin tucking.


I measured up the pattern pieces chose a size and decided to grade out the hips just a little to give myself more room.
In looking for fabric it was deja vu as I was looking deep into the stash but got distracted with a recent addition of this Lisette lawn. I’d picked it up at a half price sale at the fabric cave.
Within moments I had the pattern onto the fabric and was cutting out with reckless abandon…and reckless it was. My fabric wasn’t quite long enough. Some shifting around and I could make the top but it would just be shorter than planned.


Pintucks, side seam, neck binding, sleeve hem and body hem made it an incredibly fast make that when finished looks like it takes far more time than it did. The pintuck detail elevates it from boring basic to interesting basic.
Cutting it shorter due to lack of fabric would normally be an issue but here is where I’m grateful to be a short sewer as it’s actually an ok length on me. Here I am wearing it with a scarf to cover up the drainage pump I had for a bit after surgery.


Pattern: The Betty Blouse
Fabric: Lisette Lawn from The Fabric Cave
Alterations: shortened to fit onto available Fabric, graded out at hips a little. Would make again

Posted on Leave a comment

Sewing Adventures: Lisette B6169 dress in floaty rayon

As you’ve probably gathered a lot of my recent makes and crafts have all been based around either being in hospital or post surgery. Before I went to hospital it was fairly stressful so I made a list of what would be needed. Pajamas, robes, outfits for post hospital and crafts to do while recovering. This planning and sewing kept me busy and was a great help in keeping me calm.
Now that I have time to blog about it, it’s feeling a little ALL about the hospital/surgery. I didn’t have time or inclination beforehand to make anything new that wasn’t going to be useful and now post surgery I can’t yet cut out or sew. Blogging these pieces and explaining the reasoning behind them is just like the rest of my wardrobe, garments made with a purpose. Hopefully it’s interesting to read and may help anyone else needing to go to hospital and wanting to make their own wardrobe to take with them?


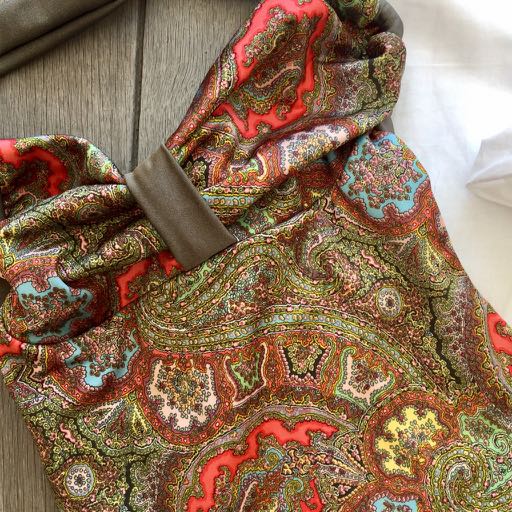
When I bought this rayon at Spotlight I had entirely different plans for it. Ideas of floaty scrappy summer dresses were flitting through my mind. Fast forward through a few months of endless doctor visits for me and for The Englishman with his broken shoulder, the fabric was still sitting there and summer was rapidly on its way out.
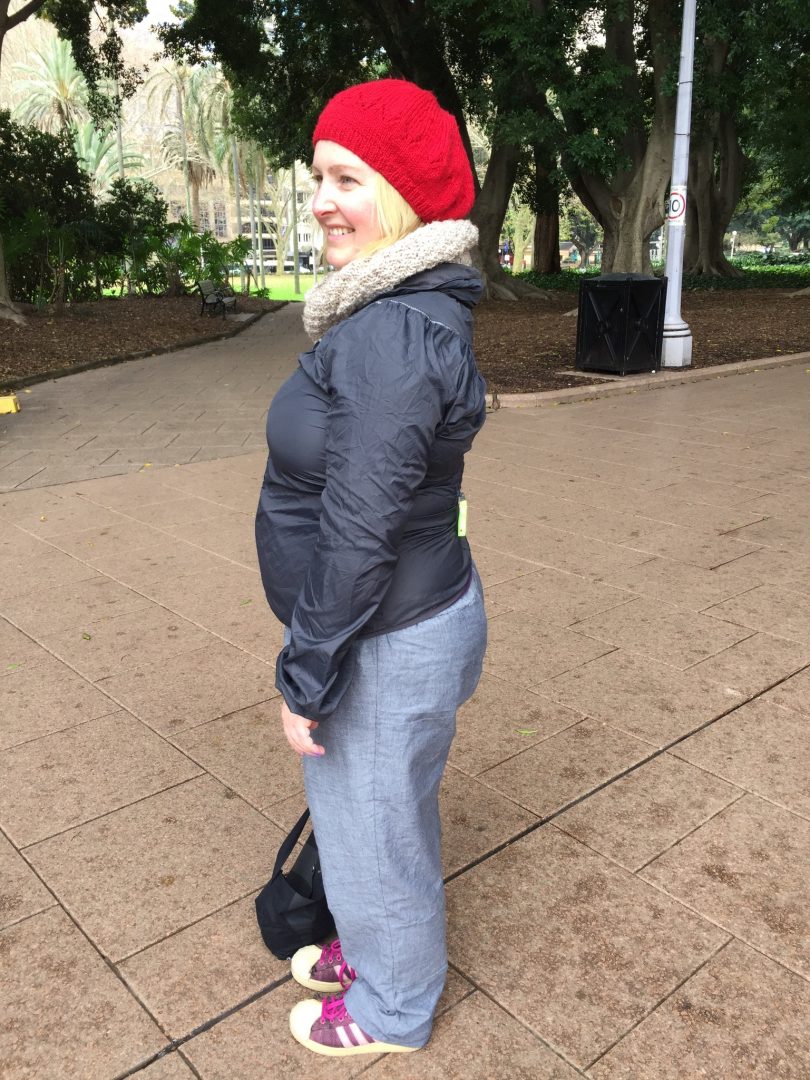
I wanted a light loose dress for post surgery. The reasoning being that the weight of the garment couldn’t be felt on my skin and that plenty of room would make it comfortable.


This was all going through my mind when I spotted this Lisette B6169 pattern in a bundle going cheap at Pitt Trading. They don’t usually carry patterns and this was part of a sale lot so it seemed good fortune that it came my way.


Cutting out the pattern the pattern shapes looked incredibly straight, there was no difference from bust to waist or waist to hip. This seemed out of the ordinary so I googled the pattern looking for reviews. While the pattern is incredibly popular it seems everyone has made the jacket. I couldn’t find a single review on the dress.
I did some measuring, shortened the dress to be more appropriate for my height and added in some extra ease. I basically drew out approx 3 cm from the edge of each hem then angled the new line up to approximately the waist. It was incredibly slap dash which is not my normal approach, I didn’t even toile but cut straight into my good fabric.
The pattern itself is a bit of a fabric eater and I had to add in some extra seams in the back yoke to make it work. The fact that my fabric was a directional print certainly didn’t help.’
Once cut it was a really easy pattern to put together, the only thing I made a mistake in cutting the neck band and it’s too long and doesn’t sit flat. Every time I put it on, I think ‘ I must fix that” but it’s yet to happen.


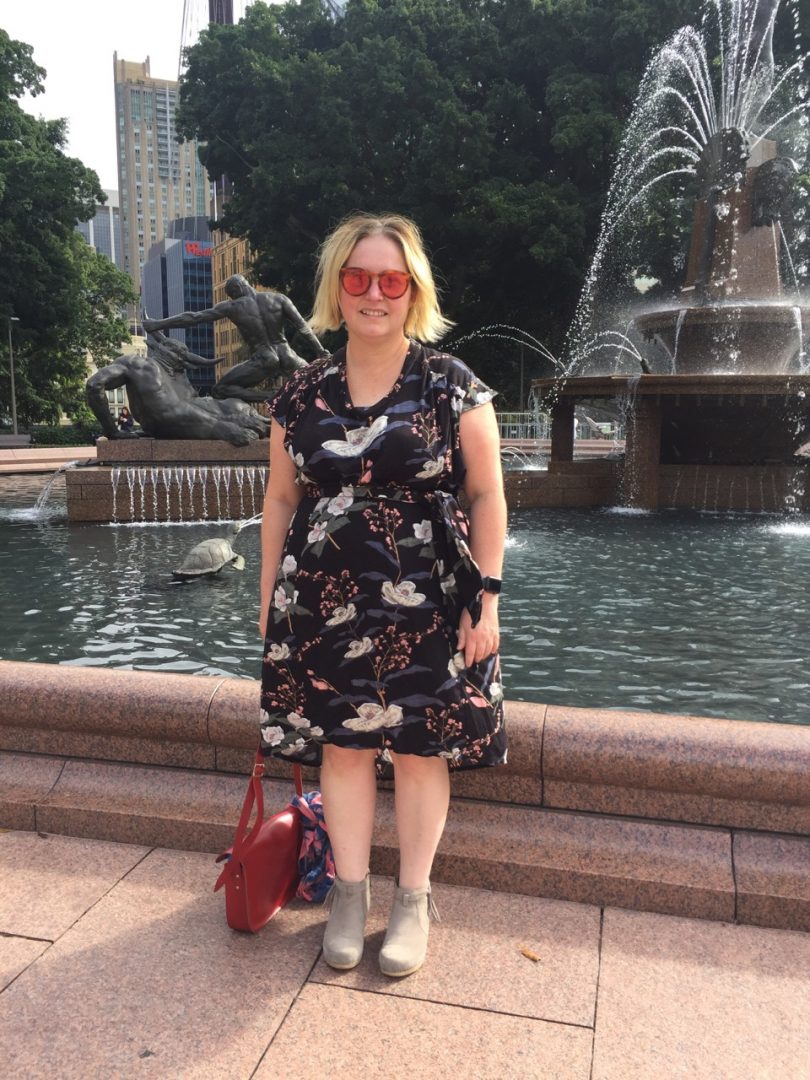
It’s not the kind of style I generally wear, it’s almost cocoon like in its shape with a high low hem. All things I tend to avoid. However it looks not too bad and it’s doing it’s intended job of a loose comfortable dress post surgery perfectly.
I wore it to the hospital and then again on my way home. Here I am at the elevators on my way out.


I’ve got a drainage pump attached at this point and the dress was loose enough to pull on over the whole thing which was wonderful.

Here it is back at Spotlight, was grabbing selfies for Me Made May.

Pattern: Lisette B6169
Fabric: Rayon from Spotlight, it’s still available just be sure to pre wash and realize it is a directional print.
Alterations: shortened for my height, extra width added hem to waistline (approximately). I cut the largest sizes in the body and the size 12 yokes.

Posted on 2 Comments

Sewing Adventures: Sewing for presents or when I forget how to sew for tall people

Do you make gifts for the family? I try to make as many as I can and for Christmas 2016 there was a definite swimsuit theme happening. I’ve already shared the roarsome suit I made my niece and the cute rashie I made for my nephew.


This swimsuit had slightly less success. It’s the Alison by Burdastyle which I’ve made before here. The pattern has plenty of issues but the style is cute so I thought I’d whip one up for The Englishman’s sister.


Fabric was the easy part using these great prints from Pitt Trading.


I already had H’s measurements so I cut her size in the width and went for the longest length as she is quite tall. Sadly it wasn’t quite enough length! They came up too short in the overall length, a clear case of me being short and forgetting just how tall she is. Rather than send them back I told her to find a shorter friend to give them to and I’ll make her a new pair.


I didn’t get a great pic before I sent the parcel off but I made a coverup to go with the swimsuit. I thought it would be handy getting to and from the beach or the pool?

This embroidered white cotton voile, another Pitt Trading fabric was perfect. It has this amazing border to it which kind of did all the work for the garment. I kept it simple and used the Named Asaka kimono pattern. The only change to the pattern was to cut the sleeves on the fold to take out the nice split sleeve that normally features in the garment. Seeing as how I wanted a sun protective garment I thought it best to cover up the slit. To help secure the cover up I added a decorative white and gold cord as waist tie.

Pattern: Burda Allison swimsuit, Named Asaka Kimono

Alterations: add length to the body of the swimsuit

Fabric: Fabric and trims for both from Pitt Trading

Posted on 6 Comments

Sewing Adventures: Hello embroidery my old friend

There was a time in my life when I would do a form of embroidery every day. I did big multi month pieces and always had a piece to work on.
Over time I got out of the habit and yet it was not replaced with something of substance. Endless scrolling for inspiration on my phone oddly left no inspiration and at nights end I had achieved nothing.


So this year I decided I was going to do more. I started with some sashiko pieces and kept fairly busy but now with weeks of enforced slowing down and beautiful wonderful time with zero pressure to do anything I have found an old friend. The meditative friend of embroidery.
I had lots of pieces pre planned for the time but an unplanned one has brought possibly the most inspiration?


While I was in hospital I was lucky to have some visitors one of whom was Maria aka Velosewer. She utterly spoiled me with a bouquet of flower chocolates, an array of magazines and yummy donuts! Such treats.
The issues of the New Yorker and Frankie Mag were shared through the whole ward but I kept my issue of Mollie Makes as it had the sweetest embroidery kit attached.


This simple Scandi floral hoop was an absolute joy to stitch and I love the colour palette.
After such enjoyment I’ve rediscovered my embroidery stash and will be adding more projects to my ever growing to do list. The advantage here is that these can be done while watching tv and will replace the endless scrolling.


And this simple embroidery? Am going to tuck in all the excess fabric, add a circle of calico to  neaten the back and hang it above my desk as a constant source on inspiration.

Pattern: Scandi Florals Hoop Kit from Mollie Makes

Alterations: none

Fabric: included in the kit

Posted on 2 Comments

Sewing Adventures – the weird Simplicity pants of mehness

Some days you make good things. Some days you make bad things and some days you make something that just makes you confused.
These pants confuse me.


It’s Simplicity 1377 elastic waist pants. Here are some photos of them being worn today in the wet and wind. I’ve got them paired with a RTW spray jacket and mum knitted beret and scarf.

I wanted some long pants to take hospital and to wear afterwards. Not having time for a toile I did what I usually do in those circumstances and measured the pattern pieces. I checked the length. Width at thigh, waist circumference and it was looking fine so I cut out. This is some stash fabric which I’ve used before to make The Englishman a jinbei from. It’s soft and has a decent drape.


The pants themselves were straight forward to put together and before I added the elastic I popped them on. They were short in the crotch like really short. You could see my underpants at the back and it barely covered the front of my underwear. I did some double checking and it has a sewn on waistband. So I cut out the waistband, added the elastic and attached it to the pants.


They still look weird. The back is really short and the front is weirdly long (yes I’ve double checked to make sure I hadn’t put them on the wrong way round). Having the sewn on waistband looks cheap and is bulky too, the legs are a decent width and the ankles don’t flap about while you are wearing them, it’s just the crotch is all wrong.
While wearing them it feels both like they are falling down and as if you are giving yourself a wedgie at the same time.


I haven’t had a chance to properly analyze the pattern but instinct says a grown on waistband would look better and solve some of the height issues. The crotch depth on front and back should be raised, the back crotch should be scooped out (especially for anyone who like me has a rounded bottom) and I’d look at where the crotch join is? It’s possible it’s too far forward which is causing the “falling” feeling? Not sure as some of the other fixes may take care of that before you need to get to that point.
All in all, not so successful but while they look and feel terrible they do the job. Filling the gap in my wardrobe till the post surgery swelling goes down and I can fit back into my regular clothes but I don’t think I would make again.

Pattern: Simplicity 1377

Alterations: too many to justify using the pattern again

Fabric: from the stash

Posted on 2 Comments

Everyone deserves Pretty Lingerie: Named Asaka Robe

I’ve made this pattern once before for a friend and always wanted one of my own and yet just hadn’t got round to it. Then early last year we had our very first Sydney Spoolettes Swap meet (you can read about it here). Where I picked up this lovely Japanese cotton. It has an ombré fade across it and a printed panel edging on one side. I knew it would be perfect for this robe.


I had to be super careful with my pattern placement so the fade would be consistent across all the panels. But I was running just a fraction short on the front panels. A quick bit of cut and slicing later and there are extra seam lines near the shoulder at the front. Honestly am not even sure anyone would notice if I didn’t point them out but it meant everything fitted on correctly.
The neck band was a great way to utilize the printed border, again I had to add some seams to make it work but it looks so good I’m glad I took the time to sort it out.

Wanting an entirely clean finish I stitched on the underside with the idea of turning under the front and top stitching it down. However when I tried to do this I had nowhere near enough fabric and raw edges to deal with!
I took it into Pitt Trading with me and had a fun time matching trims to cover up the raw edge. There was a lovely lace trim that looked so pretty but I wanted to get it done quickly so I went with this lilac petersham ribbon. It’s just stitched over the top of the raw edges to keep everything neat. The excess I used to create the waist tie with.
Despite being incredibly lightweight it’s a lovely gown to wear. Not great on very cold nights but as a lovely cover up for warmer weather it’s just about perfect.

I like that despite the dramatic sleeves you can still use your arms (in fact am typing this while wearing it!). Here I am tucked up with my robe and quilt, it’s very hard to take a downwards photo while sitting.

It even looked good draped across the bottom of a hospital bed.

Highly recommended and perfect for gifts too.

Pattern: Named Asaka Robe

Alterations: changed front band construction to have clean finish, then had to add ribbon to fix the gap.

Fabric: from Sydney Spoolettes swap, thank you whomever dontated it!


Posted on Leave a comment

Everyone deserves Pretty Lingerie: Seamwork Alamda robe

The moment I saw the Seamwork Alamda regrammed by Sophie from Ada Spragg I knew I had to give it a try, I really liked the sleeves and front tie and was smitten.
Cue a few weeks after that and this gorgeous silk came into Pitt Trading. Besides the lilac there is nothing here I normally like, peach, animal print all usually end in a big NO from me. This however I found irresistible. So I grabbed some.
In the meantime I’d read a few reviews and almost all of them complained about how short the gown was. Now not being blessed in the leg department I didn’t think I had much to worry about but when I cut it out I cut to the very longest length possible.
Then like so many great projects it got packed into the “current projects” box and left for a year. Not the best that’s for sure.
Then a few weeks ago knowing I was bound for hospital, I grabbed it from it’s super large zip lock bag, French seamed the sides, shoulders and attached the bands and created the bands. It took like no time at all! Seriously fast make.


I didn’t like the way the neckline was finished by just turning it under and topstitching. It seemed a bit down market for a garment that is a huge fabric eater and due to the fact I used silk I wanted a better finish. So I cut bias strips and created my own binding. Silk bias binding is certainly a thing you cannot rush so I spent an enjoyable afternoon carefully ironing it into place.
The bias finish went on really well except I want to do a better mitre on the corners.
I also cut the front ties longer, in fact I cut them the entire width of the fabric. This allows me to either wrap it around me or tie it in a very huge looping bow at the front. It’s cute but I probably wouldn’t do this next time as if you are just quickly throwing the gown on you can trip over the long ties.


Overall I really like it as a gown, it has good coverage but allows for plenty of movement, the silk is wonderfully lightweight yet keeps you warm and the whole thing packs to practically nothing.
Definite win and would make again.

The weather has been atrocious the last few days and I’ve missed getting some extra photos of this make, am hoping I can add some more in soon!

Pattern: Seamwork Almada very luxurious would make again
Alterations: narrow bias binding to finish neckline and front edges, super long front ties
Fabric: Designer silk from Pitt Trading

Posted on 2 Comments

Everyone deserves Pretty Lingerie: Ohhh Lulu Romper

I’ve long admired Ohhh Lulu patterns and her style. I really like the fabrics and lace combos she comes up with. They seem cute and feminine but with this cool edge to them somehow?


The Evelyn romper is one I’ve been swaying back and forth on since it came out. “Oh it’s cute!” “Perfect to help use up my silk stash” to “is it comfy?” “Are the legs too short?” “Will it look weird on my shape?”. So I finally gave in, bought it and made it up.

I got the .pdf and it went together well, there is a slight mistake on one of the first pages where some of the size lines are marked incorrectly. Just keep an eye out for it and once you have the pages taped together trace your own size using a highlighter so it doesn’t get confusing.

First the sewing. It’s a bit of a fabric eater as it’s all on bias but not overly so. According to the sizing I’m a different bottom to top size so as I cut out the bottoms I angled the side seams to match the same same I was going to cut the top in. I dived into the stash and found a cute vintage cotton seersucker to use.

Once I started sewing it went together with utter ease. Everything lines up, all the sizes match together. Such a nice way to sew when patterns just work.
The self fabric bias is a really nice touch. I like the wider style on this cotton but I think if I did use a silk I might take it narrower just to add to the delicate nature of the style?


Initially the waist is meant to be a casing that elastic is threaded through. Because this is a toile and I have heaps of lingerie elastic I used that instead and topstitched it into place. The triple stitch zig zag made short work of it and looks wise it’s fine on the cotton. Again on a fancier silk set I would do the casing as I think it looks better in the fabric with more sheen.


Comfort wise I’m still testing them out. I’m a super wriggly sleeper so wasn’t sure how they were going to fare or if they were best suited for lounging about at home in the hot weather? They are very cheeky cut on the bottom, like very. Someone asked me if it could be used as a romper for day wear? Well it could but it would expose quite a lot of your bottom?

The front comes quite low exposing cleavage but you don’t feel like you are going to fall out of it? I don’t know how to properly explain it but it kind of covers you up and yet shows a lot of skin at the same time? Cute but certainly puts it in the wear to bed only category.
Pattern: Ohhh Lulu Evelyn Romper very cute would make again
Alterations: narrow bias binding for silk, do waist casing for silk, potentially add some length and even lace to the leg hems?
Fabric: vintage printed cotton seersucker from the stash

Posted on Leave a comment

Everyone deserves Pretty Lingerie Week 2017

It’s back! a whole week of pretty lingerie because everyone deserves to have pretty things!

Lots planned for this week to show off some of my more recent makes, there’s been plenty of robe wearing going on here, so I’ll have a run down of a few patterns that I’ve used and some other bits and pieces that I’ve made. The whole point of the week is to encourage everyone to grab some pretty fabric and a pattern of their choice and make something just for them. Go on and give it a go, I know you will enjoy it.

Plus just for fun a good old fashioned blog button

<a href=”http://www.measuretwicecutonce.com.au/2017/06/everyone-deserves-pretty-lingerie-week-2017/”><img src=”http://www.measuretwicecutonce.com.au/wp-content/uploads/2017/06/2017-knickers-website-button.jpg”/>

Posted on 3 Comments

Me Made May 2017 – drawing challenge

And another Me Made May comes to a close. I don’t always do the challenge as I wear me made almost all the time anyway but it is fun to do and see where and what I actually wear.
Of course this year has been completely different as I threw in the challenge of surgery, hospital visit and recovery to the mix! Knowing that was coming up I had set myself an additional challenge to do a drawing of a fellow sewer every day.


I wanted to do this to increase my skills, practice and honestly in case I was too sick/in pain to be bothered to take my photos.


Luckily my recovery has been going well and I’ve been enjoying the drawings and the responses so much I am working on ways to do more  with my drawings, including ways for them to be printed.
And in no particular order, here is the months drawings.

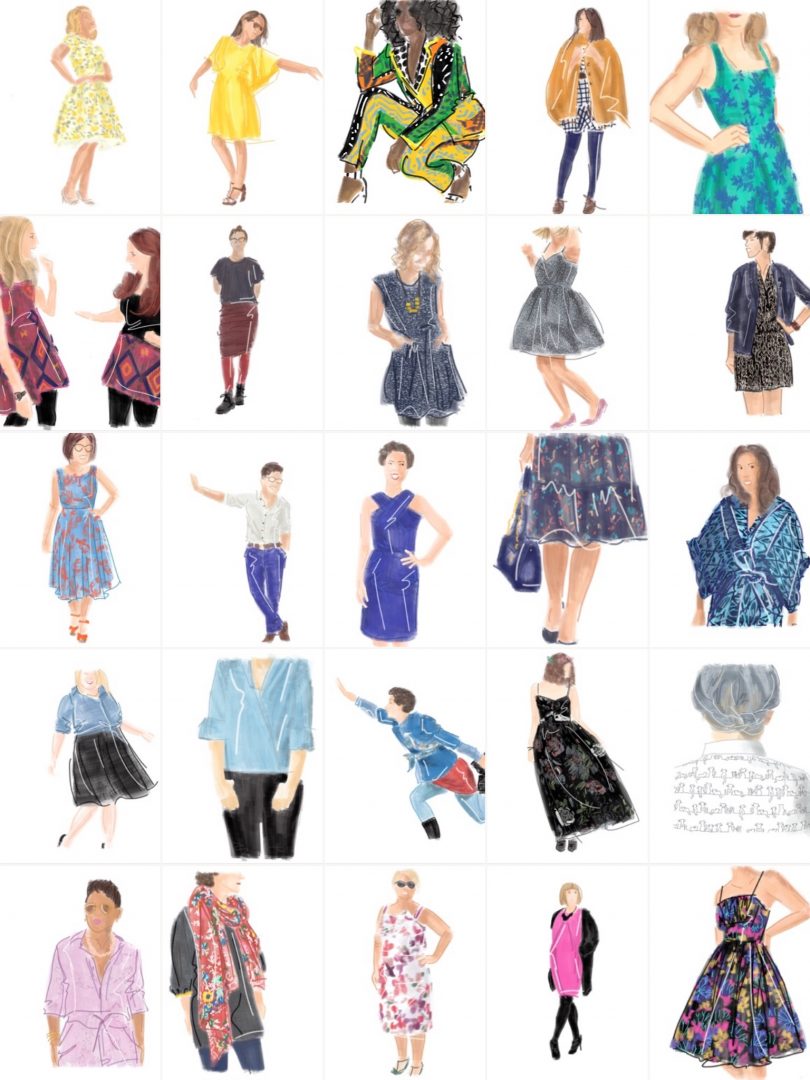
Everyone was chosen for their inspiring makes, and I was wanting to work on different patterns so plenty of patterned garments make an appearance.

Thank you to everyone who has left lovely messages, regramed, tweeted or mentioned the drawings, it has been a privilege to showcase just a fraction of the talents of the entire online sewing community.