Posted on 2 Comments

Sewing Adventures: Free Darcy Boxer Shorts Pattern

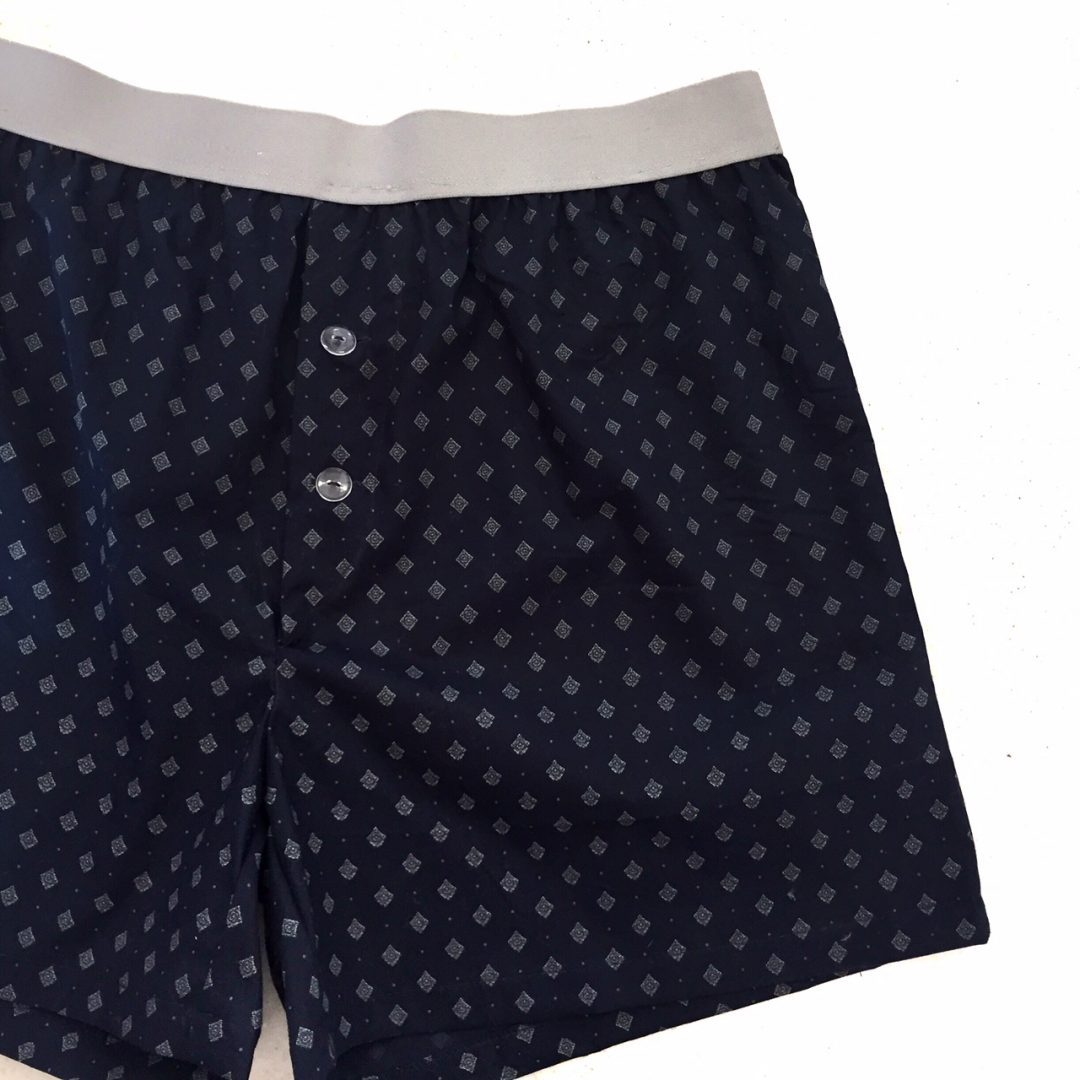
The Darcy Boxer shorts are one of my all time most downloaded patterns, am sure its 98% because it’s free and about 2% because it’s the pattern the person wanted? regardless it is a fabulous pattern that makes up in no time, takes a minimal amount of fabric and results in awesome shorts for yourself or to use as a gift.

These ones are intended for a gift. We are way behind on birthdays for the entire family this year so I’m trying to get ahead of the curve and get some Christmas sewing/whenever we see them next sewing in. When you don’t live near your family you sometimes find yourself giving and receiving presents at odd times of the year.

This is a lovely dense Japanese woven cotton I got at Pitt Trading. The tiny diamond pattern is perfect for an understated pair of boxers. I’ve gone with French seams throughout because a) I felt like being fancy and b) I currently only own white or black overlocking thread and well that’s not close enough for my colour matching loving heart. So French seams it was.

It’s been a little while since I made a pair with a fly so I had to go back and check my own notes. Apart from a slightly tricky fly/French seam junction point it was a straight forward sew.

For the elastic I jumped at the chance to delve into my Prym box of goodies and use this ultra plush yet firm elastic. It’s so lush and perfect for these boxers. Because I wanted to practice more with my coverstitch I used it to apply the elastic. It was a little finicky but now that I’ve done it once am sure I’ll be good for next time. Plus the stitching looks invisible!

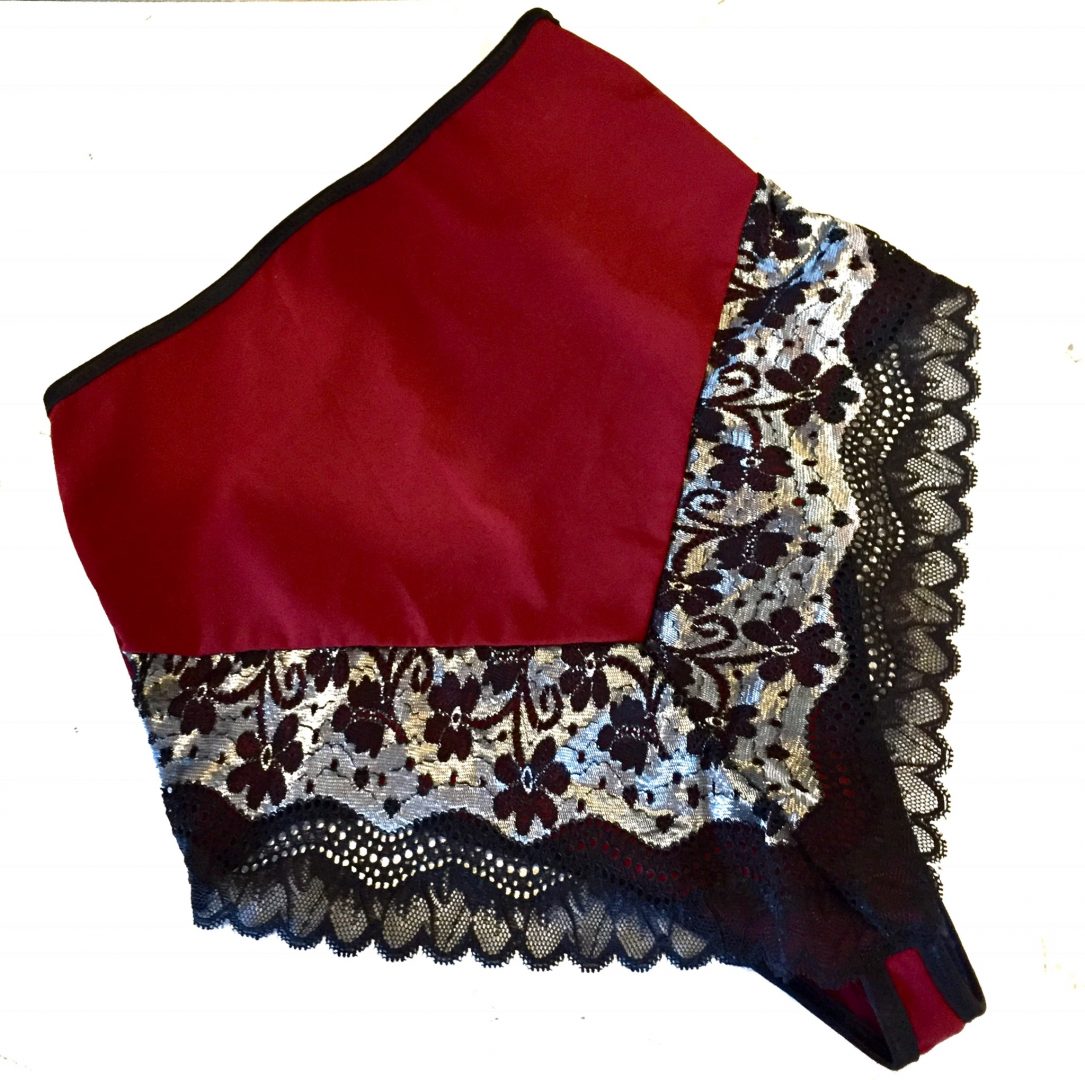
All in all a pretty lovely make and a great example of “Everyone deserves pretty Lingerie”

Pattern: The Darcy Boxers Shorts by Measure Twice Cut Once

Fabric: made by Sevenberry sold at Pitt Trading waist elastic from Prym

Changes: French seams throughout, nice change but am unsure I would do that again?

Posted on 3 Comments

Sewing Adventures – Emma Racer Back Slip with lace

Another Emma! this time with added lace. I really like how this one turned out, I made the variation with the lace and like how the black lace works so well with the darker style print.

The fabric was picked up at the Sydney Spoolettes first fabric swap of 2018 (2nd from the top in this photo. It was smallish but you need so little for this pattern that I knew I could make it work. It’s super soft and the original owner said she got it from Knit Wit in Perth.

It’s slightly firmer across my stomach where I’m lopsidedly swollen after surgery but am not worried as thats something that is unique to me and not the pattern fitting incorrectly.

Since my last version I’ve sized down the bust area to a size 12 but kept the body at a 14 but apart from that no other changes.

One of the reasons I wanted to do a racer back slip is that I am a very wriggly sleeper. Normally slips fall off my shoulders and I get all tangled up in them. This narrow curving back fits perfectly and stops the slip from moving off me as I wriggle in my sleep. A great solution that also looks flattering.

I also got to use my overstitch machine for the hem, was very exciting. Am still in the early stages of knowing all the ins and outs of the machine but so far very impressed.

Pattern: The Emma Slip by Measure Twice Cut Once

Fabric: Sydney Spoolettes fabric swap 2018 and black fold over elastic and lace from Pitt Trading

Alterations or changes for next time: None

Posted on 2 Comments

Sewing Adventures: Emma Racer Back Slip in a moody floral

My first make of the year that’s all for me! I’m very excited. It was such a wonderful feeling to pull on something I’d made after what feels like forever since I’d last done that.

Onto the make, it’s my newly released Emma Slip. I’ve been wearing these since I finished the pattern like 2 years ago. I kept putting off releasing the pattern thinking it wasn’t the right time or I need to have professional photos for it or a million and one other excuses. No more waiting for the perfect timing. If patterns are ready I’m going to let them loose into the world and not wait for that elusive perfect moment (that doesn’t exist anyway).

Size wise I went for a straight 14 as I’m still swollen post surgery and have an oddly lopsided torso. Ideally I think I should have gone 14 for the skirt section and cut a 12 for the bust as it’s a little big, not hugely so but just enough for me to notice it.

Apart from wanting to make that small size adjustment everything else is exactly as the pattern is. The dreamy moody floral knit fabric was a remnant at Pitt Trading and it’s lovely and soft. Perfect for a wriggly sleeper like me.

While I was making it I shared this quick tip on Instagram, when sewing to easily note the front and backs of a project I use one pin for the front and two for the back. You’d be surprised just how useful this turns out to be!

I like it so much I’ve already got more planned!

Pattern: The Emma Slip by Measure Twice Cut Once

Fabric: Floral remnant and lilac fold over elastic from Pitt Trading

Alterations or changes: Next time size the bust down

Posted on Leave a comment

Everyone Deserves Pretty Lingerie Week is Back!

It’s that time of the year again, the annual Everyone deserves Pretty Lingerie week! I started this week years ago to encourage everyone to make pretty knickers and it’s since grown to encompass all things underwear and lingerie.

So I encourage everyone to take a look at their lingerie supplies, patterns and wardrobe and decide they need something a bit pretty, something nice and go out there and make it this week!

I’ll be popping onto the blog all week with different bits and pieces from pattern releases to sharing of new makes of my own.

Blog yours too or if you are on instagram keep an eye out for the #everyonedeservesprettylingerie and #everyonedeservesprettyknickers hashtags to see what everyone has been creating.
Happy Sewing!

Posted on Leave a comment

Sewing Adventures: another lingerie set

Not content with giving my friend one matching set of lingerie I thought I’d add another not quite a set to her parcel.

After the success of sewing the Delphine thong I decided to try another one, this time in a soft stretch lace and without the additional back coverage.

The lace from Pitt Trading is so lovely to work with but was so soft that the very end of the plate on my sewing machine was catching ever so slightly as it went though.

A quick fix was to use some wide washi tape to cover the plate and hey presto! Snag free sewing.

I really I thought the thong would pair perfectly with a plain black satin bra but as I was running out of time to get it finished in I cheated a little. In my teaching bag I often have samples of pieces that are not quite finished so I can show students diffferent steps along the way. A bit of a rummage through the bag and I found this black lace triangle that only needed a little bit of finishing off.

Together they make a nice not quite matching set.

Pattern: Delphine thong by Ohhh Lulu, my own pattern for the triangle bra

Fabric: Laces from Pitt Trading, elastics and trims from my stash

Alterations: None

Posted on Leave a comment

Sewing Adventures: Euler bra and Delphine thong

Recently a friend was lamenting the lack of cool lingerie that covered the tummy and yet still looked youthful. Naturally I knew I could sew a solution and because it was for a friend I knew I’d make her a matching set.

The Euler bra by Sophie Hines was an obvious choice as I’ve made it before and the shape is so modern it automatically makes any set look very contemporary.

It also gave me a good excuse to buy the Delphine high waist thong by Ohhh Lulu  I’d seen it on instagram and liked the shape, plus I thought it would fulfill the covered tummy option my friend wanted.

The Euler went together with no problems at all, I did add a touch of lace trim to the cup seam just to make it match the knickers a little more. The fabric is a sensitive jersey from Pitt Trading. Elastics and trims from my stash.

Delphine was easy to sew once I checked the instructions! I went with the added lace covered back and initially had the thong pinned in the wrong section. That looked odd so I checked the instructions, realised my mistake and once I had it attached in the right place it all went together well. It really is a lovely pattern and I was so pleased with how  they look.

I really like the lace across the back and think its super flattering as well as a great way to use up smaller lace leftovers or splash out on a small amount of a very fancy lace.

Pattern: Euler bra by Sophie Hines and Delphine Thong by Ohhh Lulu

Fabric: burgundy sensitive Lycra from Pitt Trading, lace from Pitt Trading, elastics and trims from my stash

Alterations: added lace to cup seam of Euler Bra

Posted on 2 Comments

Everyone deserves Pretty Lingerie: Named Asaka Robe

I’ve made this pattern once before for a friend and always wanted one of my own and yet just hadn’t got round to it. Then early last year we had our very first Sydney Spoolettes Swap meet (you can read about it here). Where I picked up this lovely Japanese cotton. It has an ombré fade across it and a printed panel edging on one side. I knew it would be perfect for this robe.


I had to be super careful with my pattern placement so the fade would be consistent across all the panels. But I was running just a fraction short on the front panels. A quick bit of cut and slicing later and there are extra seam lines near the shoulder at the front. Honestly am not even sure anyone would notice if I didn’t point them out but it meant everything fitted on correctly.
The neck band was a great way to utilize the printed border, again I had to add some seams to make it work but it looks so good I’m glad I took the time to sort it out.

Wanting an entirely clean finish I stitched on the underside with the idea of turning under the front and top stitching it down. However when I tried to do this I had nowhere near enough fabric and raw edges to deal with!
I took it into Pitt Trading with me and had a fun time matching trims to cover up the raw edge. There was a lovely lace trim that looked so pretty but I wanted to get it done quickly so I went with this lilac petersham ribbon. It’s just stitched over the top of the raw edges to keep everything neat. The excess I used to create the waist tie with.
Despite being incredibly lightweight it’s a lovely gown to wear. Not great on very cold nights but as a lovely cover up for warmer weather it’s just about perfect.

I like that despite the dramatic sleeves you can still use your arms (in fact am typing this while wearing it!). Here I am tucked up with my robe and quilt, it’s very hard to take a downwards photo while sitting.

It even looked good draped across the bottom of a hospital bed.

Highly recommended and perfect for gifts too.

Pattern: Named Asaka Robe

Alterations: changed front band construction to have clean finish, then had to add ribbon to fix the gap.

Fabric: from Sydney Spoolettes swap, thank you whomever dontated it!


Posted on Leave a comment

Everyone deserves Pretty Lingerie: Seamwork Alamda robe

The moment I saw the Seamwork Alamda regrammed by Sophie from Ada Spragg I knew I had to give it a try, I really liked the sleeves and front tie and was smitten.
Cue a few weeks after that and this gorgeous silk came into Pitt Trading. Besides the lilac there is nothing here I normally like, peach, animal print all usually end in a big NO from me. This however I found irresistible. So I grabbed some.
In the meantime I’d read a few reviews and almost all of them complained about how short the gown was. Now not being blessed in the leg department I didn’t think I had much to worry about but when I cut it out I cut to the very longest length possible.
Then like so many great projects it got packed into the “current projects” box and left for a year. Not the best that’s for sure.
Then a few weeks ago knowing I was bound for hospital, I grabbed it from it’s super large zip lock bag, French seamed the sides, shoulders and attached the bands and created the bands. It took like no time at all! Seriously fast make.


I didn’t like the way the neckline was finished by just turning it under and topstitching. It seemed a bit down market for a garment that is a huge fabric eater and due to the fact I used silk I wanted a better finish. So I cut bias strips and created my own binding. Silk bias binding is certainly a thing you cannot rush so I spent an enjoyable afternoon carefully ironing it into place.
The bias finish went on really well except I want to do a better mitre on the corners.
I also cut the front ties longer, in fact I cut them the entire width of the fabric. This allows me to either wrap it around me or tie it in a very huge looping bow at the front. It’s cute but I probably wouldn’t do this next time as if you are just quickly throwing the gown on you can trip over the long ties.


Overall I really like it as a gown, it has good coverage but allows for plenty of movement, the silk is wonderfully lightweight yet keeps you warm and the whole thing packs to practically nothing.
Definite win and would make again.

The weather has been atrocious the last few days and I’ve missed getting some extra photos of this make, am hoping I can add some more in soon!

Pattern: Seamwork Almada very luxurious would make again
Alterations: narrow bias binding to finish neckline and front edges, super long front ties
Fabric: Designer silk from Pitt Trading

Posted on 2 Comments

Everyone deserves Pretty Lingerie: Ohhh Lulu Romper

I’ve long admired Ohhh Lulu patterns and her style. I really like the fabrics and lace combos she comes up with. They seem cute and feminine but with this cool edge to them somehow?


The Evelyn romper is one I’ve been swaying back and forth on since it came out. “Oh it’s cute!” “Perfect to help use up my silk stash” to “is it comfy?” “Are the legs too short?” “Will it look weird on my shape?”. So I finally gave in, bought it and made it up.

I got the .pdf and it went together well, there is a slight mistake on one of the first pages where some of the size lines are marked incorrectly. Just keep an eye out for it and once you have the pages taped together trace your own size using a highlighter so it doesn’t get confusing.

First the sewing. It’s a bit of a fabric eater as it’s all on bias but not overly so. According to the sizing I’m a different bottom to top size so as I cut out the bottoms I angled the side seams to match the same same I was going to cut the top in. I dived into the stash and found a cute vintage cotton seersucker to use.

Once I started sewing it went together with utter ease. Everything lines up, all the sizes match together. Such a nice way to sew when patterns just work.
The self fabric bias is a really nice touch. I like the wider style on this cotton but I think if I did use a silk I might take it narrower just to add to the delicate nature of the style?


Initially the waist is meant to be a casing that elastic is threaded through. Because this is a toile and I have heaps of lingerie elastic I used that instead and topstitched it into place. The triple stitch zig zag made short work of it and looks wise it’s fine on the cotton. Again on a fancier silk set I would do the casing as I think it looks better in the fabric with more sheen.


Comfort wise I’m still testing them out. I’m a super wriggly sleeper so wasn’t sure how they were going to fare or if they were best suited for lounging about at home in the hot weather? They are very cheeky cut on the bottom, like very. Someone asked me if it could be used as a romper for day wear? Well it could but it would expose quite a lot of your bottom?

The front comes quite low exposing cleavage but you don’t feel like you are going to fall out of it? I don’t know how to properly explain it but it kind of covers you up and yet shows a lot of skin at the same time? Cute but certainly puts it in the wear to bed only category.
Pattern: Ohhh Lulu Evelyn Romper very cute would make again
Alterations: narrow bias binding for silk, do waist casing for silk, potentially add some length and even lace to the leg hems?
Fabric: vintage printed cotton seersucker from the stash