

It’s the cat’s birthday today so that seems like as good as excuse as any to have a SALE!
For the next 2 weeks all digital sewing patterns are 50% off.
Enjoy!

It’s the cat’s birthday today so that seems like as good as excuse as any to have a SALE!
For the next 2 weeks all digital sewing patterns are 50% off.
Enjoy!

One of my goals this year is to reduce my stash, by sewing more of it. I have some gorgeous fabrics that I have bought, been given or picked up along the way and they sit in boxes. No more I say, it’s all the good fabrics everyday around here.

This is one such fabric. Bought ages ago in Cabramatta for the princely sum of $10 a metre.
At the time I must’ve been planning a skirt as there wasn’t a whole lot of it. Maybe 1.5m? I also wanted to take advantage of the beautiful edging so some careful planning was required. I measure out a long rectangle that went the length of the fabric panel. That was to become the skirt with only a centre back panel. This left a long narrow top section with the scallop edge still intact.

I’ve been working on perfecting a bodice pattern for myself. It still needs some work but it’s getting closer. I used this pattern and laid it onto the panel to create a wrap over front and V back. I’d like to say it was all carefully planned and calculated but I totally winged it.

The bodice was a simple construction of darts, shoulder and side seams, while the skirt was simply gathered onto the bodice and a seam put into the centre back.

The whole thing is lined in coral cotton silk and there is an invisible zip at centre back. The zip insertion is fantastic but the embroidery means it’s a little tough to raise up and down. In hindsight I should have totally put in a lapped zip. The linking is hands itched around the neckline to keep it in place and there are a few sneaky stitches at centre front keeping the crossover in place. I had a fuzzy supervisor for my hand sewing.

I wore it out yesterday to catch up with my niece and nephew. Their tiny cousin was with them and she loved my dress and wanted to be my friend because I had a “pretty dress”. Kid compliments are awesome.
Fabric: Embroidered cotton from Cabramatta.
Dress Pattern: winged it, bodice based on my own block.
Alterations: next time I’d raise the centre front cross over a little.
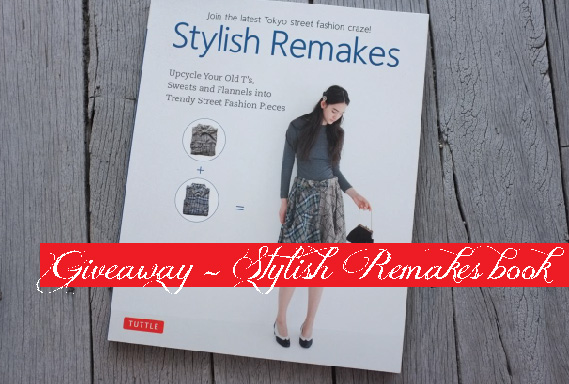
Some time ago I was given a copy of Stylish Remakes to review, when I was asked to do it I said sure, I’m not normally an up cycling type of sewer but am always interested to have a look at something.

When the book arrived I was intrigued. It has some really great ideas to take pre existing garments and give them some cool and sometimes quirky twists to create a new garment.


I was all inspired and yet the book has been sitting there and I haven’t created any projects. I sat down the other week to choose a project and then it dawned on me, I’m trying to decrease my stash and I rarely if ever buy any clothes (even 2nd hand clothes).
This is a book that is to be utilised and treasured by upcyclers who love to rummage at a charity shop. Who chop and recreate and do all manner of wondrous things with an existing start point…and I’m not one of those people. I struggle to find anything at charity shops, am hopeless at doing alterations because to me it’s faster and easier to just grab fabric from the stash and create from the very beginning.

Despite all this the book really sparks my imagination, one of the pieces I really like is taking a bunch of bandannas and making outfits from sewing them together. Such a cool idea to use scarves or bandannas or even fat quarters. Now I don’t have any of those things but I do have a collection of lovely swatches from when we did our Shibori workshop.

I started sewing them together using french seams in the fine fabric. it was this very fineness that made me reconsider the dress as the fabric was virtually sheer and a dress made from it would be unwearable. Creating something only for the photos goes against all the good that upcycling promotes so I needed another way of using the sewn together squares.
During all this sewing and thinking it’s been really hot, when I’m working at home I keep the front door open to promote a cross breeze. This is good except for the flaw that everyone who walks past has a look in, it seems like half the apartments in my building are now some kind of AirBnB and the foot traffic / looking in was getting a little ridiculous for my tastes.
Taking my sewn together squares and inspiration from Japanese doorways which often have fabric coverings called Noren, I created one of my own.

As you can see it keeps the airflow going but discourages peeping eyes, added benefit of looking really beautiful.
So while it’s not a project from the book it is a project inspired by the book which has certainly made me look more seriously at upcycling and how I can use what is around me to create new things.
The publishers have generously given me a book to giveaway to any Australian upcyclers (sorry overseas readers maybe next time), so if you genuinely think you want to give upcycling a go or are a current upcycling fan then please leave a comment below telling me why you should get the book or linking to one of your own upcycling projects. I’ll choose a winner within a week and post it out.
Sydney has been hot, like hot hot and it’s unrelenting so even overnight it doesn’t cool down very much so it’s been an endless amount of feeling too warm. Which is kind of nice because yay summer and also kind of over it, would like to not constantly feel hot and sticky.
It was on one of these hot days that I was working at Pitt Trading and by the end of the day I declared it was far too hot to be wearing a skirt and a top. I purchased one of my favourite new fabrics that has only just arrived instore along with some insertion trim with the plan of making a dress. If you want the same fabric you can get it here or come instore.

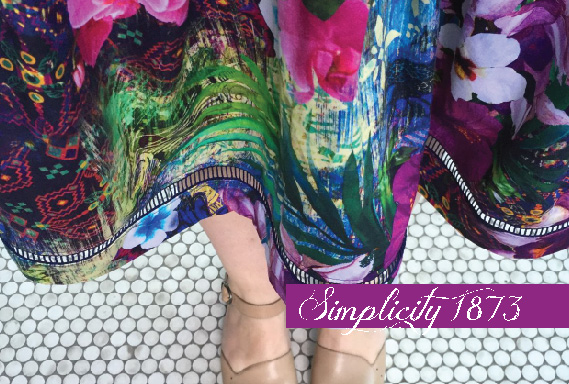
Pressed for time and wanting a sure fire sewing win I went with Simplicity 1873 which I have made before with much success. Construction wise it was very much like what I’ve done before. Slight sway back adjustment, invisible zip at centre back, no linings or facings I’ve just used bias binding around the neck and armholes. I was pretty happy with my invisible zip.

The only big departure from previous editions was the addition of the insertion trim. I cut the skirt panels 5cm longer than I normally do, constructed the entire dress and then proceeded to measure 10cm up from the raw edge of the skirt. I cut along this line and overlocked the new hem of the skirt.

To place the insertion trim in, I stitched the edge of the trim just above the finished line of overlocking, turned it under and topstitched it down. Then taking the 10 cm circle I cut off, pressed it half with the iron reducing the height to 5cm, overlocked the top edge and pinned it to the lower edge of the trim.

Some slight fiddling with the seams helped it line up correctly as it was slightly larger in circumference than the insertion trim due to the nature of the flared panels of the skirt. Repeated the stitching, then topstitching and hey presto insertion trim and pretty hem.

I’m so happy with it as the insertion trim really lifts it out of the homemade arena and into a more fashion item. It’s certainly the type of garment that I’m aiming towards with my makes this year, more fashion less plain sewing.
Fabric: Polished cotton from Pitt Trading, insertion trim also from Pitt Trading who have one if not the biggest number of trims instore anywhere in Australia.
Dress Pattern: Cynthia Rowley by Simplicity 1873
Alterations: Added the insertion trim as explained, other alterations as per previous editions of this pattern, I cut the skirt width as per the pattern this time and didn’t add extra volume.


I’ve given the site a makeover, new layout, some new features and all kinds of nice shiny features under the hood that you don’t get to see but make the site actually work.

There’s a new FAQ page that covers most of the questions I get most frequently via email and the sewalongs page has been updated to include links to all the Named Clothing Beverly Bikini posts.
The webstore has also been restocked with lots of beautiful new colours of bra kits. The gorgeous new Tumeric cover has almost sold out already so get in quick if there is a colour you like.

If you find any glitches with the new layout just let me know and I’ll fix them right up.
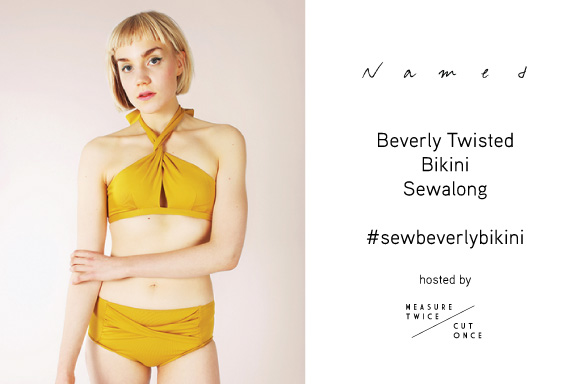

I hope everyone has been having fun with their swimwear sewing? This is the final installment in the sewalong and it’s been pushed back to today as I had so many requests for more time as people wanted to join in.
Don’t forget to share your makes using the hashtag #SewBeverlyBikini so we can see all your beautiful bikinis.
So let’s get started on the top. The outer of mine will be the same beautiful red paisley I’ve been using for the bottoms and the lining will be the solid darker red I used for the front contrast panel on the bottoms.
Stitch your darts into the outer and lining fabrics

Sew the side seam of the outer panels.

Iron interfacing into the seam allowance of the lining.

Sew the side seam of the lining. Note that the side seam is 2 different widths for the lining. The front panel has 2cm and the back panel has 1cm.

Press the seam towards the back, turn the extra seam allowance of the front panel under to create a little channel.

Stitch the channel down.

Placing the lining and the outer right sides together prepare to sew along the top edges of the panels. Go up one side, along the narrow top edge and down the other side.

As you sew the panels together you will also be attaching in the elastic. I’m using my overlocker and the same method I used for inserting the clear elastic into the pants.


Once you’ve done both sides, turn them right side out.
Take your boning and cut it to length, be sure to cut it shorter than the full length of the channel as there is a seam allowance at the bottom.

Before inserting your boning, quickly run it through a lit match so the flame seals the ends. Then insert it into the channel.

Lay the underbust band down, wrong side up. Matching the notches, line up the 2 front panels and pin into place. Once pinned this line is then stitched.


Fold underbust band in half, tuck under the seam allowance and pin into place.

Topstitch underbust band.

Using a safety pin thread your elastic through the underbust band. Make sure it stays flat and doesn’t twist. Once inserted stitch the elastic in place at either end.
Thread the ends of the underbust band (now with inserted elastic) and thread it through your bikini clasp. Pin in place and then securely stitch. My camera has made my clasp look pink! it’s actually not but just looks weird in photos for some reason?

Try your bikini on, check where the knot is. You may need to secure it with a few stitches. Experiment with different twists to see what suits you best.

and you are done!
This has been so much fun, I hope everyone has enjoyed themselves, learnt some new skills and ended up with beautiful bikinis!
As always if you have any questions just let me know and hopefully I’ll be back soon with a round up of all the fantastic swimwear we’ve created!
Huge thank you to Named Clothing for allowing me to do the sewalong and for providing me with the pattern, also to Pitt Trading for providing my amazing fabrics and trims. Finally thanks to Jillian and Kirsty for asking me to do the sewalong in the first place.
How’s everyone going so far with their bikini’s? Don’t forget to share all your progress on social media using the #sewbeverlybikini hashtag.
In this installment of the sewalong we are tackling the elastic on the bottoms. The most important thing to remember when using swimwear elastic is to not stretch it. It is to be put in under tension (by very gently pulling it) but not stretched. If you’ve pulled so hard that the width of the elastic has decreased then you’ve pulled too hard.
Start by pinning your lining in position. Here on the front you can see the lining is cut without the seam allowances. I’ve done the back differently so you can see 2 ways of attaching the lining/elastic.

I’m using my overlocker to attach the elastic. Line up your elastic underneath the foot but not right on the edge of the garment. It’s actually easier to cut off a slither of the fabric while attaching the elastic. If you line the elastic right to the edge it is way too easy to cut into the elastic and that way causes dramas.

I always attach my elastic in the flat and once I get back to the start point I just lap the elastic over and run the overlocker off the edge. It’s by far the easiest and flatest way to do it. Flat is good as elastic joins tend to poke in and get uncomfortable.

The instructions had you cut your lining slightly smaller than the outer garment. This means the elastic sits only on the outer fabric and not on the lining.


Personally I find this method slightly more difficult as you have to make sure the lining tucks in when you do the topstitching.
An alternative is to cut the lining the same size as the outer fabric and catch it as you add the elastic in. I find this easier to sew and it stays in place no matter how active a swimmer you are as it’s anchored evenly across the entire pant. This is the back where the lining was cut the same size as the outer.


Once you’ve attached your elastic it’s time to fold it down in preparation for topstitching. Lycra plus clear elastic often makes for it difficult to pin through. You could use quilting clips to hold it in place or even just clothesline pegs.
For topstitching you can use a twin needle, a zig zag or a 3 step zig zag. I’m going with my 3 step zig zag as I like the way it looks. When you are topstitching you don’t have to pull or stretch the fabric, you do have to ensure you keep a straight edge. Where the elastic is tucked under it tends to like to roll, if you let it you end up with a ropey looking edge and get puckers. Make that edge nice and smooth as you topstitch and it will look beautiful and professional.

After topstitching I’ve gone back and checked my lining to ensure it is flat and even. On the back where the lining was cut the same size as the outer. It sits flat.

On the front where the lining was cut smaller it looks ok but there are a few places where the lining hasn’t been caught into the topstitching. You can see it on the left hand side of the crotch and the upper left hand side of the waist.

Here is the finished pant.

If you have any questions about the elastic application just ask in the comments, next time we will be moving onto the top.
Still need your pattern? Named have set up a 20% discount code on PDF and printed patterns of the Beverly Twisted Bikini that can be redeemed until the 10th of February. Just use the code sewbeverlybikini at the checkout.
Stitch56 are also offering 20% off the paper pattern with the code BIKINI
Share your choices on social media using the hashtag #sewbeverlybikini so we can see what everyone is making.
Thank you for the great response to the sewalong, I hope you are enjoying it?
A few people have requested a more high rise style pant bottom for a bit more coverage. So here’s how to achieve a higher pant.
First trace out the size that you require according to the size chart included in the pattern. For the adjustment we need the front, side front and back to start with. Mark in 2 places where you are going to add the extra height.
Why 2 places? you want to keep the balance of the style intact and if you just put it all on the top it can result in a weird look or odd fit.

On your body measure from crotch to the desired height of your pant. Measure the current pattern pieces. If you need to add say 5cm in height then split that measurement between the 2 lines marked for adding the extra height.
Here the grey lines indicate where the extra height has been added, don’t worry about the side seam we are going to fix that in the next step.

Next we are going to reshape the side seam. You are aiming for a nice smooth line from hip to waist. Since the pant is now higher the waist will need to come in a bit to account for the tapering of your body towards the waist. If the difference between your hip to waist is large, measure your waist and taper in the seam according to your measurements.
The blue line is the smoothing of the side seam and the gradual taper for the waist. I’ve taped both the front and side front panel so that the front panel doesn’t get too wide in comparison to the side panel. It’s all about maintaining the balance of the design.

Double check all your adjusted seams to ensure that all match each other in length so your bikini will fit back together correctly. Re mark all pattern markings including the positioning of the front twisted panel.

Now you have a higher rise bikini pant! Once you’ve got the outer panels all sorted, follow the same principals to increase the height of your lining too.
If you’ve got any questions or need clarification on anything just ask and I can help you out.
Still need your pattern? Named have set up a 20% discount code on PDF and printed patterns of the Beverly Twisted Bikini that can be redeemed until the 10th of February. Just use the code sewbeverlybikini at the checkout.
Stitch56 are also offering 20% off the paper pattern with the code BIKINI
Share your choices on social media using the hashtag #sewbeverlybikini so we can see what everyone is making.
Welcome to the Beverly Twisted Bikini sew along! I do hope you are going to enjoy making your own bikini. Don’t forget if you want to join in, you can use the discount code sewbeverlybikini at the named clothing site to purchase the pattern.
Before we get to cutting out the fabric, check your sizing and assemble your pattern.

Some of you may find you will be a different size top to bottom, I’m cutting a 46 bottom* and a 44 top. Part way through the bottoms I’m going to try them on to see if I need to adjust the sizing as I like quite a firm fit on my bikini bottoms so I can swim with no worries. The seam allowance is included in the pattern (I’m using the PDF, if you are using the paper pattern please double check if seam allowance is included before cutting) so you can cut or trace without having to add the seams afterwards.
We are going to start with cutting out the bottoms including the lining. Before cutting your lining, read the post adding the elastic to the bottoms as there are 2 methods of lining used there and it makes a difference to your cutting. I’m using this stunning red paisley from Pitt Trading with a contrast centre front panel in a matte dark red also from Pitt Trading.

Here are all my panels ready to go. When cutting be sure to cut with the greatest stretch going around the body. If you are dealing with a tricky print and want to avoid unfortunate print placements try cutting out your pattern piece in tracing paper. Cut it as a whole piece not place on fold and you will find you can see through the tracing paper to the print and avoid the poor print placement choices.

Starting with the Twist panel we are going to put ride sides together and sew along the top edge. I’m using my overlocker but you can use the stretch stitch on your regular machine if you would prefer.

Turn the tube right side out and give it a press

Using a straight stitch add rows of gathering or basting stitches to either end. Pull the bobbin thread to create the gathers until you’ve gathered it in enough fit into the side of the centre front panel.

Twist the panel once and pin or baste it into place. Make sure you hide the seam of the band so it won’t be visible on your finished bottoms. Pinned in place you can see it buckles the front panel slightly. Once I put them on this buckling was not noticeable at all and the twist sat nice and flat to my body and didn’t sag forwards so don’t worry about the buckling.

Position side panels and sew in place.


Take front lining and crotch lining, sew seam.

Place front panel and back panel of main fabrics right sides together, matching at crotch. Take front and back lining fabrics, right sides together match at crotch and place them on top of the main panels.

Stitch through all layers.
When you open them up the seam you’ve just sewn should be tucked inside the lining so no exposed seams are on the inside of the swimmers.
*If you need to check your sizing, pin or baste your side seams and pop them on. You want them to feel firm but not tight. The stretch of your fabric must be used, if they feel loose when they get wet they may not stay in place. Mine could be a little firmer so I’m going to take an extra seam allowance from the side seams.
Using the same technique you’ve just used to sew the crotch, sew the side seams so all internal seams are encased inside the lining.

In the next installment we will be attaching the elastic and finishing up the bottoms before heading on to do the top. If you’ve got any questions or queries just ask in the comments.
Don’t forget to share your makes on social media using the hashtag #sewbeverlybikini
Still need your pattern? Named have set up a 20% discount code on PDF and printed patterns of the Beverly Twisted Bikini that can be redeemed until the 10th of February. Just use the code sewbeverlybikini at the checkout.
Stitch56 are also offering 20% off the paper pattern with the code BIKINI
Share your choices on social media using the hashtag #sewbeverlybikini so we can see what everyone is making.


